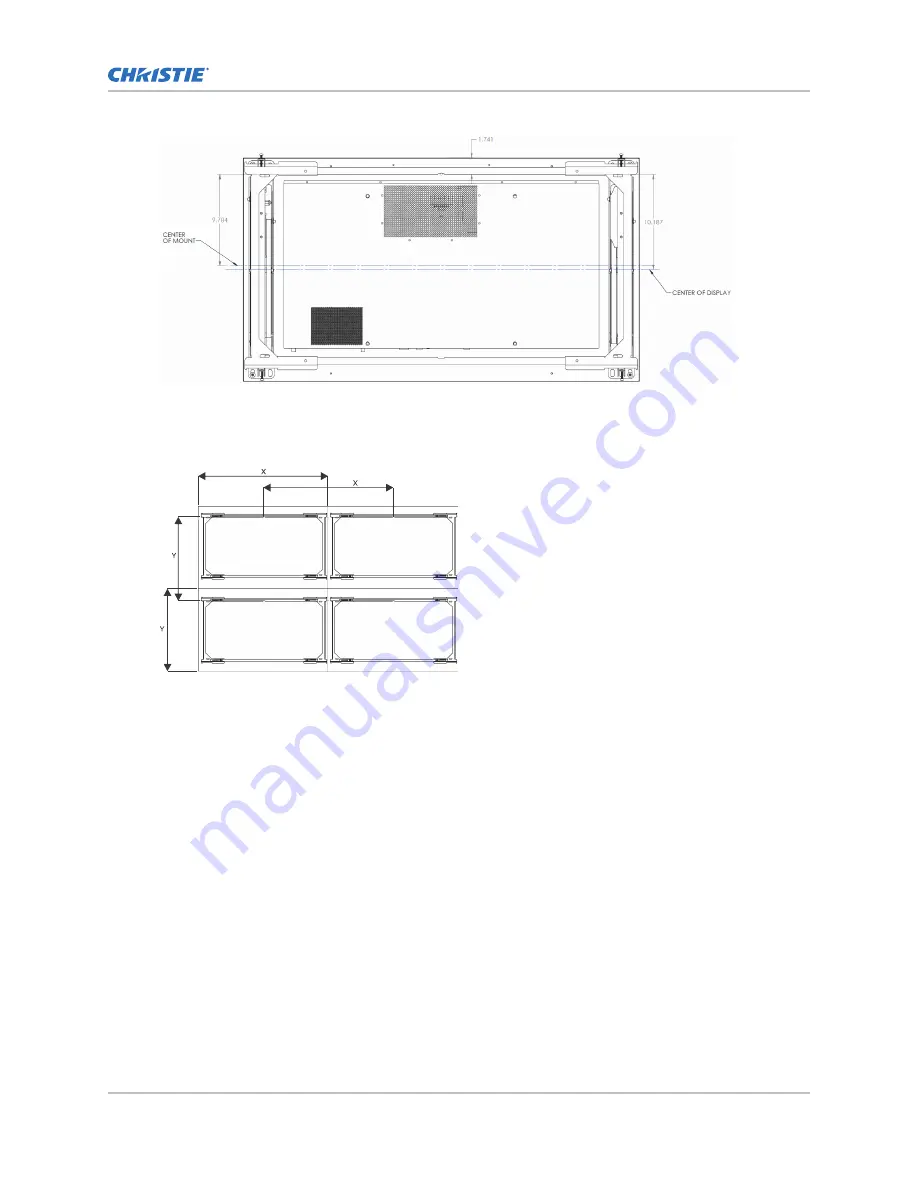
3. To identify where the mount for the display to the right of the first display should be installed,
measure the width of the display panel from the center notch of the wall mount of the first
display to the center notch of the second display (X).
A laser level is recommended for this step.
4. Install all wall mounts in the bottom row.
Install all rows starting with the far left display.
5. To identify where the mount for the second row of displays should be installed, measure the
height of the display panel from the top of the bottom left display to the top of the first display
in the second row (Y).
Installing the mount to plywood
Learn how to install the wall mounts onto plywood.
Hardware provided is for attaching the mount through standard thickness drywall into plywood.
Installers are responsible for providing the hardware for other types of mounting situations.
When installing the wall mounts on a wood stud wall covered with plywood, verify that the wood studs
are a minimum of 2" x 4" nominal size and plywood is a minimum 1/2" (13 mm) thickness. Plywood
may be covered by drywall up to 5/8" thick.
1. Place the wall mount assembly on the wall to use as a template, and mark the center notch.
2. Drill a 5/32" (4 mm) diameter hole 2.5" (64 mm) deep and install a #14 x 2.5" wood screw,
leaving a 6mm (1.4") gap from the plywood.
3. Hang the wall mount on the center screw.
Installing flat panels on the ML20 wall mount
Installing Flat Panels on the ML20 Wall Mount Instruction Sheet
5
020-102525-01 Rev. 1 (02-2017)
Copyright
©
2017 Christie Digital Systems USA Inc. All rights reserved.


