17
English
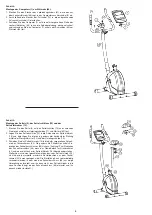
Step 8:
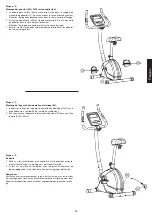
Checks
1. Check the correct installation and function of all screwed and plug con-
nections. Installation is thereby complete.
2. When everything is in order, familiarise yourself with the machine at a
low resistance setting and make your individual adjustments.
Note:
Please keep the tool set and the instructions in a safe place as these may
be required for repairs or spare parts orders becoming necessary later.
Step 7:
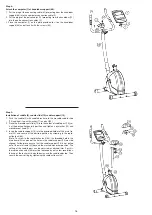
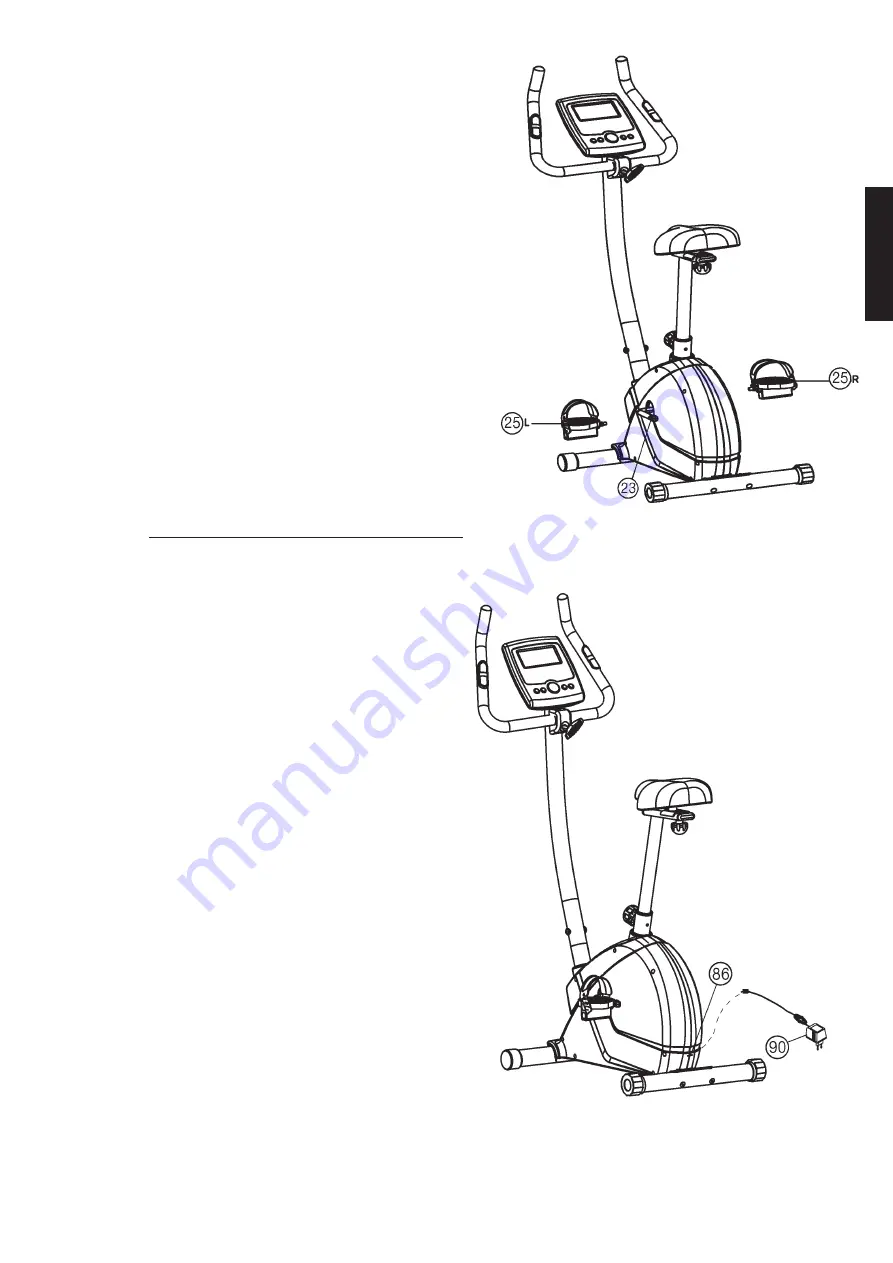
Installation of the power adaptor (90).
1. Please insert the plug of adaptor (90) to the jack (86) at the end of chain
cover.
2. Please insert the plug of adaptor (90) to the jack of wall power
(230V~/50Hz).
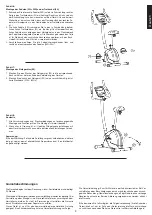
Step 6:
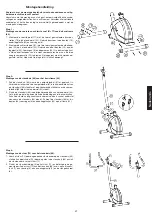
Installation of the right and left pedal (25L+25R) at pedal crank (23).
1. Screw the left pedal (25L) into the threaded hole on the left hand side of
the pedal crank (23) and tighten firmly.
(Note: Right and left are specified as viewed seated on the machine
during training. The threaded part of the left pedal must be screwed
anticlockwise into the threaded hole of the pedal crank.)
The pedals are marked “R” for right and “L” for left.
2. Screw the right pedal (25R) into the threaded hole on the right hand
side of the pedal crank (23) and tighten firmly.
(Note: It must also be observed that the threaded part of the right pedal
must be screwed clockwise into the threaded hole of the pedal crank.)
3. Then attach the pedal straps left and right to the respective pedals (25).
Summary of Contents for 1205
Page 3: ...3 Deutsch ...
Page 4: ...4 ...

