


19
English
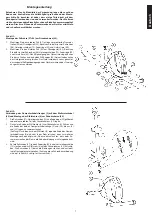
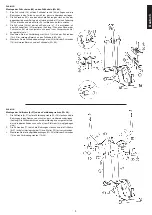
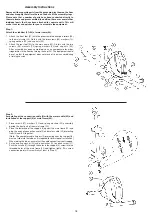
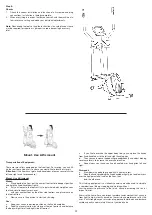
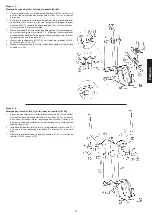
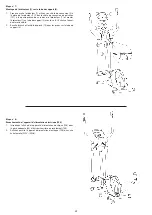
Step 3:
Installation of the connecting tubes (19+28) at handlebar support (4).
1. Push the axle (26) into the middle position at handlebar support (4) and
put one wave washer (52) on each side of axle (26).
2. Put the connecting tubes (19+28) into right direction onto the axles’ end
(26). Put on the screw (21) a spring washer (22) and a washer 8//25 (20)
and secure the connection tubes (19+28) at axle (26). (Note: Right is
specified as viewed standing on the machine during training.)
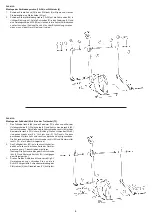
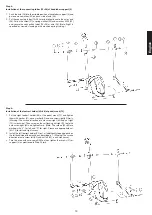
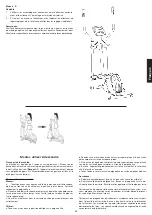
Step 4:
Installation of the footrest holder (42+68) at pedal crank (72).
1. Put the right footrest holder (68) at the pedal crank (72) and tighten
them with washer (51), wave washer (52) and axle screw right (69) firmly.
(Warning! The screws direction of axle screw right (69) and nut right
(70) is clockwise). Then screw on the self locking nut right (70) onto the
axle screw right (69) and tighten firmly. (Note: The screws (50+69) are
marked with “L” for left and “R” for right. Please use appropriate nut
(53+70) for left and right screw)
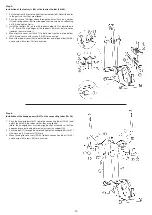
2. Install the left footrest holder (42) incl. all additionally required parts on
the left hand side of the machine as described in 1. (Warning! The screws
direction of axle screw left (50) and nut left (53) is anti-clockwise).
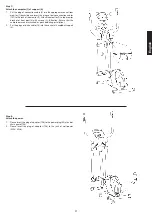
3. Turn the drive with care some RPM an then tighten the screws (31) of
support (4) as mentioned in Step 2 firmly.


