16
Assembly Instructions
Before beginning assembly, be sure to observe our recommendations
and safety instructions.
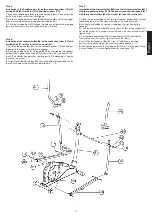
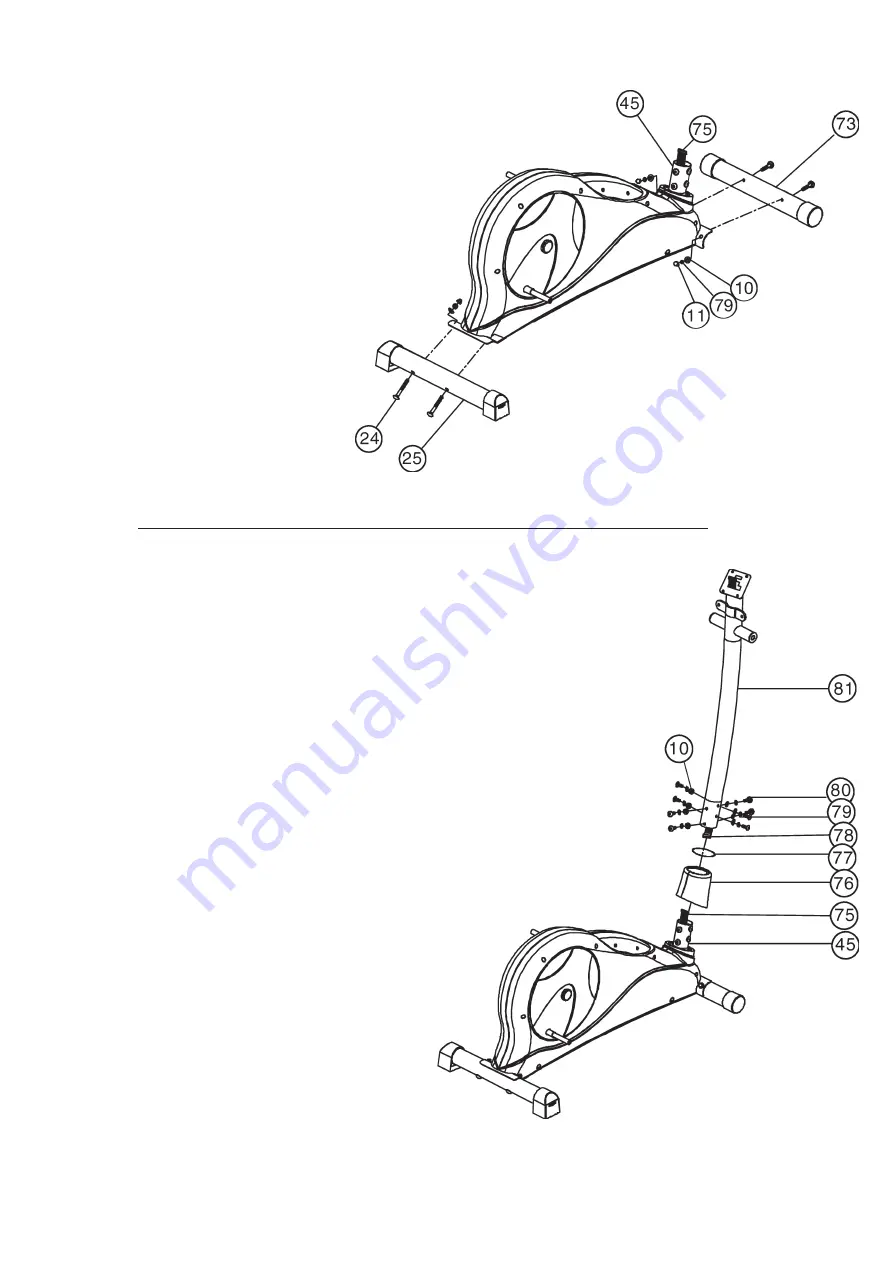
Step 1:
Install of the front footbar (73) and the rear footbar (25) on the main
frame (45) with the carriage bolts (24), the washers 8//20 (10) and the
cap nuts M8 (11).
1.
Place screws (24) and two each washers (10), spring washers (79) and
nuts (11) accessibly beside the front and rear parts of the main frame (45).
2.
Insert the footbars (73) + (25) in the holder of the main frame (47) and
adjust so that the hole patterns of the holders and the footbars (73) + (25)
are aligned.
3.
Push one screw (24) through each hole.
4.
Fit the screw ends of (47) with one washer (10), one spring washer (79)
and fasten each with a nut (11).
Step 2:
Connecting the computer cable harness (75) to the computer cable
harness (78), installation of the plastic cover (76) and rubber (77),
installation of the support (81) on the main frame (45) with the round-
headed Allen screws M8x15 (80), the washers 8//16 (10), and the spring
washers for M8 (79).
1.
Place screws (80), each washers (10) and spring washers (79) accessibly
beside the front part of the main frame (45).
2.
Place the lower end of the support (59) against the main frame (1) and
push the rubber (77) and plastic cover (76) onto the support (81). Plug the
ends of the two computer cable harnesses (75) and (78) projecting from
(45) and (81) together.
(Note: The computer cable harness (78) projecting from the support (81) must
not slide into the tube, as it is required for later steps of installation.)
When joining the tubes, ensure that the cable connection is not trapped.
3.
Put one spring washer (79) and one washer (10) on each screw (80). Push
the screws (80) through the holes in the support (81), screw into the threaded
holes of the main frame (45) and tighten fi rmly.
(This screw connection point will screw tightly at least in Step 5)
Summary of Contents for 98251
Page 3: ...3 Deutsch ...


