18
Step 6:
Checks
1. Check the correct installation and function of all screwed and plug
connections.
Installation is thereby complete.
2. When everything is in order, familiarise yourself with the machine at a
low resistance setting and make your individual adjustments.
Note:
Please keep the tool set and the instructions in a safe place as these may
be required for repairs or spare parts orders becoming necessary later.
Step 5:
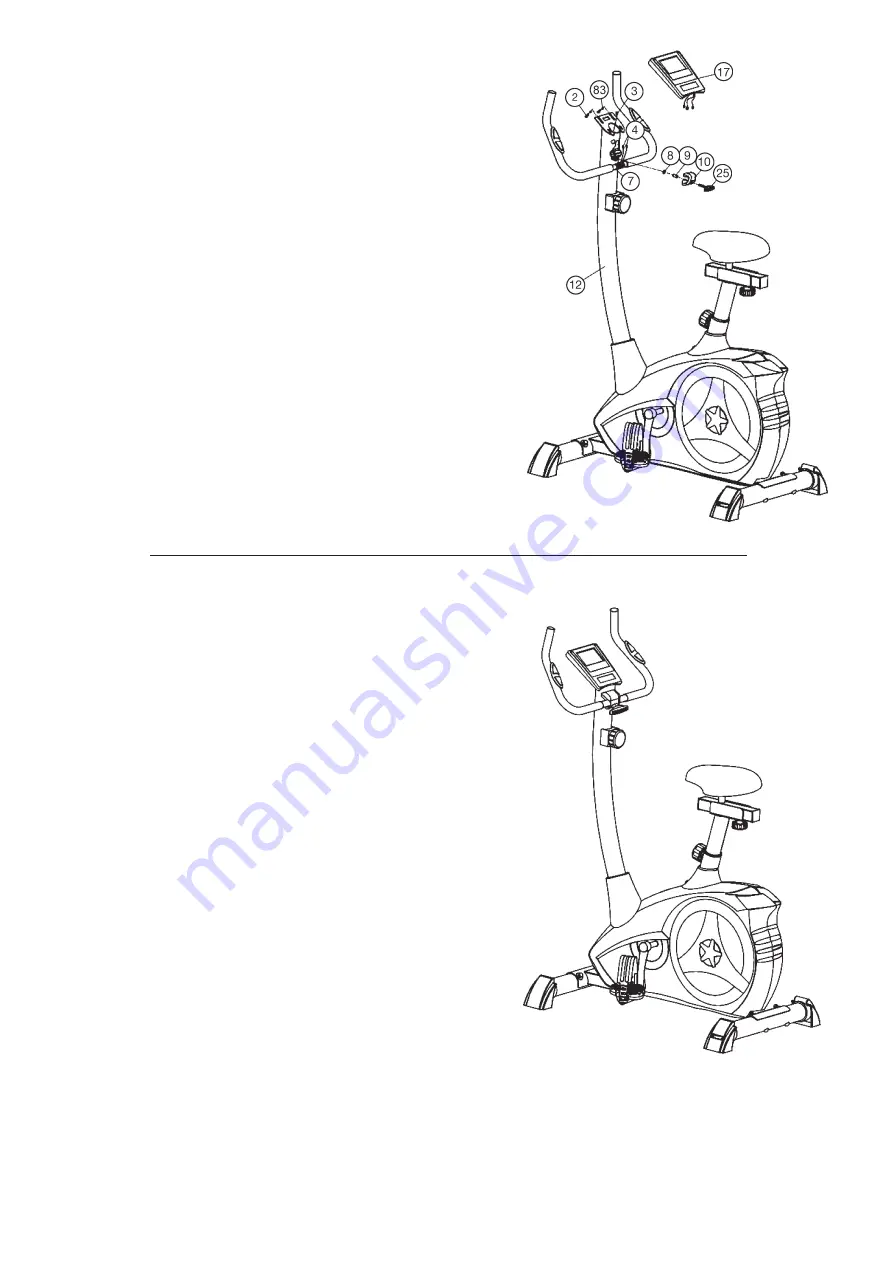
Attach the handlebar (7) and computer (17) at handlebar support (12).
1. Guide the preassembled handlebar unit (7) through the upper part of the
handlebar post (12) and push the pulse cable (4) through the holes at
handlebar support into top position and close the bracket of handlebar
holder.
2. Attach the handlebar cover (10) at the handlebar holder.
3. Screw the handlebar (7) in desired position at the handlebar post (12)
with spacer (9), washer (8) and handlebar screw (25).
4. Push the plugs of the connecting cable (3) and pulse cable (4) projecting
from the handlebar support (12) into the associated socket of the
computer (17).
5. Place the computer (17) on top of the handlebar support (12) and tight
firmly by using screw (2) and washers (83).
Summary of Contents for MS 2
Page 3: ...3 Deutsch ...
Page 4: ...4 ...


