Programmable DC Power Supply (with Solar Array Simulation) 62000H Series
Operating & Programming Manual
3-64
current read by Current Shunt (DVM) to position [1]
and press “
ENTER
” to confirm and
wait for it to end.
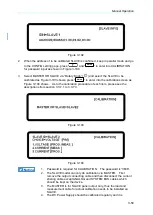
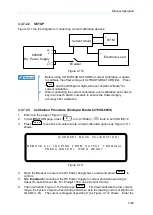
[ C U R R E N T M E A S C A L I B R A T I O N ]
A P P L Y L O A D I N G A N D P R E S S [ E N T E R ]
S E T L O A D I N G C U R R E N T = 1 . 5 0 0 A
A C T U A L
O U T P U T C U R R E N T
= 0 . 0 0 0 0 _ A
[ 1 ]
Figure 3-112
7.
Once the 1.5A point was calibrated,
it is important
to turn the loading of Electronic
Load off and reconnect the DC Power Supply to current shunt whose rating is closest to
but still cover 20A. For Prodigit 7550, use 20A shunt directly.
8.
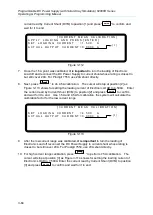
Next, press “
” to do 4.5A calibration. The cursor will stop at position [2] as
Figure 3-113 shows for setting the loading current of Electronic LOAD to 4.500A. Enter
the current read by Current Shunt (DVM) to position [2]
and press “
ENTER
” to confirm
and wait for it to end. Use 1.5A and 4.5A for calibration, the system will calculate the
calibration factor for the low current range.
[ C U R R E N T M E A S C A L I B R A T I O N ]
S E T L O A D I N G C U R R E N T = 4 . 5 0 0 A
A C T U A L
O U T P U T C U R R E N T
= 0 . 0 0 0 0 _ A
[ 2 ]
Figure 3-113
9.
After the low current range was calibrated,
it is important
to turn the loading of
Electronic Load off reconnect the DC Power Supply to current shunt whose rating is
closest to but still cover 20A. For Prodigit 7550, use 20A shunt directly.
10.
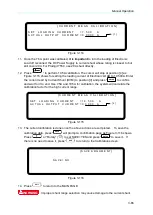
For high current range calibration, press “
” to perform 7.5A calibration. The
cursor will stop at position [3] as Figure 3-114 shows for setting the loading current of
Electronic LOAD to 7.500A. Enter the current read by Current Shunt (DVM) to position
[3]
and press “
ENTER
” to confirm and wait for it to end.


