background image

24

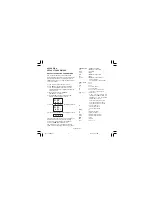
Grd1

Ramp applied to an increasing  set
point change

Range:  from 1 to 100 digits per minute.
Above this value the display shows “InF”
meaning that the transfer will be done as
a step change.

Grd2

Ramp applied to a decreasing set
point changes

For other details see Grd1 parameter.

OLH

Output high limit

Range:
- From 0.0 to 100.0 % of the output span
when device is configured with one
control output.
- From -100.0 to 100.0% of the output
span when device is configured with two
control outputs.

tOL

Time duration of the output power
limiter (soft start)

Range: from 1 to 540 min. Above this
value the display shows “InF” meaning
that the limiting action is always on.

Note

: The tOL can be modified but the

new value will become operative only at
the next instrument start up.

rnP

Control output max. rate of rise

This parameter is available only when
Pb is different from zero or one control
output is a linear output type.
Range: From 0.1 % to 25.0 % of the
output span/second. Above this value
the display shows “InF” meaning that no
limit is imposed.

Note

:the rnP parameter is active on a

linear control output even if the device is
in ON/OFF control mode.

1604-7-1-AB.p65

5/16/00, 10:50 AM

24

Summary of Contents for TEMPERATURE CONTROLLER 1604-7

Page 1: ...1604 7 Temperature Controller with mA Output Issue date r USER S MANUAL May 2000 Chromalox 1604 1604 7 0 AB p65 5 16 00 10 50 AM 1 ...

Page 2: ...ay function 18 Indicators 18 Pushbutton function during operating mode 19 Enable disable the control output 19 SP SP2 selection 19 Direct access to the set point 20 Manual function 20 Lamp test 20 Serial link 21 SMART function 21 OPERATIVE PARAMETERS 22 ERROR MESSAGES 25 GENERAL INFORMATIONS 27 MAINTENANCE 31 DEFAULT PARAMETERS A 1 II 1604 7 0 AB p65 5 16 00 10 50 AM 2 ...

Page 3: ...0 VAC Resistive load Code 0 None 1 Out 3 2 Amps at 250 V AC Resistive load 2 Heater Break Down input Out 3 3 RS 485 Digital communications Out 3 4 RS 485 Digital comm Heater Break Down input Out 3 Code Instrument Power 3 100 240 Vac 5 24 Vac dc Code 0 Add to complete model number 1601 6 1 0 3 0 Typical Model Number 1604 7 0 AB p65 5 16 00 10 50 AM 3 ...

Page 4: ... instrument is shipped with rubber panel gasket 50 to 60 Sh To assure the IP65 and NEMA 4 protection insert the panel gasket between the instrument and the panel as shown in fig 1 While holding the instrument against the panel proceed as follows 1 insert the gasket in the instrument case 2 insert the instrument in the panel cutout 3 pushing the instrument against the panel insert the mounting brac...

Page 5: ...2 OUTLINE AND CUT OUT DIMENSIONS Fig 2 OUTLINE AND CUT OUT DIMENSIONS 3 0 75 2 4 60 1 77 45 1 77 45 1 9 48 2 2 56 4 8 122 1604 7 1 AB p65 5 16 00 10 50 AM 2 ...

Page 6: ...between sensor and input terminals may cause errors in measurement due to excessive and or not balanced line resistance or possible leakage currents TC INPUT Fig 4 NOTE 1 Don t run input wires together with power cables 2 For TC wiring use proper compensating cable preferable shielded 3 when a shielded cable is used it should be connected at one point only 9 _ Shield 9 _ Shield 10 10 1604 7 1 AB p...

Page 7: ...qual to 5 W for 20 mA input 1 MW for 60 mV input 200 kW for 5 V input 400 kW for 10 V input RTD INPUT Fig 5 RTD INPUT WIRING NOTE 1 Don t run input wires together with power cables 2 Pay attention to the line resistance a high line resistance may cause measurement errors 3 When shielded cable is used it should be grounded at one side only to avoid ground loop currents 4 The resistance of the 3 wir...

Page 8: ...ng of the OUT 2 3 is 2A 250V AC on resistive load The number of operations is 1 x 10⁵ at specified rating NOTES 1 To avoid electrical shock connect power line at the end of the wiring procedure 2 ForpowerconnectionsuseNo16AWG or larger wires rated for at last 75 C 3 Use copper conductors only 4 Don t run input wires together with power cables The relay contacts are protected by varistor against in...

Page 9: ... internal protection varistor assures a correct protection up to 0 5 A of inductive component The same problem may occur when a switch is used in series with the internal contacts as shown in Fig 9 Fig 9 EXTERNAL SWITCH IN SERIES WITH THE INTERNAL CONTACT In this case it is recommended to install an additional RC network across the external contact as show in Fig 9 The value of capacitor C and res...

Page 10: ...he wiring procedure 3 For supply connections use No 16 AWG or larger wires rated for at last 75 C 4 Use copper conductors only 5 Don t run input wires together with power cables 6 For 24 V DC the polarity is a do not care condition 7 The power supply input is NOT fuse protected Please provide it externally Power supply Type Current Voltage 24 V AC DC T 500 mA 250 V 100 240 V AC T 125 mA 250 V When...

Page 11: ...8 NOTE asingleswitchorcircuit breakercandrive more than one instrument 9 When the NEUTRAL line is present connect it to terminal 4 1604 7 1 AB p65 5 16 00 10 50 AM 8 ...

Page 12: ...per can be positioned on pin 7 9 OPEN INPUT CIRCUIT This instrument is able to identify the open circuit for TC and RTD inputs The open input circuit condition for RTD input is shown by an overrange indication For TC input it is possible to select overrange indication standard or underrange indication set ting the CH101 and SH101 according to the follow ing table Overrange STD CH101 close SH101 op...

Page 13: ...TE the electrical characteristic of the RS 485 serial interface allows you the connection of 31 devices maximum SEr3 Baude rate for serial link Not available when SEr1 OFF From 600 to 19200 baud NOTE 19200 baud is shown on display as 19 2 SEr4 Byte format for serial link Not available when SEr1 OFF 7E 7 bits even parity For ERO protocol only 7O 7 bits odd parity For ERO protocol only 8E 8 bits eve...

Page 14: ... will be re aligned to it P4 Full scale value For linear inputs it is programmable from 1999 to 4000 For TC and RTD input it is programmable within the input range When this parameter is modified rH parameter will be re aligned to it The initial and full scale values determine the input span which is used by the PID algorithm the SMART and the alarm functions NOTE the minimum input span S P4 P3 in...

Page 15: ...ing mode Available only when P9 is equal to AL1 P AL1 b or AL1 d H A High alarm outside for band alarm with automatic reset latched L A Low alarm inside for band alarm with automatic reset latched H L High alarm outside band with manual re set latched L L Low alarm inside band with manual reset latched P11 Output 3 function nonE output not used rEv Out 3 is used as control output with reverse acti...

Page 16: ...unction Threshold value in eng units to initiate the Soft start function output power limiting at start up Range within the readout span NOTE This threshold value will not be taken into account when tOL InF P17 Safety lock 0 No parameter protection The device is always in unlock condition and all parameters can be modified 1 The device is always in lock condition and no one of the parameters excep...

Page 17: ...lculation P21 Displayed value of the power output for the secondary control output This parameter is available only when two control outputs are configured nOrL the displayed value is equal to the result of PID calculation CnPL the displayed value is complemented 100 PID calculation NOTE when two control outputs are configured the P18 and P19 selections are applied to the rEv control output while ...

Page 18: ...ondition rEV reverse action relay de energized in alarm condition P27 Alarm 2 stand by mask function Available only when P11 AL2 P AL2 d or AL2 b OFF Stand by mask function disabled On Stand by mask function enabled NOTE for more details to stand by mask function see P25 parameter P28 OFFSET adjustment added to the measured value This parameter allows to set a constant OFFSET throughout the readou...

Page 19: ...to 100 0 when the device is configured with one control output only from 100 0 to 100 0 when the device is configured with two control outputs P31 Maximum value of the proportional band calculated by the SMART algorithm This parameter is skipped when none of the outputs is programmed as control output or P30 0 This parameter is programmable from P32 value to 200 0 P32 Minimum value of the proporti...

Page 20: ...tension of the anti reset wind up Range from 30 to 30 of the proportional band NOTE a positive value increases the high limit of the anti reset wind up over set point while a negative value decreases the low limit of the anti reset wind up under set point P43 Set point indication Fn SP during operative mode when the instrument performs a ramp it will show the final set point value OP SP during ope...

Page 21: ...The two power outputs are displayed only if therelativefunctionhasbeenpreviouslyconfigured When no pushbutton is pressed during the time out see P36 the display will automatically return in Normal Display Mode In order to keep the desired information continuously on the lower display depress s or t push button to remove the timeout When return in Normal Display Mode is desired push FUNC push butto...

Page 22: ... can be selected for parameter modification during run time mode If during operative parameter modification no pushbutton is pressed for more than 10 30 seconds the instrument goes automatically to the normal display mode and the eventual modification of the last parameter will be lost ENABLE DISABLE THE CONTROL OUTPUT When the instrument is in normal display mode by keeping depressed for more tha...

Page 23: ...e the output resolution is equal to 1 By depressing for more than 1 second MAN pushbutton the device returns in AUTO mode The transfer from AUTO to MANUAL and viceversa is bumpless this function is not provided if integral action is excluded If transfer from AUTO to MANUAL is performed during the first part of SMART algorithm TUNE when returning in AUTO the device will be forced automatically in t...

Page 24: ... end of configuration procedure the device performs an automatic reset and then returns to close loop control SMART function It is used to optimize automatically the control action To enable the SMART function push the FUNC pushbutton until Snrt parameter is shown Pushing s or t set the display On and push the FUNC pushbutton The SMRT LED will turn on or flashing according to the algorithm selecte...

Page 25: ... Pb parameter is set to 0 the control action becomes ON OFF OPERATIVE PARAMETERS Push the FUNC pushbutton the lower display will show the code while the upper display will show the value or the status On or OFF of the selected parameter By s or t pushbutton it is possible to set the desired value or the desired status Pushing the FUNC pushbutton the instrument memorizes the new value or the new st...

Page 26: ...nly if P9 is equal to rEv or dir Range From 1 to 200 s Cy3 Output 3 cycle time This parameter is available only if P11 is equal to rEv or dir Range From 1 to 200 s rC Relative Cooling gain This parameter is available only when device is configured with two control outputs and Pb is different from zero or device is in manual mode Range from 0 20 to 1 00 Note When the device is working with SMART al...

Page 27: ...s tOL Time duration of the output power limiter soft start Range from 1 to 540 min Above this value the display shows InF meaning that the limiting action is always on Note The tOL can be modified but the new value will become operative only at the next instrument start up rnP Control output max rate of rise This parameter is available only when Pb is different from zero or one control output is a...

Page 28: ...on or OFF if direct action The instrument is set for heating cooling action and an UNDERRANGE is detected rEV output turns ON and dir output turns OFF When P37 is different from zero and an out of range condition is detected the instrument operates in accordance with P37 and P38 parameters NOTE in every cases the P18 and P20 parameters will conditioned the real outputs of the instrument The sensor...

Page 29: ...n error 307 RJ input calibration error 320 Analog retransmission calibration error 400 Control parameters error 500 Auto zero error 502 RJ error 510 Error during calibration procedure NOTES 1 When a configuration parameter error is detected it is sufficient to repeat the configura tion procedure of the specified parameter 2 If error 400 is detected push contemporarily the t and s pushbuttons for l...

Page 30: ...ic compatibility and safety requirements This instrument is marked CE Therefore it is conforming to council directives 89 336 EEC reference harmonized standard EN 50081 2 and EN 50082 2 and to council directives 73 23 EEC and 93 68 EEC reference harmonized standard EN 61010 1 Installation category II Temperature drift CJ excluded 200 ppm C of span for mV and TC ranges 1 3 5 7 20 21 22 24 300 ppm C...

Page 31: ...put types No indication are available for 0 20 mA 0 5 V and 0 10 V input types D LOGIC INPUT The instrument is equipped with one input from contact voltage free for setpoint selection Contact open Main setpoint Contact closed Auxiliary setpoint NOTES 1 Use an external contact with a contact rating better than 0 5 mA 5 V DC 2 The instrument needs 100 ms to recognize a contact status variation 3 The...

Page 32: ...tegral pre load from 0 0 to 100 0 for one control output from 100 0 cooling to 100 0 heating for two control outputs SMART keyboard enabling disabling Auto Manual selectable by front pushbutton Auto Manual transfer bumpless method type Indicator MAN OFF in auto mode and lit in manual mode OUTPUTS Type This instrument is equipped with 3 independent outputs programmable as follows Out 1 Out 2 Out 3 ...

Page 33: ...on resistive load Function programmable as control output heating or cooling Alarm 1 output Output cycle time when used as control output programmable from 1 s to 99 s OUTPUT 3 Type relay with SPST contact with rated current 2 A at 250 V AC on resistive load Function programmable as control output heating or cooling Alarm 2 output Output cycle time when used as control output programmable from 1 s...

Page 34: ...1 REMOVE POWER FROM THE POWER SUPPLY TERMINALS AND FROM RELAY OUTPUT TERMINALS 2 Remove the instrument from case 3 Using a vacuum cleaner or a compressed air jet max 3 kg cm2 remove all deposit of dust and dirt which may be present on the louvers and on the internal circuits trying to be careful for not damage the electronic components 4 To clean external plastic or rubber parts use only a cloth m...

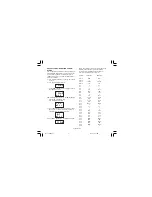
Page 35: ...seconds the loading procedure is terminated and the instrument reverts to NORMAL DISPLAY mode The following is a list of the default operative parame ters loaded during the above procedure PARAMETER DEFAULT VALUE SP Minimum range value SnrT Disabled n Srt OFF SP2 Minimum range value nnn OFF A1 A2 Minimum range value for process alarms 0 for deviation or band alarms HSA1 HSA2 0 1 Pb 4 0 HyS 0 5 ti ...

Page 36: ... or table 2 American default set of parameters the display will show f Press FUNC pushbutton the display will show This means that the loading procedure has been initiated After about 3 seconds the loading procedure is terminated and the instrument reverts to visualization as in point b PARA TABLE 1 TABLE 2 SEr 1 ErO ER0 SEr 2 1 1 SEr 3 19200 19200 SEr 4 7E 7E P1 3 21 P2 P3 0 0 P4 400 1000 P5 rEV ...

Page 37: ...n On P30 2 2 P31 30 0 30 0 P32 1 0 1 0 P33 00 20 00 20 P34 On On P35 0 0 P36 10 30 P37 0 0 P38 0 0 0 0 P39 nO FL nO FL P40 nO FL nO FL P41 Pid Pid P42 10 0 10 0 P43 Fn Sp Fn Sp P44 0 0 1604 7 A AB p65 5 16 00 10 50 AM 3 ...

Page 38: ...Appendix A 4 1604 7 A AB p65 5 16 00 10 50 AM 4 ...

Page 39: ...IL QUAKER BOULEVARD LAVERGNE TN 37086 3536 PHONE 615 793 3900 FAX 615 793 3563 WIEGAND INDUSTRIAL DIVISION WIEGAND INDUSTRIAL DIVISION WIEGAND INDUSTRIAL DIVISION WIEGAND INDUSTRIAL DIVISION WIEGAND INDUSTRIAL DIVISION EMERSON ELECTRIC CO 1604 7 A AB p65 5 16 00 10 50 AM 5 ...

Reviews: