13
5.4 Installation procedure
5.4.1 Pre-installation
The installation location selected shall meet the following conditions and be approved by users.
• The strength shall be sufficient to withstand the weight of the connection kit
• There is no significant tilt on the plane.
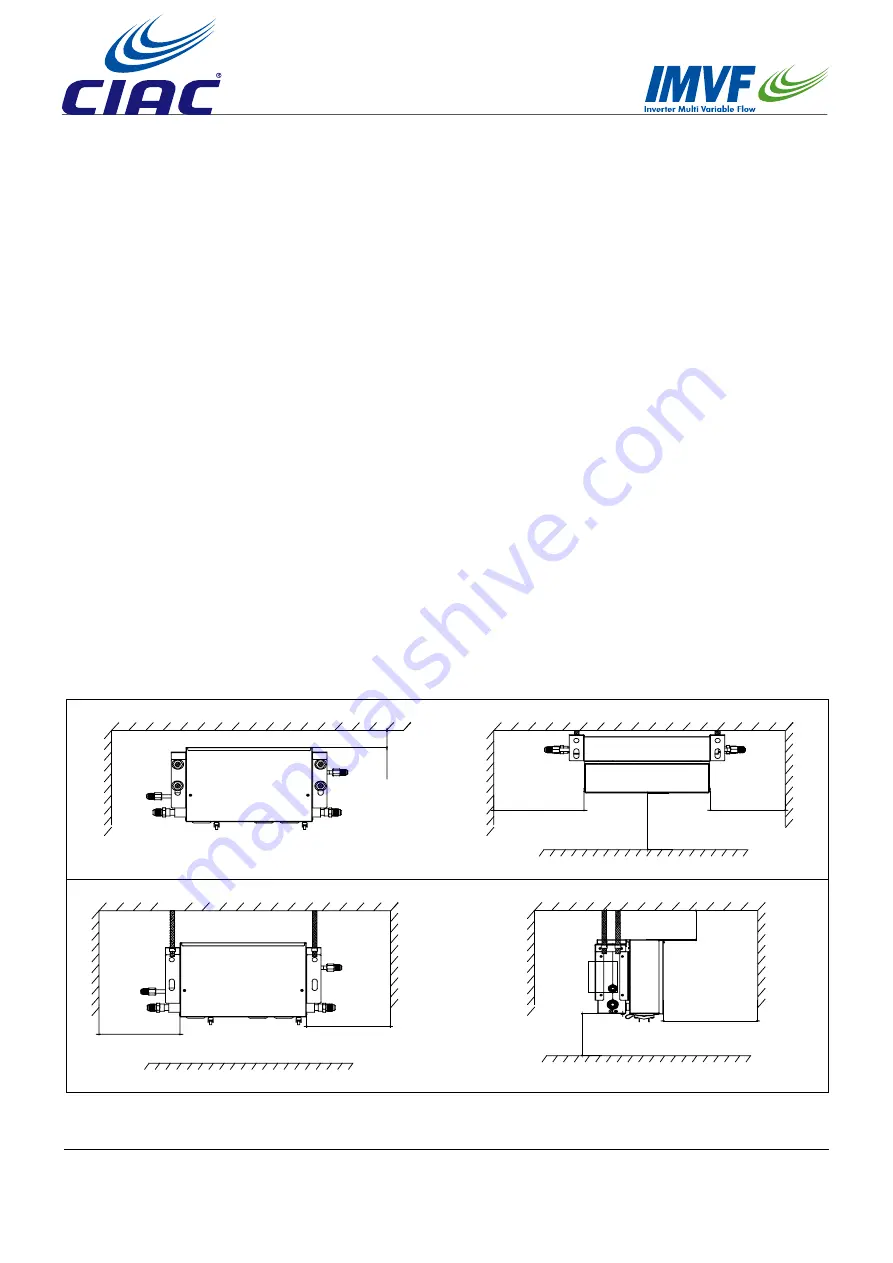
• Ensure that there is enough space for installation and maintenance.
• There is space for inspection on the side and top of the electric box
• The length of piping between the indoor and outdoor units shall be within the permissible range (referring to the
specification attached to the outdoor unit).
• Please install the connection kit in places where noise will not influence the customers too much (such as
washroom, passageway, warehouse, equipment room, etc.). Places with high requirement for quiet are not
suggested for installation, such as bedroom, drawing room, meeting room, office, etc.
Note:
• the electrical box can be changed as show in 3 connection kit installation.
• When starting up, stop, defrosting, and oil-returning in heating mode , the 4-way valve will veer and create noise.
This kind of noise is normal for the running of connection kit.
• A noise may be emitted by the connection kit as a result of control during operation or stopping of an indoor unit.
If it is installed in the ceiling where it is exposed, take adequate precautions with the installation location.
<Notice item>
• Inspect whether the installation location can sufficiently withstand the weight of connection kit and set the hoisting
bolts by reinforcing the beam if necessary. Use hoisting bolts in installation (referring to 2 for the preparation
before installation).
• Install the power wiring and power line of the connection kit at more than 1 m away from TV and radio to prevent
the image clutter and noise. But, there may be noise even if it is more than 1 m according to the different waves.
Min100
Front view
Min200
Min200
Min300
Top view
Wall mounted (mm)
Celing mounted (mm)
Front view
Side view
Min200
Min200
Min300
Min50
Min50
Summary of Contents for CA43BV-V5J1H Series
Page 1: ...VERSION A DATA Aug 12th 2016 SEVICE MANUAL AHU VALVE BOX ...
Page 8: ...6 AH1 560A 13 59 161 266 296 309 433 501 597 553 14 84 78 87 192 201 99 266 193 12 39 83 9 ...
Page 28: ...26 6 PCB photo 0151800113A SW01 SW03 SW07 LED7 LED3 LED4 LED2 LED1 LED5 ...
Page 43: ...CARRIER INTERAMERICA CORPORATION MIAMI FLORIDA USA C CIAC 2016 ...


