background image


MXM

-

P2000  Series  |  Quick  Installation  Guide   

10


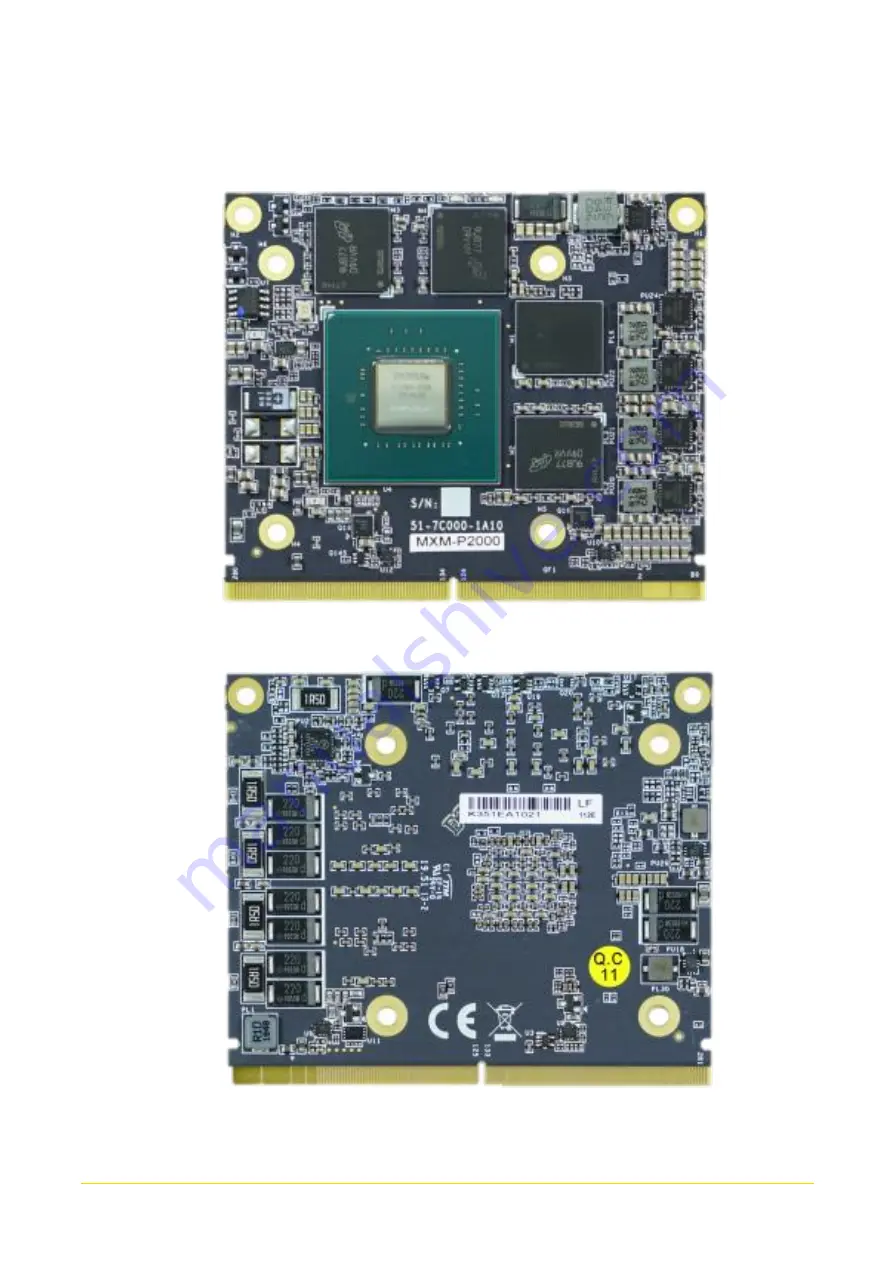
1.1 Product pictures 


  Front


  Rear


Summary of Contents for MXM-P2000 Series

Page 1: ...Embedded MXM GPU Module Nvidia Quadro Embedded P2000 MXM Kit with Heatsink and Thermal Pad Version V1 00 Embedded MXM GPU Module MXM P2000 Module Quick Installation Guide ...

Page 2: ...ity 03 Product Warranty Statement 04 Technical Support and Assistance 05 Conventions Used in this Manual 06 Safety Precaution 06 Package Contents 08 Ordering Information 08 Chapter 1 Product Introductions 1 1 Product Pictures 10 1 2 Key Features 11 1 3 Specifications 11 1 4 Mechanical Dimension 12 Chapter 2 Module Setup 2 1 Install an MXM Module 14 ...

Page 3: ...nly and is subject to change without notice It does not represent a commitment on the part of Cincoze This product might include unintentional technical or typographical errors Changes are periodically made to the information herein to correct such errors and these changes are incorporated into new editions of the publication Declaration of Conformity FCC This equipment has been tested and found t...

Page 4: ...oftware or an expendable item such as a fuse battery etc are not warranted RMA Before sending your product in you will need to fill in Cincoze RMA Request Form and obtain a RMA number from us Our staff is available at any time to provide you with the most friendly and immediate service RMA Instruction Customers must fill in Cincoze Return Merchandise Authorization RMA Request Form and obtain an RM...

Page 5: ...therwise shall not exceed the original selling price of the product The remedies provided herein are the customer s sole and exclusive remedies In no event shall Cincoze be liable for direct indirect special or consequential damages whether based on contract of any other legal theory Technical Support and Assistance 1 Visit the Cincoze website at www cincoze com where you can find the latest infor...

Page 6: ...liable surface during installation Dropping it or letting it fall may cause damage 7 Make sure the voltage of the power source is correct before connecting the equipment to the power outlet 8 Use a power cord that has been approved for using with the product and that it matches the voltage and current marked on the product s electrical range label The voltage and current rating of the cord must be...

Page 7: ...ked by service personnel The power cord or plug is damaged Liquid has penetrated into the equipment The equipment has been exposed to moisture The equipment does not work well or you cannot get it work according to the Quick Installation Guide The equipment has been dropped and damaged The equipment has obvious signs of breakage 14 CAUTION Danger of explosion if battery is incorrectly replaced Rep...

Page 8: ...ckage Item Description Q ty 1 NVIDIA Quadro Embedded P2000 GPU card 1 2 GPU Heatsink 1 3 GPU Thermal Pad 2 4 Screws Pack 1 5 Utility DVD Driver 1 Note Notify your sales representative if any of the above items are missing or damaged Ordering Information Model No Product Description MXM P2000 01 Nvidia Quadro Embedded P2000 MXM Kit with Heatsink and Thermal Pad ...

Page 9: ...MXM P2000 Series Quick Installation Guide 9 Chapter 1 Product Introductions ...

Page 10: ...MXM P2000 Series Quick Installation Guide 10 1 1 Product pictures Front Rear ...

Page 11: ...0 Memory 4GB GDDR5 memory 128 bit Bandwidth 96 GB s CUDA Cores 768 CUDA cores 2 3 TFLOPS SP Peak Compute API Compute API CUDA Toolkit 8 0 CUDA Compute version 6 1 OpenCL 1 2 Graphics API DirectX 12 OpenGL 4 5 Vulcan 1 0 Display Outputs 4x DisplayPort 1 4 digital video outputs 4K at 120Hz or 5K at 60Hz Interface MXM 3 1 PCI Express Gen3 x16 support Dimensions 82 W x 70 D x 4 8 H mm Form Factor Stan...

Page 12: ...MXM P2000 Series Quick Installation Guide 12 1 4 Mechanical Dimension Unit mm ...

Page 13: ...MXM P2000 Series Quick Installation Guide 13 Chapter 2 Module Setup ...

Page 14: ...users need to follow the instructions of the system s user manual to remove the system s chassis cover and to install the MXM carrier board 1 Locate the slot on the MXM carrier board installed on the MXM Module supported system The system used here is GM 1000 2 Place the thermal pad on the chips of the MXM Module This slot is used to connect an MXM Module An MXM carrier board installed on GM 1000 ...

Page 15: ...15 3 Insert the MXM Module into the slot on the MXM carrier board at 45 degrees 4 Fasten the two screws M3X5L Note Before putting on the thermal block in the next step please make sure the protective film on the Thermal Pad has been removed 45 ...

Page 16: ...t on the thermal block with aligning the screw holes and fasten the 4 screws M3X8L 6 Place the thermal pad on the thermal block Note Before assembling the system s chassis cover please make sure the protective film on the Thermal Pad has been removed ...

Page 17: ...registered trademark of Cincoze Co Ltd All other logos appearing in this catalog are the intellectual property of the respective company product or organization associated with the logo All product specifications and information are subject to change without notice ...

Reviews: