background image

Cineroid

User Manual

E l e c t r o n i c   V i e w   F i n d e r

Cineroid

Model : EVF 4Le


  EVF 4Be


En

glis

h

K

ore

an

Summary of Contents for EVF 4Be

Page 1: ...Cineroid User Manual Electronic View Finder Cineroid Model EVF 4Le EVF 4Be English Korean...

Page 2: ...on once powered and check if the information menu is being properly displayed on the LCD Copyrights and Prohibitions The use of images of people property and places can without permission can be proh...

Page 3: ...keep the product out of reach of young children Injuries may occur due to damage to the product When using the product in an airplane or hospital setting it is recommended to acquire authorization fir...

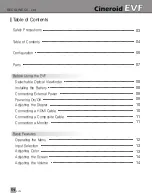
Page 4: ...cal Viewfinder Installing the Battery Connecting External Power Powering On Off Adjusting the Diopter Connecting a HDMI Cable Connecting a Composite Cable Connection a Monitor Basic Features Operating...

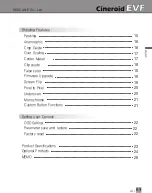
Page 5: ...aker Clip guide False color Firmware Upgrade Screen Flip Pixel to Pixel Underscan Monochrome Custom Button Functions Setting User Controls OSD Setting Parameter save and restore Factory reset Product...

Page 6: ...Components Please ensure all parts are present after opening the box B Battery Cover C Battery D Battery Charger F Mini Shoe Mount Adapter G User Manual H Cineroid EVF Carrying Case E Mini HDMI Cable...

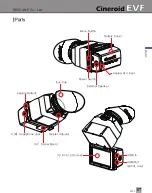
Page 7: ...VF4 English Parts 07 HDMI In HDMI Out EVF4L only Power Switch 1 4 Screw Mount Battery Cover Diopter Adjuster Menu Button 3 2 inch LCD screen Analog A V input Eye Cup 3 5 Headphone Jack Feature Buttons...

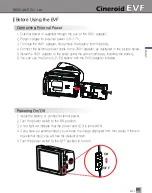
Page 8: ...the left and lift up the loupe To replace the loupe slide the small latch to the left and place the loupe back into place Installing the Battery 1 The Cineroid EVF can be used with small medium or lar...

Page 9: ...1 adapter to the body using the same method as installing the battery 6 You can use the Canon LP E6 battery with the PA01 adapter installed Powering On Off 1 Install the battery or connect external po...

Page 10: ...you 3 Rotate the dial in either direction until the image becomes clear Connecting a HDMI Cable 1 Make sure the EVF input selection is set to HDMI Please refer to Input Selection on page 13 2 First c...

Page 11: ...re is no input signal into the EVF then there will be no image to the external monitor 5 The EVF4Be model does not come with a loop through function Connecting a Composite Cable 1 Make sure the EVF in...

Page 12: ...ccess that feature 5 Press the up and down arrow keys to change the value of the feature 6 Move the cursor to Exit and press the M button to return to the previous menu 7 To exit the main menu Select...

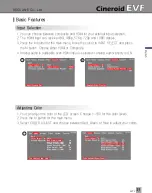
Page 13: ...g audio is audioable even HDMI input is selected if Analog Audioi priority is ON Adjusting Color 1 You can adjust the color of the LCD screen Choose 1 100 for the color levels 2 Press the M button for...

Page 14: ...speaker and headphone volumes can be adjusted independently To do so you must adjust the volume within the menu 4 Audio Level meter is displayed on screen if it is turned on 2 Adjusting the Screen 1 Y...

Page 15: ...menu Select PEAKING from the menu and then select PEAKING MODE Select Red or Sharp mode You can also adjust the peaking threshold by selecting PEAKING THRESHOLD and adjusting accordingly The threshold...

Page 16: ...ition of center is adjustable at Offset menu Shooting Features Crop guide 1 The crop guide information is displayed on screen 2 Ratio can be selected from 4 3 1 85 1 16 9 2 1 2 35 1 Custom 3 The size...

Page 17: ...2 The aspect ratio of image is not changed Also it is set for each resolution 480p 720p 1080i 3 Image can be moved to vertical or horizontal Shooting Features Center Marker 1 The center of screen is...

Page 18: ...d Zebra both 2 Zebra range is selectable among 3 5 8 11 Also Zebra mark has two types moving or fixed 3 There is three kinds of threshould High Middle Low Shooting Features False color 1 False color s...

Page 19: ...irmware upgrade Shooting Features Screen Flip 1 You can flip the video image on the LCD screen 180 degrees vertically or horizontally by activating the screen flip feature 2 To flip the image horizont...

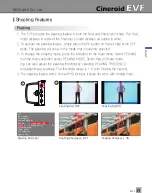
Page 20: ...creates a scale down effect 3 The pixel to pixel feature only maps the center of the video image Pixel to Pixel OFF Pixel to Pixel ON Underscan 1 You can view every corner of the image on the LCD by...

Page 21: ...W OFF 1 3 Custom Button Functions 1 The left side of the EVF body contains the buttons PK F1 F2 SA The factory default for these buttons are peaking PK Pixel to pixel F1 False color 1 F2 and Clip guid...

Page 22: ...The pixel to pixel display only appears when the feature is activated OSD Peaking ON Pixel to Pixel ON Factory reset 1 Powering on the EVF while pressing down the PK button will reset the EVF to its...

Page 23: ...iewing angle Display area HDMI Composite HDMI Phone Jack Internal speaker Battery External 3 2inch TFT LCD 800 x 480 16 7M H 180 degrees V 180 degrees 69 6 H x 41 76 V mm 480i 480p 576p 720p 1080i Vid...

Page 24: ...al Products 24 FCB044 FCB043 Power Adapter DC plug with D tap Power Adapter DC plug only for PA01 DC plug with D tap for PA01 PA01 SET PA01 FCB043 6inch 10inch External power adapter Form Articulating...

Page 25: ...td EVF4 English 25 Optional Products Mini ball head MBH P Mini ball head MBH M HDMI Cable Model Length Mini ball head Reinforced plastic Metal Model Weight Material Form RCA x 3EA Plug form Length Plu...

Page 26: ...er RM01 Trigger functions of EVF by wired Functions are assigned in EVF menu EVF Remote controller RM01 Trigger functions of EVF by wired Functions are assigned in EVF menu L clamp Extends screw mount...

Page 27: ...SECULINE Co Ltd EVF4 English MEMO 27...

Page 28: ...e Customer Support Center Seculine Co LTD Tel 82 2 850 3021 Fax 82 2 850 3027 Rm 510 Kolon Science Valley 2 Guro dong 811 Guro gu Seoul 152 878 Korea Homepage www cineroid com E mail sales secu line c...

Reviews: