78 Furniture Wizard CPT-8061 Wireless Scanner Use and Installation v10
4.5.3 Gateway IP Address Setting
1.
To specify the Gateway IP address for the scanner, press <3> in the WLAN Settings menu.
The current Gateway IP address setting for your local area network displays in the scanner
information window (Figure 77):
Figure 77: Gateway Address Setting
2.
Enter the Gateway IP address for the wireless scanner into the New field, then press the
<Blue Enter>
key to save the setting and return to the WLAN Settings menu. The specified
Gateway IP address must match the IP address of your Access Point receiver. Use the
Access Point IP Address setting in Section 2 of the Settings Worksheet.
4.5.4 DNS Server Setting
1.
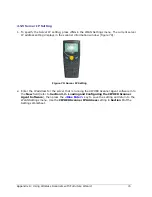
To specify the DNS Server setting for the scanner, press <4> in the WLAN Settings menu.
The current network DNS Server setting displays in the scanner information window (Figure
78):
Figure 78: DNS Server Setting
2.
Enter the IP address for the DNS Server into the New field, then press the
<Blue Enter>
key to save the setting and return to the WLAN Settings menu. The specified DNS Server IP
address must match the DNS Server setting of your local area network. Use the LAN DNS
Server setting in Section 1 of the Settings Worksheet.

