22
Raption 150 Series Installation Manual
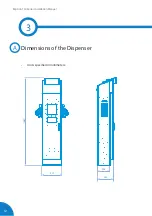
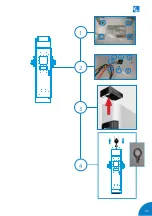
Steps to elevate the Dispenser:
1- Check that the screws of the Dispenser base are removed, so it can be moved and
elevated. Find the eyebolt too. It is provided but it needs to be installed*.
2- Locate the top cover screws inside the unit, remove the screws.
3- Remove the roof cover and install the eyebolt in the middle (there is one hole
inside the steel nerve for the eyebolt installation).
4- Hold the sling to the eyebolt. Make sure that it is properly fastened. Raise up,
move and place the Dispenser in the final location. Remove the eyebolt and install
the roof cover when installation has been finished.
*It is mandatory to remove the roof cover to install the eyebolt in the top of the
Dispenser. In like manner, eyebolt has to be removed in order to be able to install
the roof cover again.
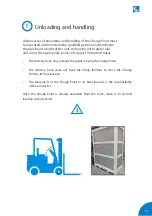
P L A C I N G T H E D I S P E N S E R I N T H E F I N A L LO C AT I O N
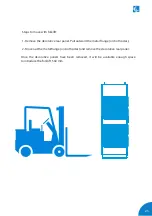
Once the Dispenser is free from the pallet, follow the next steps to move the charger:
Summary of Contents for Raption 150 Series
Page 1: ...Installation Manual Raption 150 Series ...
Page 2: ......
Page 4: ......
Page 7: ...03 ...
Page 20: ...16 Raption 150 Series Installation Manual Power Unit front door Power input supply ...
Page 21: ...17 Power Unit rear door Output wiring to Dispenser ...
Page 27: ...23 1 2 3 4 ...
Page 34: ...30 Raption 150 Series Installation Manual E Dispenser template dimensions 435 300 70 ...
Page 35: ...31 400 165 280 310 ...
Page 37: ...33 0 1920 ...
Page 51: ...47 CCS CCS CHA CHA 3 ...
Page 53: ...49 PE DC 2 L N PE ETHERNET CABLE 2 1 3 DC 1 2 2 Wiring connection for the Dispenser Scheme ...
Page 55: ...51 L1 N PE ETHERNET 1 2 ...
Page 56: ...52 Raption 150 Series Installation Manual CCS CCS 3 ...
Page 57: ...53 CHA PE CHA 3 ...
Page 59: ...55 ...
Page 65: ...61 ...

