background image

- 15 -

Diode Test

1.   Set the function switch to       position.
2.   Press the 

RANGE

/ /  button until the   symbol appears in the 

display.

3.   Insert the black test lead banana plug into the negative (-) jack 

COM


and the red test lead banana plug into the positive (+) jack 

Ω

.

4.   Touch the test probe tips to the diode or semiconductor junction you 

wish to test. Note the meter reading

5.   Reverse the probe polarity by switching probe position. Note this read-

ing.

6.   The diode or junction can be evaluated as follows:

A. If one reading shows a value and the other reading shows OL, the 

diode is good.
B. If both readings show OL, the device is open.
C. If both readings are very small or 0, the device is shorted.

WARNING: 

To  avoid  electric  shock,  do  not  test  any  diode  that  has

voltage on it.

NOTE: 

The  value  indicated  in  the  display  during  the  diode  check  is  the 

forward voltage.

Frequency/Duty Cycle Measurements

1.  Set the rotary function switch to the “Hz %” position.
2.   Insert the black lead banana plug into the negative 

COM

 jack and the 

red test lead banana plug into the positive 

Hz

 jack.

3.   Touch the test probe tips to the circuit under test.
4.   Read the frequency on the display.
5.   Press the Hz/% button again to indicate “%” on the display.
6.   Read the % of duty cycle on the display.

Summary of Contents for DMR-6550

Page 1: ...USER S MANUAL Multimeter True RMS Auto ranging DMR 6550 CIRCUIT TEST ELECTRONICS www circuittest com...

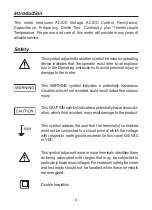
Page 2: ...potentially hazardous situation which if not avoided could result in death or serious injury This CAUTION symbol indicates a potentially hazardous situ ation which if not avoided may result damage to...

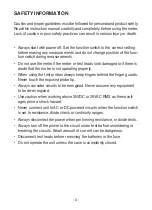
Page 3: ...ly When using the test probes always keep fingers behind the finger guards Never touch the exposed probe tip Always consider circuits to be energized Never assume any equipment to be de energized Use...

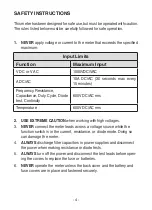
Page 4: ...Continuity 600V DC AC rms Temperature 600V DC AC rms 2 USE EXTREME CAUTION when working with high voltages 3 NEVER connect the meter leads across a voltage source while the function switch is in the...

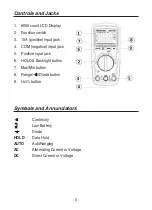
Page 5: ...nput jack 4 COM negative input jack 5 Positive input jack 6 HOLD Backlight button 7 Max Min button 8 Range Diode button 9 Hz button Continuity Low Battery Diode HOLD Data Hold AUTO AutoRanging AC Alte...

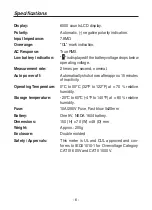
Page 6: ...Auto power off Automaticallyshutsdownafterapprox 15minutes of inactivity Operating Temperature 0 C to 50 C 32 F to 122 F at 70 relative humidity Storage temperature 20 C to 60 C 4 F to 140 F at 80 rel...

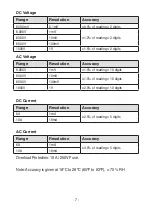
Page 7: ...Resolution Accuracy 6 000V 1mV 1 5 of reading 10 digits 60 00V 10mV 1 5 of reading 10 digits 600 0V 100mV 1000V 1V 2 0 of reading 10 digits DC Current Range Resolution Accuracy 6A 1mA 2 5 of reading...

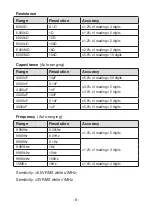
Page 8: ...00nF 10pF 5 0 of reading 50 digits 400 0nF 0 1nF 3 0 of reading 5 digits 3 0 of reading 5 digits 4 000uF 1nF 40 00uF 10nF 400 0uF 0 1uF 5 0 of reading 5 digits 4000uF 1uF 5 0 of reading 5 digits Frequ...

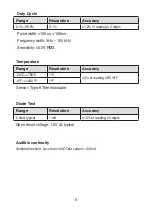
Page 9: ...Hz Sensitivity 0 5V RMS Temperature Range Resolution Accuracy 20 C 760 C 1 C 3 of reading 5 C 9 F 4 F 1400 F 1 F Sensor Type K Thermocouple Diode Test Range Resolution Accuracy 0 3mA typical 1 mV 10 o...

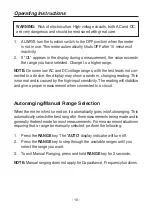
Page 10: ...OL appears in the display during a measurement the value exceeds the range you have selected Change to a higher range NOTE On some low AC and DC voltage ranges with the test leads not con nected to a...

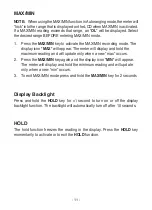
Page 11: ...ld the maximum reading and will update only when a new max occurs 2 Press the MAX MIN key again and the display icon MIN will appear The meter will display and hold the minimum reading and will update...

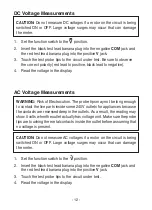
Page 12: ...on The probe tips may not be long enough to contact the live parts inside some 240V outlets for appliances because the contacts are recessed deep in the outlets As a result the reading may show 0 volt...

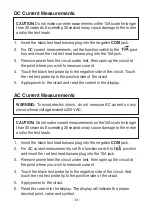
Page 13: ...nt in the display AC Current Measurements CAUTION Do not make current measurements on the 10Ascale for longer than 30 seconds Exceeding 30 seconds may cause damage to the meter and or the test leads 1...

Page 14: ...wires that have voltage on them Resistance Measurements WARNING To avoid electric shock disconnect power to the unit under test and discharge all capacitors before taking any resistance measurements R...

Page 15: ...d the other reading shows OL the diode is good B If both readings show OL the device is open C If both readings are very small or 0 the device is shorted WARNING To avoid electric shock do not test an...

Page 16: ...ng the part under test until the reading stabilizes about 30 seconds 4 Read the temperature in the display WARNING To avoid electric shock be sure the thermocouple has been removed before changing to...

Page 17: ...avoid electric shock do not operate your meter until the battery door is in place and fastened securely Replacing the Fuses WARNING To avoid electric shock disconnect the test leads from any source of...

Page 18: ...period of 2 years from the date of purchase Any product which has been subjected to misuse or accidental damage is excluded from the warranty Except as stated above Circuit Test Electronics makes no p...

Reviews: