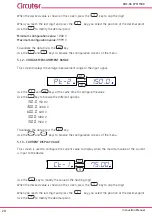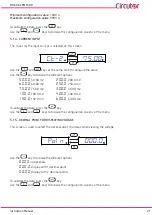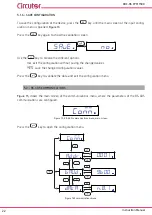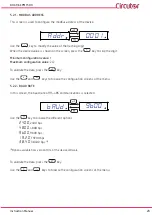
background image

18

DHC-96 CPM 1500

Instruction Manual

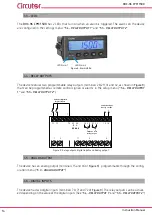
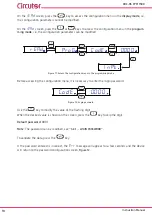
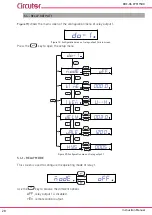
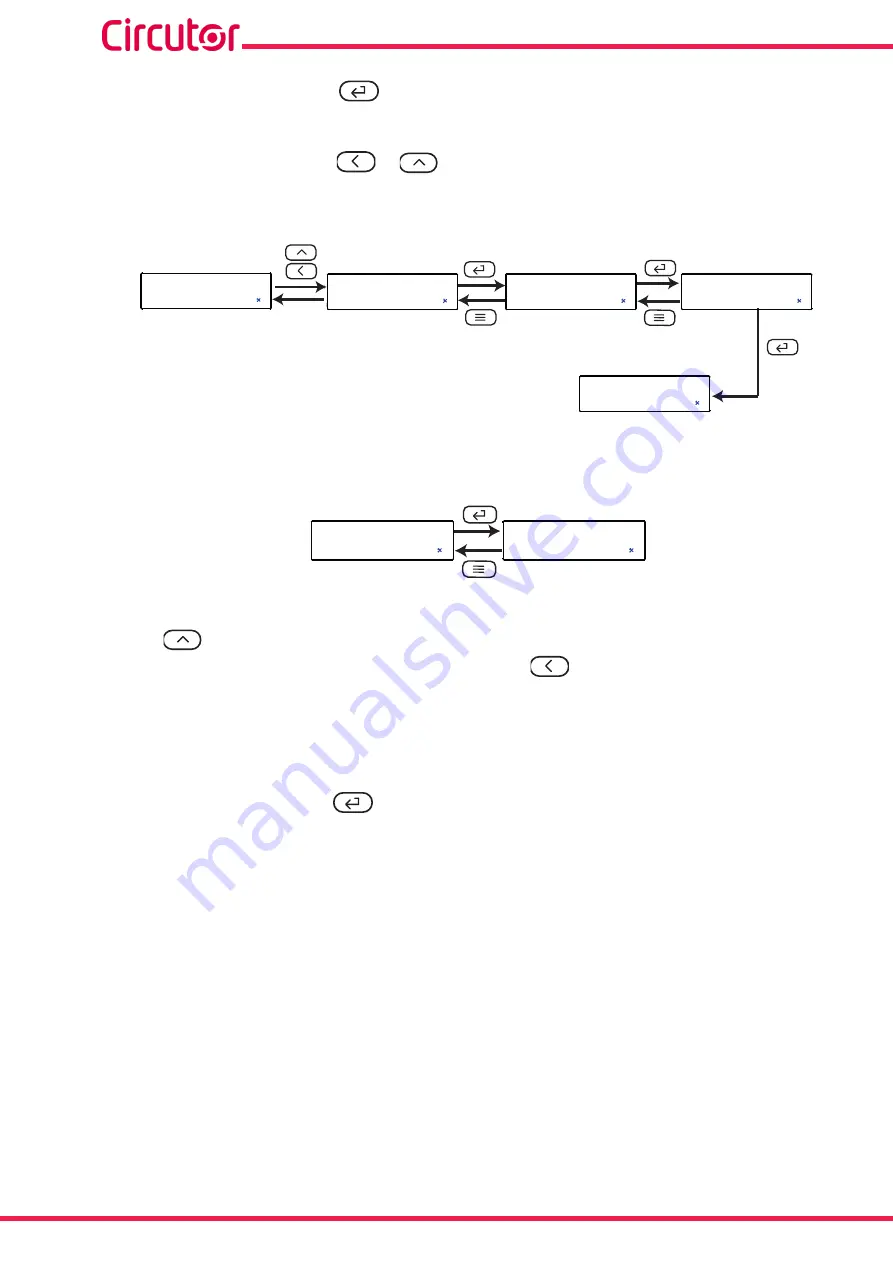
On the 

R

EAd

 screen, press the


,


key to access the configuration menu in the 

display mode

, i.e., 

the configuration parameters cannot be modified.

On the 

R

EAd

 screen, press the 

 or 


keys to access the configuration menu in the 

program-

ming mode

, i.e., the configuration parameters can be modified.


ProG

CodE


0000


inPt

 rEAd

Figure 11: Access the configuration menu in the programming mode�

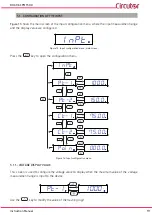
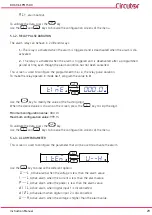
Before accessing the configuration menu, it is necessary to enter the login password.

CodE


0000

Figure 12: Login password�

Use the 

, key to modify the value of the flashing digit

When the desired value is shown on the screen, press the


key to skip the digit.

Default password:


0001

Note: 

The password can be modified, see 

"5.6.1 .- LOGIN PASSWORD"


To validate the data, press the


key.

If the password entered is incorrect, the 

Err


message will appear for a few seconds and the device 

will return to the password configuration screen, 

Figure 12

.

Summary of Contents for DHC-96 CPM

Page 1: ...INSTRUCTION MANUAL DC Multimeter DHC 96 CPM 1500 M331B01 03 22B...

Page 2: ...2 DHC 96 CPM 1500 Instruction Manual...

Page 3: ...efully prior to connecting the unit Follow all installation and maintenance in structions throughout the unit s working life Pay special attention to the installation standards of the National Electri...

Page 4: ...LAY VALUE 19 5 1 2 VOLTAGE MEASUREMENT RANGE 20 5 1 3 CURRENT DISPLAY VALUE 20 5 1 4 CURRENT INPUT 21 5 1 5 DECIMAL POINT FOR DISPLAYING VOLTAGE 21 5 1 6 SAVE CONFIGURATION 22 5 2 RS 485 COMMUNICATION...

Page 5: ...S 38 6 2 MODBUS PROTOCOL 39 6 2 1 READING EXAMPLE FUNCTION 0x01 39 6 2 2 EXAMPLE OF OPERATION OF THE REMOTE CONTROL FUNCTION 0x05 39 6 3 MODBUS COMMANDS 40 6 3 1 MEASUREMENT VARIABLES AND DEVICE STATU...

Page 6: ...B01 03 22B Changes in the following sections 6 2 1 6 3 2 6 3 3 6 3 4 Note Devices images are for illustrative purposes only and may differ from the actual device SYMBOLS Table 2 Symbols Symbol Descrip...

Page 7: ...ception immediately contact the transport com pany and or CIRCUTOR s after sales service 2 PRODUCT DESCRIPTION The DHC 96 CPM 1500 is designed to measure and display the DC volt age DC current power e...

Page 8: ...is critical to keep the cables in perfect condition in order to avoid accidents personal injury and damage to installations The device s functionality is limited to the category of measuring voltage...

Page 9: ...or enclosure and panel mounted To install it take the following steps 1 Make a cut in the panel according to the dimensions in Figure 1 91 44 Figure 1 Cut in the panel 2 Remove the device s fixing cl...

Page 10: ...Current measurement input 32 D02 Relay output 2 NO 5 Current measurement input Voltage measurement input 58 A RS 485 11 U Voltage measurement input 59 B RS 485 15 Analog output 70 DIC Common digital...

Page 11: ...re 4 Voltage and current measurement Make sure that the positive and negative voltage terminals are as shown in the connection diagram 3 4 2 VOLTAGE MEASUREMENT 1 2 V 70 58 71 1 2 11 72 28 29 31 32 16...

Page 12: ...NG SHUNT 1 2 70 58 71 1 2 11 72 28 29 31 32 16 15 B A RS 485 C 1 2 1 2 Digital inputs Entradas Digitales Analog output Salida Anal gica Alimentaci n Auxiliar Power Supply Relay output Salida de rel s...

Page 13: ...of the digital inputs if an input is connected its corresponding number flashes The status of the relay outputs if a relay is closed its corresponding number flashes 4 2 KEYBOARD FUNCTIONS The DHC 96...

Page 14: ...ELAY OUTPUT 1 and 5 5 RELAY OUTPUT 2 1 2 V 70 58 71 1 2 11 72 28 29 31 32 16 15 B A RS 485 C 1 2 1 2 Digital inputs Entradas Digitales Analog output Salida Anal gica Alimentaci n Auxiliar Power Supply...

Page 15: ...nge automatically depending on the time programmed in section 5 6 2 CYCLIC DISPLAY Table 6 Display menu Display menu 1000 DI 1 1 2 2 D0 V Voltage 500 DI 1 1 2 2 D0 A Current 5003 DI 1 1 2 2 D0 k W Pow...

Page 16: ...n to the instantaneous value The maximum and minimum values can be deleted in the settings menu 5 6 6 DELETING THE MAXI MUM AND MINIMUM VALUES or through the communications options 6 3 5 DELETING VALU...

Page 17: ...e input Relay output 1 Relay output 2 Configuration of the display Software version Communications Analog output Ao 1 1000 DI 1 1 2 2 D0 V rEAd ProG inpt Conn do 2 SEt uEr Figure 10 DHC 96 CPM 1500 co...

Page 18: ...configuration menu in the programming mode Before accessing the configuration menu it is necessary to enter the login password CodE 0000 Figure 12 Login password Use the key to modify the value of the...

Page 19: ...Input configuration menu main screen Press the key to open the configuration menu 75 00 75 00 A 000 0 inPt Pt 1 Pt 2 Ct 1 Ct 2 1000 150 0 V V mV Poin Figure 14 Input configuration menu 5 1 1 VOLTAGE D...

Page 20: ...t signal Pt 2 150 0V Use the and keys at the same time to configure the value Use the key to browse the different options 150 0 150 0 V 300 0 300 0 V 600 0 600 V 1000 1000 V 1500 1500 V To validate th...

Page 21: ...00 mV 200 0 200 0 mV 60 00 60 00 mV 250 0 250 0 mV 75 00 75 00 mV 300 0 300 0 mV 100 0 100 0 mV 400 0 400 0 mV 150 0 150 0 mV 600 0 600 0 mV To validate the data press the key Use the and keys to bro...

Page 22: ...ions no exit the configuration without saving the changed values YES save the changed configuration values Press the key to validate the data and exit the configuration menu 5 2 RS 485 COMMUNICATIONS...

Page 23: ...imum configuration value 247 To validate the data press the key Use the and keys to browse the configuration screens of the menu 5 2 2 BAUD RATE In this screen the baud rate of RS 485 communications i...

Page 24: ...alidate the data press the key Use the and keys to browse the configuration screens of the menu 5 2 4 SAVE CONFIGURATION To save the configuration of the device press the key until the main screen of...

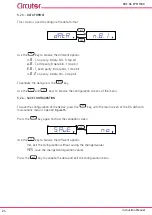
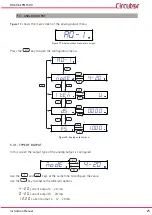
Page 25: ...the configuration menu A0 1 nodE ds FS 4 20 itEn 0000 1000 U V V Figure 18 Analog output menu 5 3 1 TYPE OF OUTPUT In this screen the output type of the analog output is configured nodE 4 20 Use the...

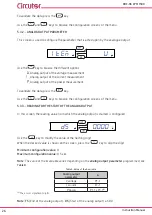
Page 26: ...the configuration screens of the menu 5 3 3 READING FOR THE START OF THE ANALOG OUTPUT In this screen the reading value from which the analog output is started is configured ds 0000 V Use the key to...

Page 27: ...uration value 1 2 x A for the analog output of the voltage measurement 1 2 x A for the analog output of the current measurement A for the analog output of the power measurement Note FS End of the anal...

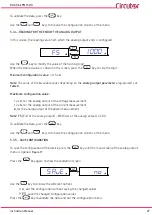
Page 28: ...elay output 1 main screen Press the key to open the setup menu nodE tinE itEn dELy HyS uALE 1200 000 0 003 0 oFF 0005 U H do 1 S S V V Figure 20 Configuration menu of relay output 1 5 4 1 RELAY MODE T...

Page 29: ...nE 000 0 S Use the key to modify the value of the flashing digit When the desired value is shown on the screen press the key to skip the digit Minimum configuration value 000 0 s Maximum configuration...

Page 30: ...e the alarm connection delay dELy 003 0 S Use the key to modify the value of the flashing digit When the desired value is shown on the screen press the key to skip the digit Minimum configuration valu...

Page 31: ...owse the configuration screens of the menu 5 4 7 SAVE CONFIGURATION To save the configuration of the device press the key until the main screen of the relay output 1 configuration menu is opened Figur...

Page 32: ...ain screen of the configuration menu of the display SEt Figure 22 Configuration menu of the display main screen Press the key to open the configuration menu S S SEt CodE CyC LiGH ALr 0001 0000 0100 12...

Page 33: ...change automatically depending on the time programmed in this section S CyC 0000 Use the key to modify the value of the flashing digit When the desired value is shown on the screen press the key to s...

Page 34: ...alarm ALr 120 0 Use the key to modify the value of the flashing digit When the desired value is shown on the screen press the key to skip the digit Minimum configuration value 30 0 Maximum configurati...

Page 35: ...s 0 5 refresh time of 0 5 s 0 3 refresh time of 0 3 s To validate the data press the key Use the and keys to browse the configuration screens of the menu 5 6 7 DELETING THE MAXIMUM MINIMUM VALUES This...

Page 36: ...reen the user selects whether or not to clear the energy totalisers Clr E no Use the key to browse the different options no the totalisers are not cleared YES the totalisers are cleared To validate th...

Page 37: ...37 Instruction Manual DHC 96 CPM 1500 Press the key to validate the data and exit the configuration menu 5 7 SOFTWARE VERSION The software version of the device is shown in the display mode 1000 uEr...

Page 38: ...vice of 1200 metres A maximum of 32 DHC 96 CPM 1500 devices can be connected to this bus Use an intelligent RS 232 to RS 485 network protocol converter to establish the communications with the master...

Page 39: ...d function Initial Register 0000 on which the reading will start No of Registers 0002 number of registers read CRC BDCB CRC Character Response Address Function No of Bytes Register No 1 Register No 2...

Page 40: ...ve energy float 24 kWh Table 10 Modbus memory map Table 2 Parameter Format Address Value Communications ID int 104 530 Voltage int 106 V or kV Decimal point of voltage int 107 0 xxxx 1 xxx x 2 xx xx 3...

Page 41: ...outputs and digital inputs is shown in Table 14 Table 14 Format of the parameter Status of relay outputs and digital inputs Bit 15 2 Bit 1 Bit 0 0 Relay 2 Digital input 2 1 Closed 0 Open Relay 1 Digi...

Page 42: ...d Funci n 0x0F multiple relay control Table 20 Modbus memory map Table 6 Parameter Address Register Remote control 0000 2 The format of the parameter is shown in Table 21 Table 21 Format of the parame...

Page 43: ...0 0 V 3 1000 V 4 1500 V Current display value int 809 1000 9999 A Decimal point of the current display value int 80A 0 xxxx 1 xxx x 2 xx xx 3 x xxx Current input int 80C 0 50 00 mV 1 60 00 mV 2 75 00...

Page 44: ...able 26 Modbus memory map Relay outputs Relay outputs Parameter Format Address Valid data margin Relay 1 mode int 820 2 Ouput disabled 1 Alarm output 0 Remote control output Relay 2 mode int 826 Relay...

Page 45: ...acklight int 801 0 9999 s 7 Light alarm int 805 300 1200 x 0 1 8 Display home screen int 806 0 Voltage 1 Current 2 Power 3 Positive energy 4 Negative energy 5 Positive electric charge 6 Negative elect...

Page 46: ...Current measurement circuit Rated current In Shunt 50 mV 60 mV 75 mV 100 mV 150 mV 200 mV 250 mV 300 mV 400 mV 600 mV Overcurrent 1 2 In continuous Consumption 1 VA Impedance 20 m Installation catego...

Page 47: ...d measurement techniques Electrostatic discharge immunity test IEC 61000 4 2 Electromagnetic compatibility EMC Part 4 3 Testing and measurement techniques Ra diated radio frequency electromagnetic fie...

Page 48: ...ruction Manual Continued Standards Electrical equipment for measurement control and laboratory use EMC requirements Part 1 General requirements IEC 61326 1 49 8 95 107 7 96 10 max Figure 25 Dimensions...

Page 49: ...ns derived from a possible failure improper installation or improper usage of the unit Consequently this guarantee does not apply to failures occurring in the following cases Overvoltages and or elect...

Page 50: ...50 DHC 96 CPM 1500 Instruction Manual 10 CE CERTIFICATE...

Page 51: ...51 Instruction Manual DHC 96 CPM 1500...

Page 52: ...52 DHC 96 CPM 1500 Instruction Manual...

Page 53: ...end of the analog output Decimal point for displaying voltage 100 0 1500 150 0 2400 4800 9600 n 8 1 o 8 1 E 8 1 n 8 2 19 20 300 0 600 0 75 00 100 0 150 0 200 0 250 0 50 00 600 0 400 0 300 0 60 00 0 2...

Page 54: ...Cyclic display Software version Display home screen Deleting the maximum minimum values Deleting the electrical charge totalisers Deleting the energy totalisers Refreshment time uEr 3021 U L i l p L...

Page 55: ...55 Instruction Manual DHC 96 CPM 1500...

Page 56: ...CIRCUTOR SA Vial Sant Jordi s n 08232 Viladecavalls Barcelona Tel 34 93 745 29 00 Fax 34 93 745 29 14 www circutor es central circutor com...

Reviews: