


6-13
Cisco Wireless LAN Controller Configuration Guide
OL-17037-01
Chapter 6 Configuring WLANsWireless Device Access
Configuring WLANs
Step 17
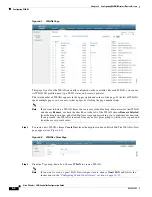
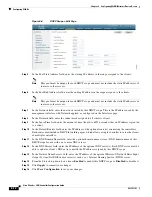
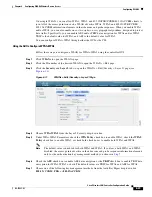
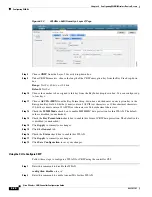
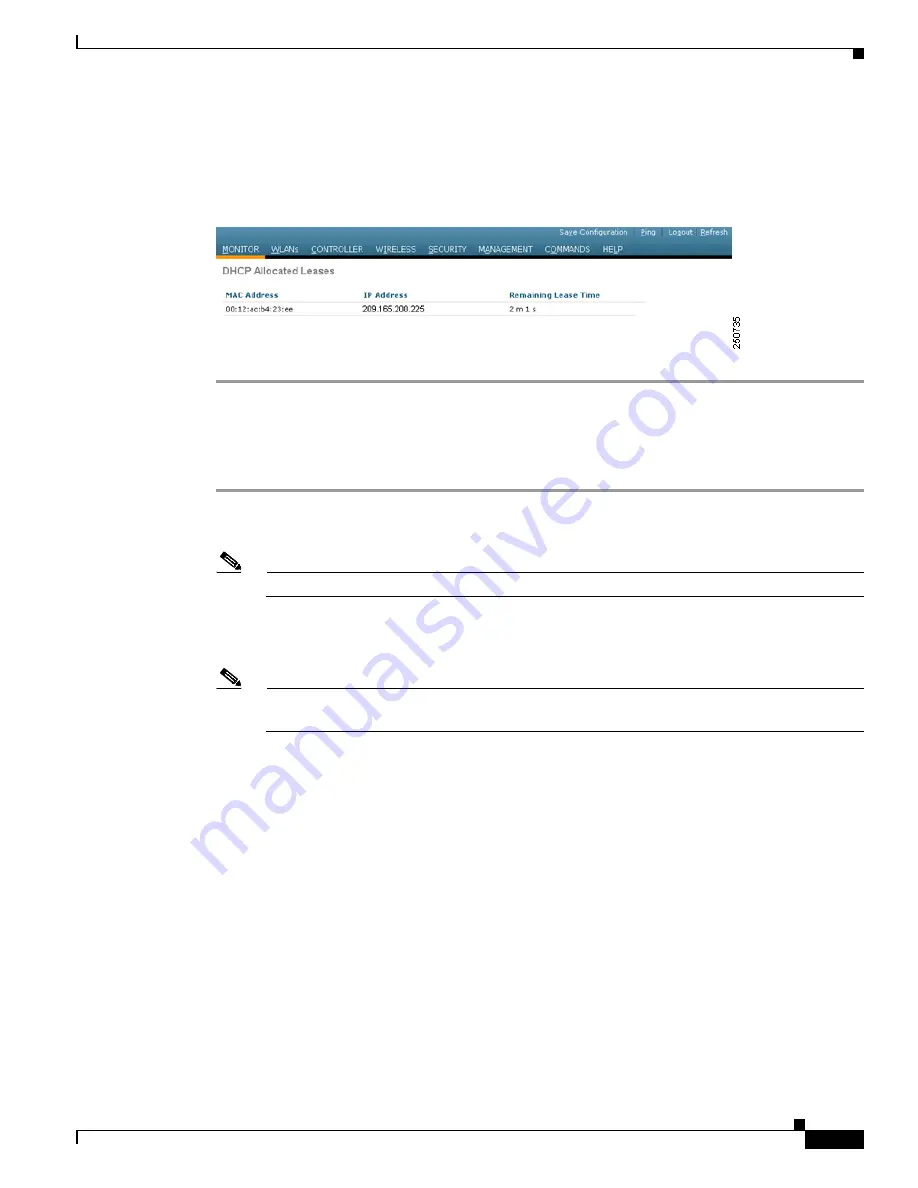
To see the remaining lease time for wireless clients, click
DHCP Allocated Leases
. The DHCP
Allocated Lease page appears (see
), showing the MAC address, IP address, and remaining
lease time for the wireless clients.
Figure 6-7
DHCP Allocated Lease Page
Using the CLI to Configure DHCP Scopes
Follow these steps to configure DHCP scopes using the CLI.
Step 1
To create a new DHCP scope, enter this command:
config dhcp create-scope
scope
Note
If you ever want to delete a DHCP scope, enter this command:
config dhcp delete-scope
scope
.
Step 2
To specify the starting and ending IP address in the range assigned to the clients, enter this command:
config dhcp address-pool
scope start end
Note
This pool must be unique for each DHCP scope and must not include the static IP addresses of
routers or other servers.
Step 3
To specify the network served by this DHCP scope (the IP address used by the management interface
with Netmask applied) and the subnet mask assigned to all wireless clients, enter this command:
config dhcp network
scope network netmask
Step 4
To specify the amount of time (from 0 to 65536 seconds) that an IP address is granted to a client, enter
this command:
config dhcp lease
scope lease_duration
Step 5
To specify the IP address of the optional router(s) connecting the controllers, enter this command:
config dhcp default-router
scope router_1
[
router_2
] [
router_3
]
Each router must include a DHCP forwarding agent, which allows a single controller to serve the clients
of multiple controllers.
Step 6
To specify the optional domain name system (DNS) domain name of this DHCP scope for use with one
or more DNS servers, enter this command:
config dhcp domain
scope domain


