16 Cisco 7000 and Cisco 7507 Chassis Replacement Instructions
Replacing a Rack-Mounted Chassis
Step 5
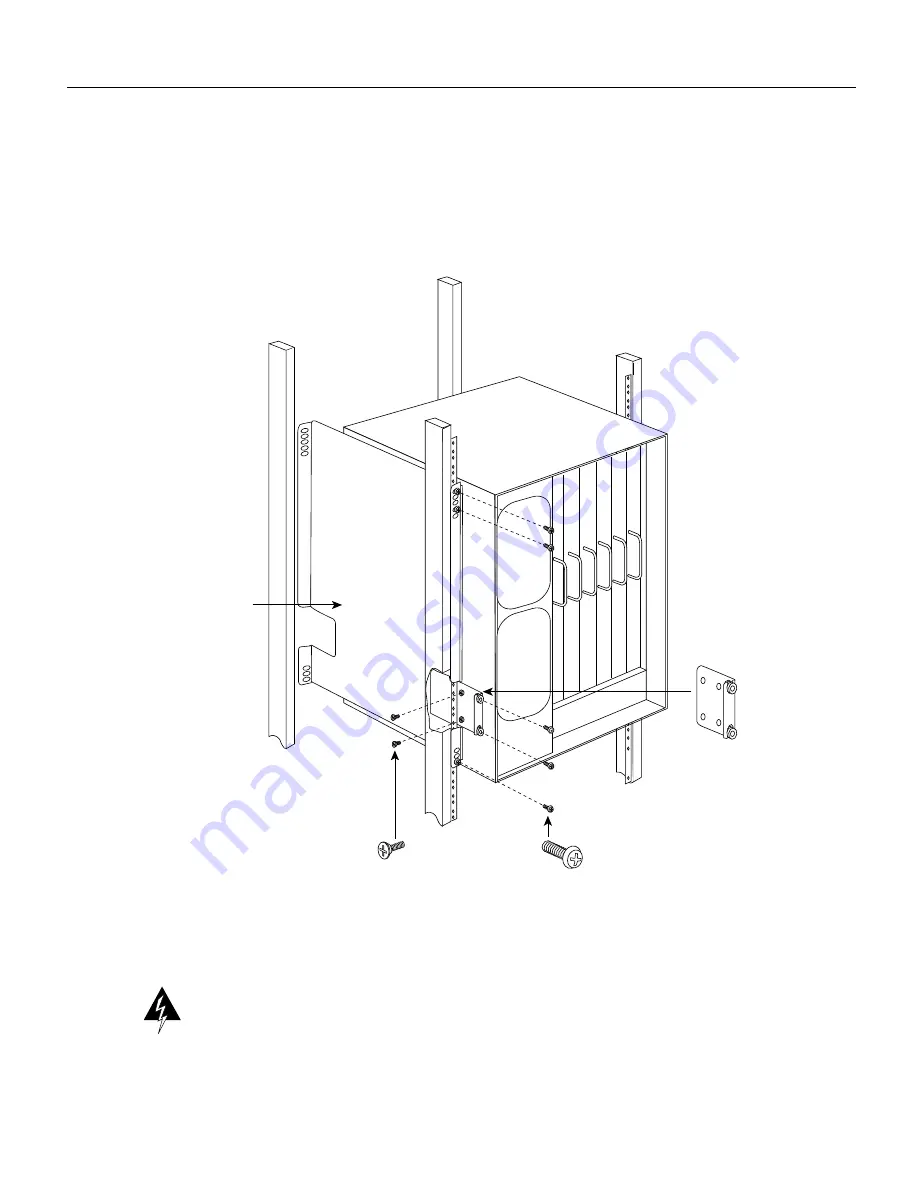
On the front of the rack, use a 1/4-inch flat-blade screwdriver to loosen and remove the four
binder-head screws that secure the left and right ears to the front mounting strips on the
equipment rack. (See Figure 7.) Keep the removed screws together; you will need them to
secure the replacement chassis in the rack.
Figure 7
Rack Mounting Hardware
Warning
The following step might shift the chassis’ center of gravity to the front of the rack and
may cause the rack or the chassis to tip or fall. Before proceeding, ensure that you have sufficient
assistance to prevent the rack from toppling and the chassis from falling out of the rack. Never
attempt to lift or support the front of the chassis with the plastic front panels. The panels can break
away and allow the chassis to drop.
H2292
M4 x 10-mm long Phillips
flat-head screws (to attach
ears to chassis)
10-32 x 5/8-inch long Phillips
pan-head screws with integral
square cone washers
(for mounting brackets and
chassis ears to rack posts)
Chassis ear with
captive sliding
grommets
Bracket


