Set TFTP Server 2 Field
Procedure
Step 1
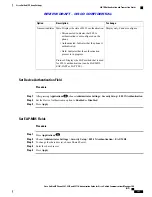
Unlock the CTL or ITL file if necessary (for example, if you are changing the administrative domain of the
phone). If both the CTL and ITL files exist, unlock either of the files.
Step 2
Unlock network configuration options.
Step 3
Enter an IP address for the TFTP Server 1 option.
Step 4
Scroll to the TFTP Server 2 option, press
Select
, and enter a new backup TFTP server IP address. If there is
no secondary TFTP Server, you can use
Delete
to clear the field of a previous value.
Step 5
Press
Apply
and then press
Save
.
DHCP Usage
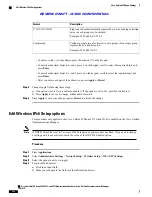
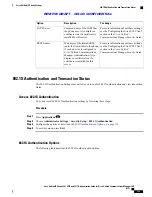
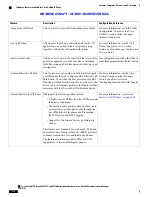
If you are configuring the Ethernet network settings on the phone for an IP network, you can set up an IP
address for the phone by either using DHCP or manually entering an IP address.
You must also enter the domain name for the phone in the Ethernet Setup page.
Note
Set Up Phone To Use DHCP
To enable DHCP and allow the DHCP server to automatically assign an IP address to the Cisco Unified IP
Phone and direct the phone to a TFTP server, perform these steps:
Procedure
Step 1
Press
Applications
and choose
Administrator Settings
>
Network Setup
>
Ethernet Setup
>
IPv4 Setup
.
Step 2
To enable DHCP, set DHCP Enabled to
Yes
. DHCP is enabled by default.
Step 3
To use an alternate TFTP server, set Alternate TFTP Server to
Yes
, and enter the IP address for the TFTP
Server.
Consult with the network administrator to determine whether you need to assign an alternative TFTP
server instead of using the TFTP server that DHCP assigns.
Note
Step 4
Press
Apply
,
Cisco Unified IP Phone 8961, 9951, and 9971 Administration Guide for Cisco Unified Communications Manager
10.0 (SIP)
118
Cisco Unified IP Phone Settings
Set TFTP Server 2 Field
REVIEW DRAFT - CISCO CONFIDENTIAL


