9-3
Cisco Aironet 1400 Series Wireless Bridges Software Configuration Guide
OL-4059-01
Chapter 9 Configuring WEP and WEP Features
Configuring WEP and WEP Features
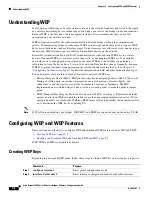
This example shows how to create a 128-bit WEP key in slot 2 for VLAN 1 and sets the key as the
transmit key:
bridge#
configure terminal
bridge(config)#
configure interface dot11radio 0
bridge(config-if)#
encryption vlan 1 key 2 size 128 12345678901234567890123456
transmit-key
bridge(config-if)#
end
Enabling and Disabling WEP and Enabling TKIP and MIC
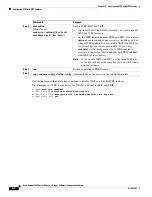
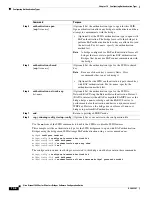
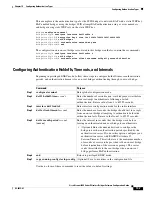
Beginning in privileged EXEC mode, follow these steps to enable WEP, TKIP, and MIC:
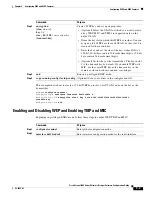
Step 3
encryption
[
vlan
vlan-id
]
key
1-4
size
{
40
|
128
}
encryption-key
[
transmit-key
]
Create a WEP key and set up its properties.
•
(Optional) Select the VLAN for which you want to create
a key. WEP, MIC, and TKIP are supported only on the
native VLAN.
•
Name the key slot in which this WEP key resides. You can
assign up to 4 WEP keys for each VLAN, but key slot 4 is
reserved for the session key.
•
Enter the key and set the size of the key, either 40-bit or
128-bit. 40-bit keys contain 10 hexadecimal digits; 128-bit
keys contain 26 hexadecimal digits.
•
(Optional) Set this key as the transmit key. The key in slot
2 is the transmit key by default. If you enable WEP with
MIC, use the same WEP key as the transmit key in the
same key slot on both root and non-root bridges.
Step 4
end
Return to privileged EXEC mode.
Step 5
copy running-config startup-config
(Optional) Save your entries in the configuration file.
Command
Purpose
Command
Purpose
Step 1
configure terminal
Enter global configuration mode.
Step 2
interface dot11radio 0
Enter interface configuration mode for the radio interface.

