14-9
Cisco Aironet 1400 Series Wireless Bridges Software Configuration Guide
OL-4059-01
Chapter 14 Configuring Filters
Configuring Filters Using the Web-Browser Interface
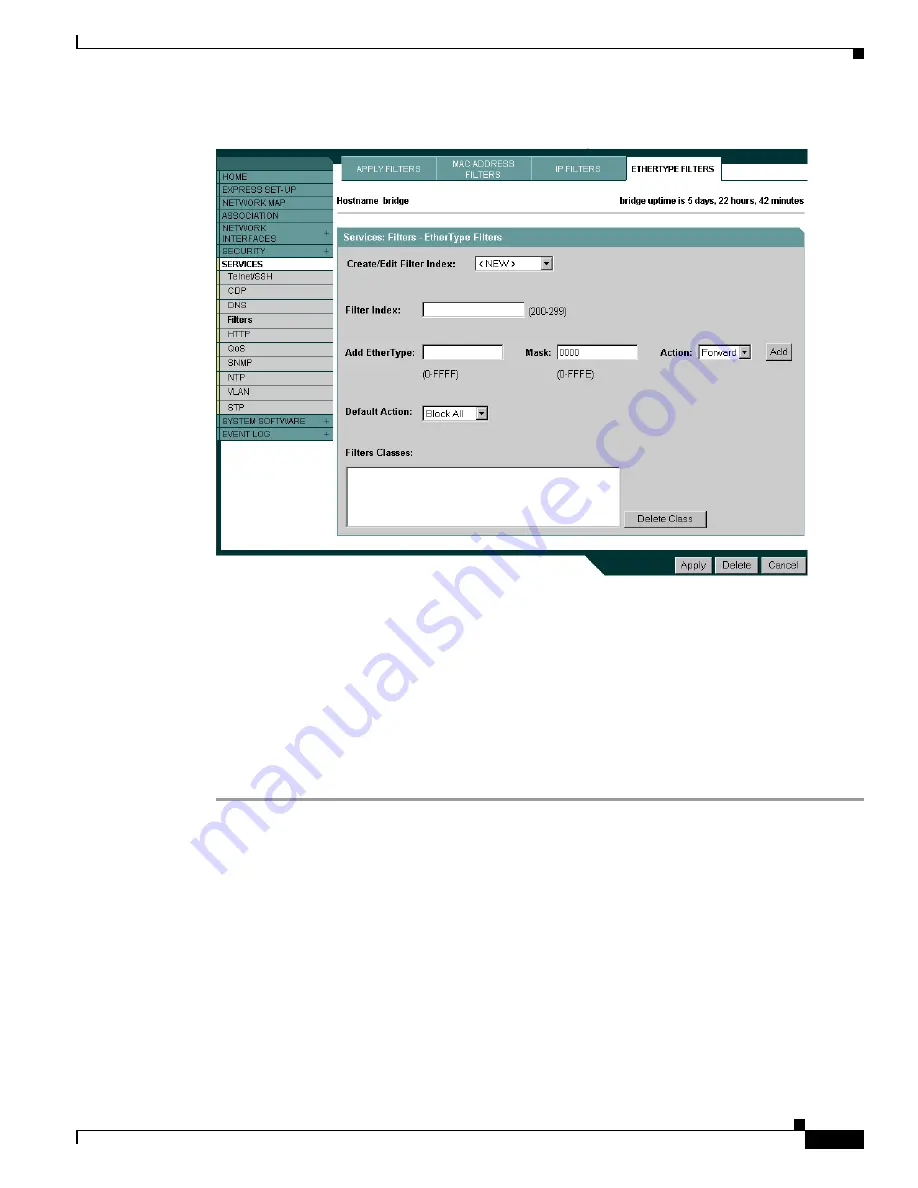
Figure 14-5 Ethertype Filters Page
Follow this link path to reach the Ethertype Filters page:
1.
Click
Services
in the page navigation bar.
2.
In the Services page list, click
Filters
.
3.
On the Apply Filters page, click the
Ethertype Filters
tab at the top of the page.
Creating an Ethertype Filter
Follow these steps to create an Ethertype filter:
Step 1
Follow the link path to the Ethertype Filters page.
Step 2
If you are creating a new filter, make sure
<NEW>
(the default) is selected in the Create/Edit Filter Index
menu. To edit an existing filter, select the filter number from the Create/Edit Filter Index menu.
Step 3
In the Filter Index field, name the filter with a number from 200 to 299. The number you assign creates
an access control list (ACL) for the filter.
Step 4
Enter an Ethertype number in the Add Ethertype field. See
Appendix B, “Protocol Filters,”
for a list of
protocols and their numeric designators.
Step 5
Enter the mask for the Ethertype in the Mask field.
Step 6
Select
Forward
or
Block
from the Action menu.
Step 7
Click
Add
. The Ethertype appears in the Filters Classes field. To remove the Ethertype from the Filters
Classes list, select it and click
Delete Class
. Repeat
Step 4
through
Step 7
to add Ethertypes to the filter.


