1-2
Cisco Aironet 1810 Series OfficeExtend Access Point User Guide
Chapter 1 Installing and Configuring the Access Point
Installing the Access Point in the Network
Installing the Access Point in the Network
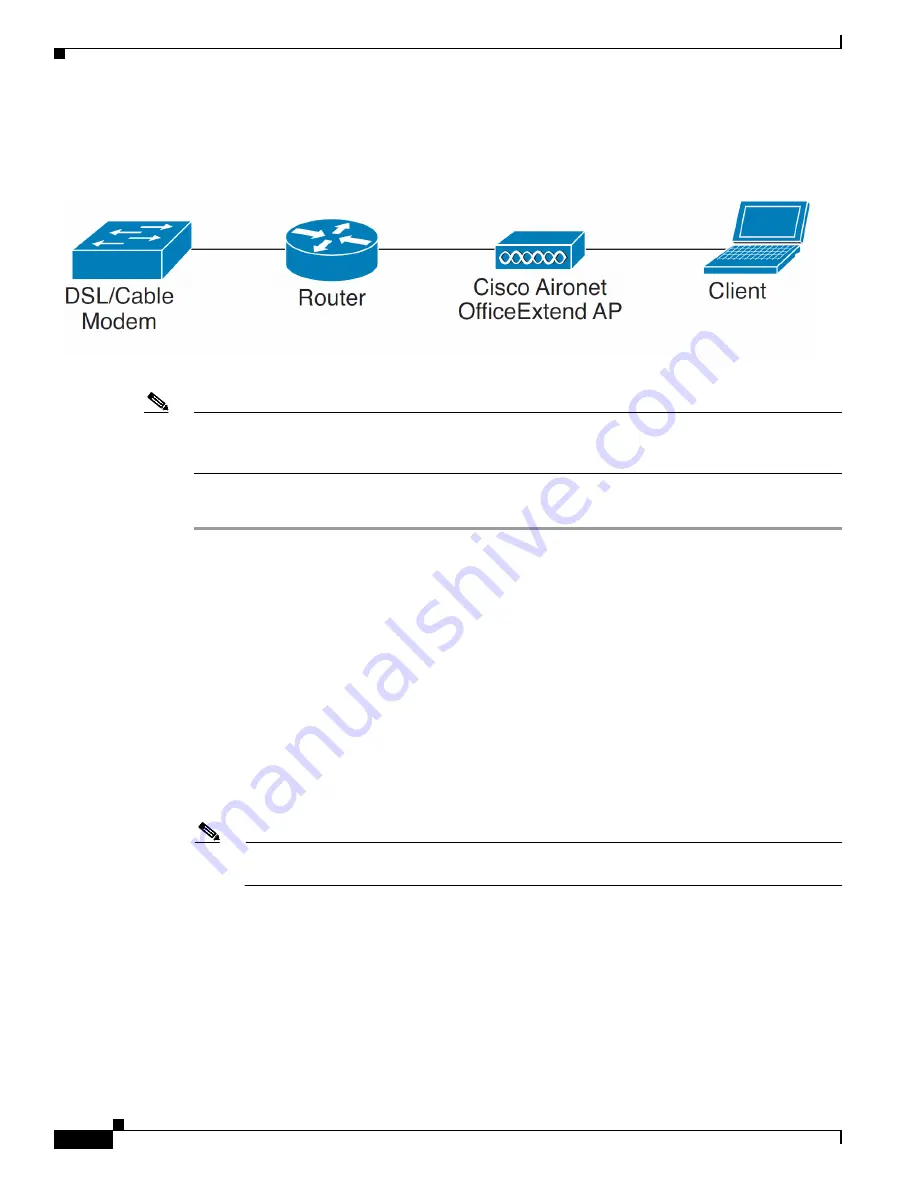
Figure 1-1
Cisco Aironet 1810 Series OfficeExtend AP Network Deployment Overview
Note
In some cases your broadband modem may have an integrated router capability and therefore you do not
require a separate router placed between the broadband modem and the Cisco Aironet 1810 Series
OfficeExtend Access Point.
To install the Cisco Aironet 1810 Series OfficeExtend AP, follow these steps:
Step 1
Insert one end of the Ethernet cable into the Ethernet port of your home router/gateway and the other end
into the LAN port of the AP.
Step 2
Power up the AP.
While the AP boots up the status LED blinks green. After association with the controller, the LED
changes to chirping green, When a wireless client associates with the AP, the LED stays green.
For information on the status LED indications, see the
Getting Started Guide
.
Step 3
If your IT administrator has not pre-provisioned the 1810 Series Office Extend AP with the IP address
of the Wireless Controller, continue with the following steps.
Step 4
Obtain the IP address of your Wireless LAN Controller from your company’s IT professional.
Step 5
Connect your laptop to the Console port of the access point.
Step 6
Open an Internet browser and go to the IP address of the access point. The default IP address is 10.0.0.1
Note
Make sure your laptop is not connected to your company’s network using a virtual private
network (VPN) connection.
Step 7
At the OfficeExtend Access Point login window, click
Login,
and then enter the username and password
to log into the access point. The default username and password are
admin
and
admin
.
Step 8
Choose
Configuration > WAN
.
Step 9
Enter the IP address of the Wireless LAN Controller in the
Controller IP Address
field.
Step 10
Leave the Static IP check box unchecked to allow the WAN IP address to be assigned by DHCP.
Step 11
Click
Apply
to commit your changes.
Step 12
On the verification screen, click
Continue
.


