17-12
Cisco ASA Series Firewall CLI Configuration Guide
Chapter 17 ASA CX Module
Configure the ASA CX Module
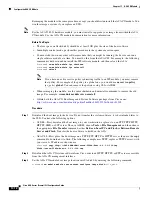
Reimaging the module is the same procedure, except you should first uninstall the ASA CX module. You
would reimage a system if you replace an SSD.
Note
For the ASA 5585-X hardware module, you must install or upgrade your image from within the ASA
CX module. See the ASA CX module documentation for more information.
Before You Begin
•
The free space on flash (disk0) should be at least 3GB plus the size of the boot software.
•
In multiple context mode, perform this procedure in the system execution space.
•
You must shut down any other software module that you might be running; the device can run a
single software module at a time. You must do this from the ASA CLI. For example, the following
commands shut down and uninstall the IPS software module, and then reload the ASA.
hostname#
sw-module module ips shutdown
hostname#
sw-module module ips uninstall
hostname#
reload
Note
If you have an active service policy redirecting traffic to an IPS module, you must remove
that policy. For example, if the policy is a global one, you would use
no service-policy
ips_policy
global
. You can remove the policies using CLI or ASDM.
•
When reimaging the module, use the same shutdown and uninstall commands to remove the old
image. For example,
sw-module module cxsc uninstall
.
•
Obtain both the ASA CX Boot Image and System Software packages from Cisco.com:
http://software.cisco.com/download/type.html?mdfid=284325223&flowid=34503
.
Procedure
Step 1
Download the boot image to the device. Do not transfer the system software; it is downloaded later to
the SSD. You have the following options:
•
ASDM—First, download the boot image to your workstation, or place it on an FTP, TFTP, HTTP,
HTTPS, SMB, or SCP server. Then, in ASDM, choose
Tools > File Management
, and then choose
the appropriate
File Transfer
command, either
Between Local PC and Flash
or
Between Remote
Server and Flash
. Transfer the boot software to disk0 on the ASA.
•
ASA CLI—First, place the boot image on a TFTP, FTP, HTTP, or HTTPS server, then use the
copy
command to download it to flash. The following example uses TFTP; replace <TFTP Server> with
your server’s IP address or host name.
ciscoasa#
copy tftp://<TFTP SERVER>/asacx-5500x-boot-9.3.1.1-112.img
disk0:/asacx-5500x-boot-9.3.1.1-112.img
Step 2
Download the ASA CX system software from Cisco.com to an HTTP, HTTPS, or FTP server accessible
from the ASA CX management interface.
Step 3
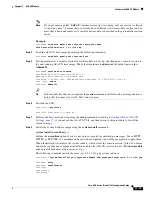
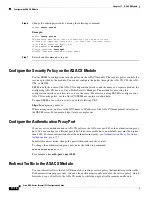
Set the ASA CX module boot image location in ASA disk0 by entering the following command:
hostname#
sw-module module cxsc recover configure image disk0:
file_path
Summary of Contents for ASA 5512-X
Page 5: ...P A R T 1 Service Policies and Access Control ...
Page 6: ......
Page 51: ...P A R T 2 Network Address Translation ...
Page 52: ......
Page 127: ...P A R T 3 Application Inspection ...
Page 128: ......
Page 255: ...P A R T 4 Connection Settings and Quality of Service ...
Page 256: ......
Page 303: ...P A R T 5 Advanced Network Protection ...
Page 304: ......
Page 339: ...P A R T 6 ASA Modules ...
Page 340: ......

