16-15
Cisco ASA Series Firewall CLI Configuration Guide
Chapter 16 ASA FirePOWER (SFR) Module
Configure the ASA FirePOWER Module
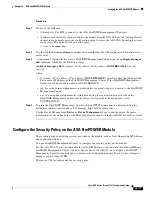
To change the management IP address through the ASA, do one of the following. In multiple context
mode, perform this procedure in the system execution space.
•
In the CLI, use the following command to set the ASA FirePOWER management IP address, mask,
and gateway. Use
1
for a hardware module,
sfr
for a software module.
session {1 | sfr} do setup host ip
ip_address
/
mask
,
gateway_ip
For example,
session 1 do setup host ip 10.1.1.2/24,10.1.1.1
.
•
In ASDM, choose
Wizards > Startup Wizard
, and progress through the wizard to the ASA
FirePOWER Basic Configuration, where you can set the IP address, mask, and default gateway.
Configure Basic ASA FirePOWER Settings at the ASA FirePOWER CLI
You must configure basic network settings and other parameters on the ASA FirePOWER module before
you can configure your security policy. This procedure assumes you have the full system software
installed (not just the boot image), either after you installed it directly, or because it is already installed
on a hardware module.
Tip
This procedure also assumes that you are performing an initial configuration. During initial
configuration, you are prompted for these settings. If you need to change these settings later, use the
various
configure network
commands to change the individual settings. For more information on the
configure network
commands, use the
?
command for help, and see the
FireSIGHT System User Guide
,
or the online help in FireSIGHT Management Center.
Procedure
Step 1
Do one of the following:
•
(All models.) Use SSH to connect to the ASA FirePOWER management IP address.
•
(Software modules only.) Open a session to the module from the ASA CLI (see the “Getting Started”
chapter in the general operations configuration guide to access the ASA CLI). In multiple context
mode, session from the system execution space.
hostname#
session sfr
Step 2
Log in with the username
admin
and the password
Sourcefire
.
Step 3
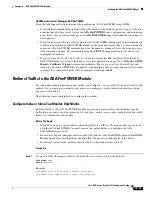
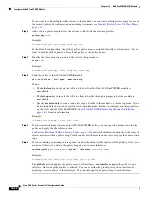
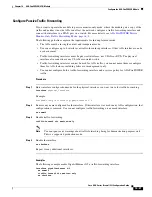
Complete the system configuration as prompted.
You must first read and accept the end user license agreement (EULA). Then change the admin
password, then configure the management address and DNS settings, as prompted. You can configure
both IPv4 and IPv6 management addresses. The configuration is complete when you see the message
that says the sensor must be managed by a FireSIGHT Management Center.
For example:
System initialization in progress. Please stand by.
You must change the password for 'admin' to continue.
Enter new password:
<new password>
Confirm new password:
<repeat password>
You must configure the network to continue.
You must configure at least one of IPv4 or IPv6.
Do you want to configure IPv4? (y/n) [y]:
y
Do you want to configure IPv6? (y/n) [n]:
Configure IPv4 via DHCP or manually? (dhcp/manual) [manual]:
Summary of Contents for ASA 5512-X
Page 5: ...P A R T 1 Service Policies and Access Control ...
Page 6: ......
Page 51: ...P A R T 2 Network Address Translation ...
Page 52: ......
Page 127: ...P A R T 3 Application Inspection ...
Page 128: ......
Page 255: ...P A R T 4 Connection Settings and Quality of Service ...
Page 256: ......
Page 303: ...P A R T 5 Advanced Network Protection ...
Page 304: ......
Page 339: ...P A R T 6 ASA Modules ...
Page 340: ......


