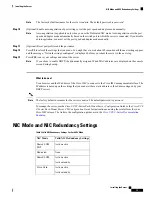
This server has the following NIC mode settings that you can choose from:
•
Shared LOM EXT
(default)—This is the shared LOM extended mode, the factory-default setting. With
this mode, the Shared LOM and Cisco Card interfaces are both enabled. You must select the default
Active-Active
NIC redundancy setting in the following step.
In this NIC mode, DHCP replies are returned to both the shared LOM ports and the Cisco card ports. If
the system determines that the Cisco card connection is not getting its IP address from a Cisco UCS
Manager system because the server is in standalone mode, further DHCP requests from the Cisco card
are disabled. Use the Cisco Card NIC mode if you want to connect to Cisco IMC through a Cisco card
in standalone mode.
•
Shared LOM
—The 1-Gb/10-Gb Ethernet ports are used to access Cisco IMC. You must select either the
Active-Active
or
Active-standby
NIC redundancy setting in the following step.
•
Dedicated
—The dedicated management port is used to access Cisco IMC. You must select the
None
NIC redundancy setting in the following step.
•
Cisco Card
—The ports on an installed Cisco UCS Virtual Interface Card (VIC) are used to access the
Cisco IMC. You must select either the
Active-Active
or
Active-standby
NIC redundancy setting in the
following step.
See also the required VIC Slot setting below.
This server has the following NIC redundancy settings that you can choose from:
•
None
—The Ethernet ports operate independently and do not fail over if there is a problem. This setting
can be used only with the Dedicated NIC mode.
•
Active-standby
—If an active Ethernet port fails, traffic fails over to a standby port. Shared LOM and
Cisco Card modes can each use either Active-standby or Active-active settings.
•
Active-active
(default)—All Ethernet ports are utilized simultaneously. The Shared LOM EXT mode
must use only this NIC redundancy setting. Shared LOM and Cisco Card modes can each use either
Active-standby or Active-active settings.
Accessing the System BIOS
Step 1
Enter the BIOS Setup Utility by pressing the
F2
key when prompted during bootup.
The version and build of the current BIOS are displayed on the Main page of the utility.
Note
Step 2
Use the arrow keys to select the BIOS menu page.
Step 3
Highlight the field to be modified by using the arrow keys.
Step 4
Press
Enter
to select the field that you want to change, and then modify the value in the field.
Step 5
Press the right arrow key until the Exit menu screen is displayed.
Step 6
Follow the instructions on the Exit menu screen to save your changes and exit the setup utility (or press
F10
). You can
exit without saving changes by pressing
Esc
.
Installing the Server
16
Installing the Server
Accessing the System BIOS


