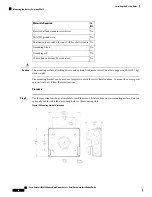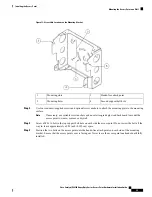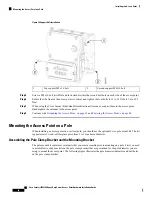
Figure 13: Support Bolt Installation
Second support M8x16 bolt
2
Top support M8 x16 bolt
1
Step 5
Screw a M8 x16 bolt (with flat and lock washers) into the second bolt hole on each side of the access point.
Step 6
Ensure that the front of the access point is vertical, and tighten the four bolts to 13 to 15 ft lbs (17.6 to 20.3
Nm).
Step 7
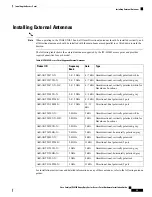
When using the Cisco Aironet Dual-Band Omnidirectional Antennas, connect them to the access point.
Hand-tighten the antennas to the access point.
Step 8
Continue with
Grounding the Access Point , on page 38
and
Powering the Access Point, on page 40
Mounting the Access Point on a Pole
When installing an access point on a vertical pole, you should use the optional Cisco pole mount kit. The kit
supports metal, wood, or fiberglass poles from 2 to 16 inches in diameter.
Assembling the Pole Clamp Bracket and the Mounting Bracket
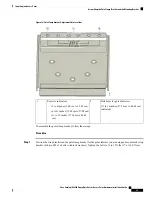
The pole mount kit contains several parts that you must assemble prior to mounting on a pole. First you need
to assemble two strap brackets on the pole clamp bracket that are positioned for the pole diameter you are
using to mount the access point. The following figure illustrates the pole diameter indicators and bolt holes
on the pole clamp bracket.
Cisco Catalyst IW6300 Heavy Duty Series Access Point Hardware Installation Guide
26
Installing the Access Point
Mounting the Access Point on a Pole


