Connecting an Ethernet Cable to the Access Point
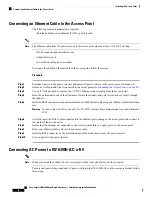
The following tools and materials are required:
• Shielded outdoor-rated Ethernet (CAT5e or better) cable
The Ethernet cable from the power injector to the access point must be at least 10 ft (3.05 m) long.
Note
• RJ-45 connector and installation tool
• Adjustable wrench
• Ex-certified cable gland or conduit
To connect the shielded Ethernet cable to the access point, follow these steps:
Procedure
Step 1
Disconnect power to the power injector, and ensure all power sources to the access point are turned off.
Step 2
Ensure a 6 AWG ground wire is connected to the access point (see
Grounding the Access Point , on page 38
Step 3
Use a 3/8” Allen wrench to remove the 1/2” NPT Ethernet connector plug from the access point.
Step 4
Insert the unterminated end of the Ethernet cable into the conduit, and pull several inches of cable through
the conduit.
Step 5
Install an RJ-45 connector on the unterminated end of the Ethernet cable using your Ethernet cable installation
tool.
To reduce the risk of fire, use only No. 26 AWG or larger telecommunication line cord. Statement
1023
Warning
Step 6
Carefully insert the RJ-45 cable connector into the Ethernet port opening on the access point, and connect to
the internal Ethernet connector.
Step 7
Ensure that the antennas are connected to the access point before you apply power to the access point.
Step 8
Route your Ethernet cable, and cut off any excess cable.
Step 9
Install an RJ-45 connector on the unterminated cable end, and insert it into the power injector.
Step 10
Turn on power to the power injector.
Connecting AC Power to IW-6300H-AC-x-K9
When you install the conduit, be sure to comply with the local electrical codes for your area.
Note
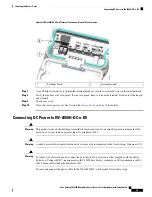
To route and connect the ground and AC power cabling to the IW-6300H-AC-x-K9 access point model, follow
these steps:
Cisco Catalyst IW6300 Heavy Duty Series Access Point Hardware Installation Guide
42
Installing the Access Point
Connecting an Ethernet Cable to the Access Point


