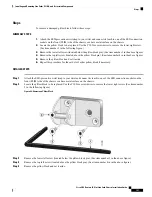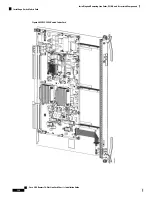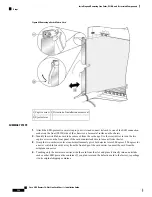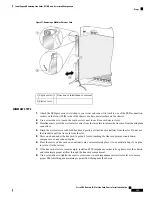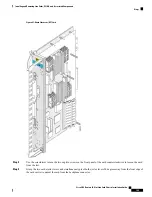
Figure 71: Removing a Modular Services Card
Direction of installation or removal
3
Captive screw
1
Ejector lever
2
SUMMARY STEPS
1.
Attach the ESD-preventive wrist strap to your wrist and connect its leash to one of the ESD connection
sockets on the front (PLIM) side of the chassis or a bare metal surface on the chassis.
2.
Use a screwdriver to loosen the captive screw next to each line card ejector lever.
3.
Simultaneously pivot the ejector levers away from the faceplate to release the line card from the midplane
connectors.
4.
Grasp the ejector levers with both hands and gently pull the line card halfway from the slot. Do not use
the bracket to pull the line card from the slot.
5.
Move one hand under the line card to guide it. Avoid touching the line card printed circuit board,
components, or any connector pins.
6.
Place the removed line card on an antistatic mat, or immediately place it in an antistatic bag if you plan
to return it to the factory.
7.
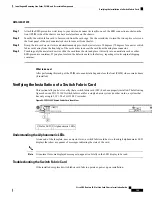
If the line card slot is to remain empty, install an MSC impedance carrier to keep dust out of the chassis
and to maintain proper airflow through the line card compartment.
8.
Use a screwdriver to tighten the captive screws next to each impedance carrier ejector lever to ensure
proper EMI shielding and maintain proper airflow throughout the chassis.
Cisco CRS Routers 16-Slot Line Card Chassis Installation Guide
135
Installing and Removing Line Cards, PLIMs, and Associated Components
Steps

