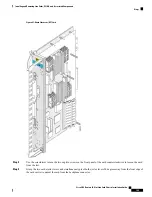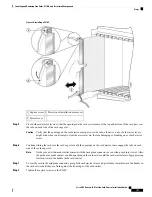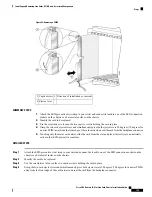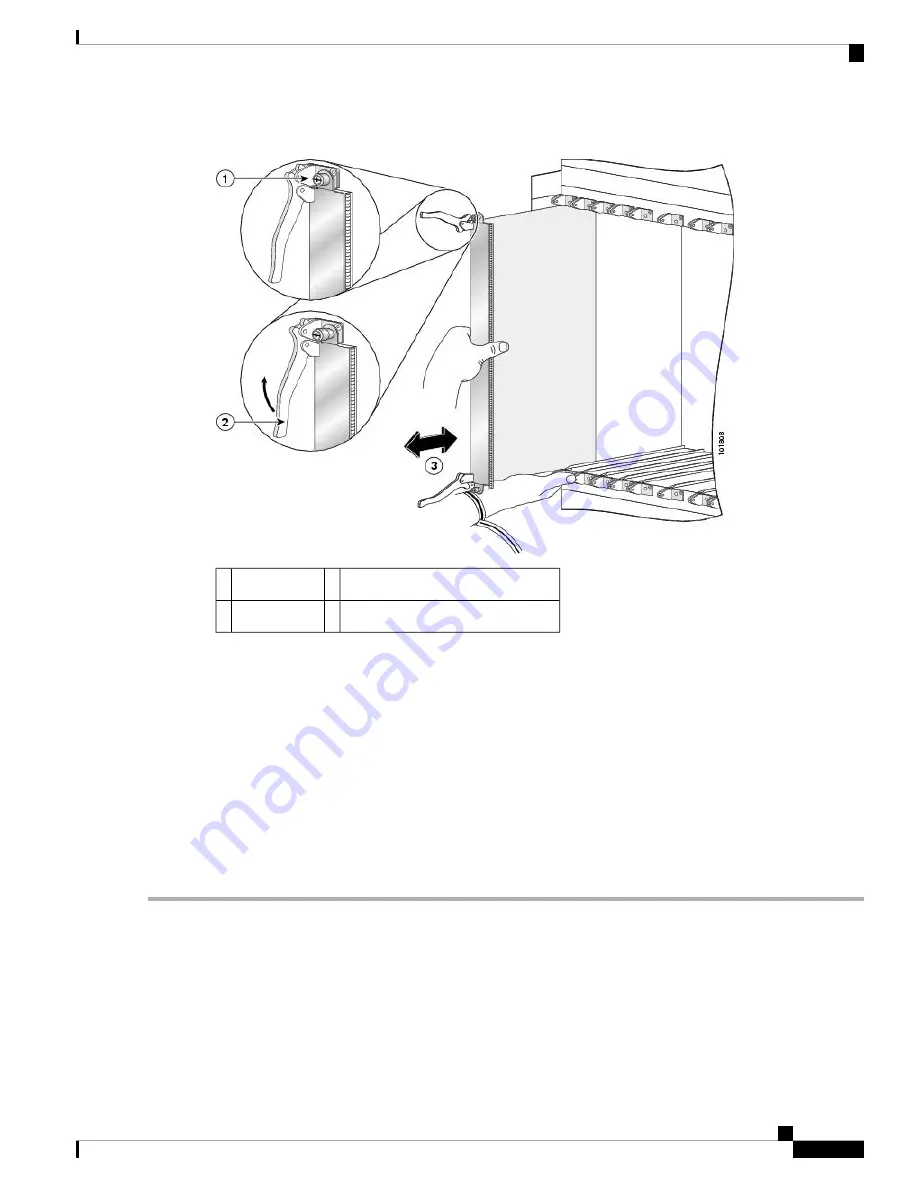
Figure 86: Removing a PLIM
Direction of installation or removal
3
Captive screw
1
Ejector lever
2
SUMMARY STEPS
1.
Attach the ESD-preventive wrist strap to your wrist and connect its leash to one of the ESD connection
sockets on the chassis or a bare metal surface on the chassis.
2.
Identify the card to be replaced.
3.
Use the screwdriver to loosen the two captive screws holding the card in place.
4.
Grasp the two card ejector levers and simultaneously pivot both ejector levers 90 degrees (70 degrees for
a newer PLIM) away from the front edge of the card carrier to unseat the card from the backplane connector.
5.
Touching only the metal card carrier, slide the card from the slot and place it directly into an antistatic
sack or other ESD-preventive container.
DETAILED STEPS
Step 1
Attach the ESD-preventive wrist strap to your wrist and connect its leash to one of the ESD connection sockets on the
chassis or a bare metal surface on the chassis.
Step 2
Identify the card to be replaced.
Step 3
Use the screwdriver to loosen the two captive screws holding the card in place.
Step 4
Grasp the two card ejector levers and simultaneously pivot both ejector levers 90 degrees (70 degrees for a newer PLIM)
away from the front edge of the card carrier to unseat the card from the backplane connector.
Cisco CRS Routers 16-Slot Line Card Chassis Installation Guide
159
Installing and Removing Line Cards, PLIMs, and Associated Components
Steps

