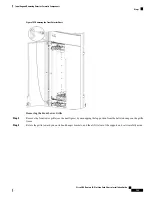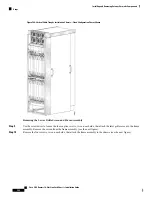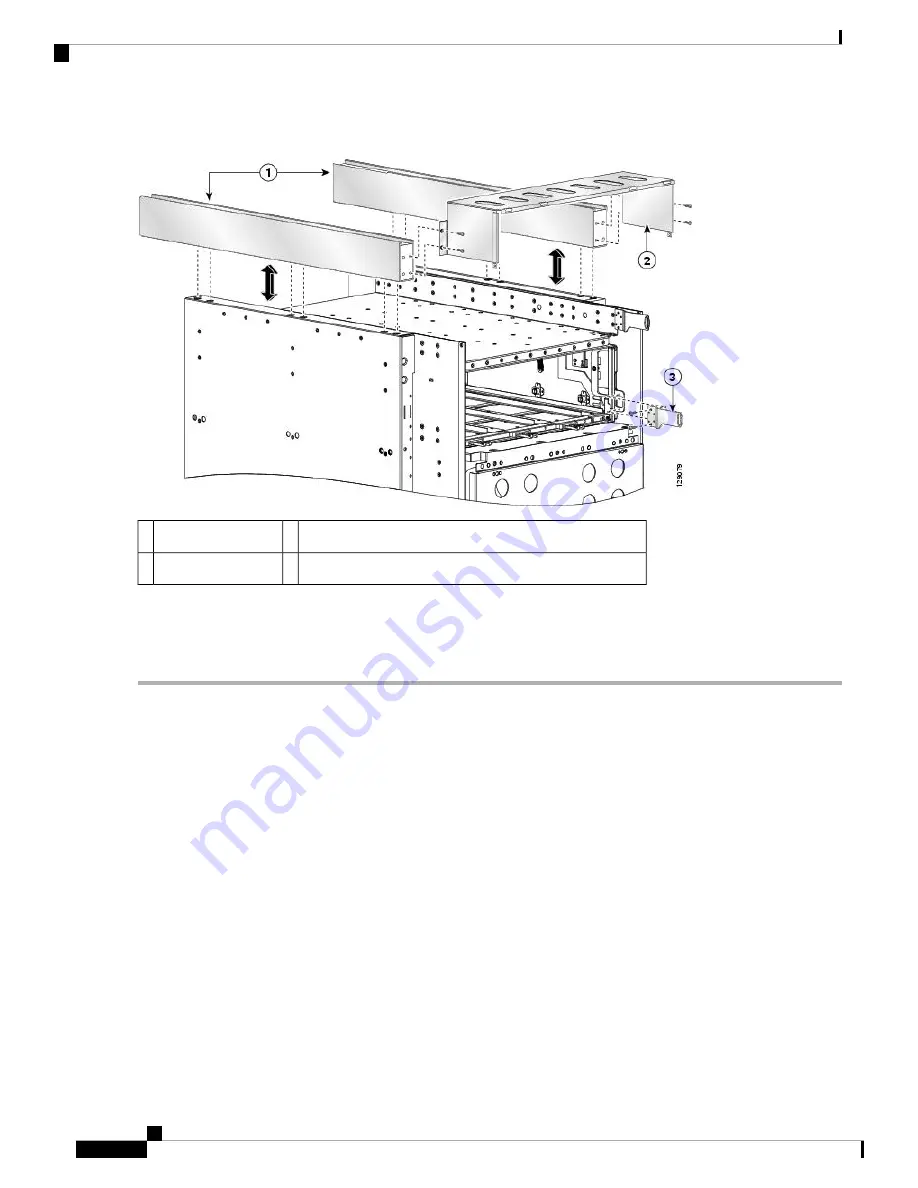
Figure 106: Removing the Unistrut, Grille Support, and Power Shutoff Extenders—Fixed Configuration Power Shown
Power shutoff extender (fixed configuration power only)
3
Unistrut
1
Upper grille support
2
Removing the Unistruts
Step 16
Use the 10-mm hex key wrench to remove the twelve M12 hex head bolts and washers, six on each unistrut, that attach
the unistrut to the top of the chassis (as in the previous figure).
What to do next
Be sure that all parts have been carefully set aside and repackaged as appropriate.
Installing the Default Rear (MSC) Side Cosmetic Components
This section describes how to install the default rear (MSC) side exterior cosmetic components on the LCC.
Figure 93: Rear (MSC) Side Exterior Cosmetic Components—Fixed Configuration Shown
shows the exterior
cosmetics on the rear (MSC) side of a LCC, with fixed configuration power shelves installed. The upper air
grille and vertical brackets are shipped with the LCC. The rear kick panel kit, is not included as part of the
default shipment and is available as an orderable option (Cisco product number CRS-16-LCC-BCK-KP). The
rear view of a LCC with modular configuration power shelves installed is similar.
This section contains the following procedures:
• Installing the Vertical Brackets and Upper Air Grille (Default)
• Installing the Rear Kick Panel (Optional)
Cisco CRS Routers 16-Slot Line Card Chassis Installation Guide
190
Installing and Removing Exterior Cosmetic Components
Installing the Default Rear (MSC) Side Cosmetic Components


