a) Check to see if the doors close without interfering with each other.
Typically, the doors will close without interfering with each other. However, you may need to adjust
either the left or right door, or both, to align the doors properly. Adjust doors only if necessary.
Note
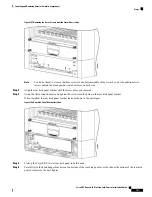
b) To decrease the door gap, loosen the five screws that secure the vertical trough to the chassis. Using the 2 mm hex
key wrench, tighten the bottom set screws one full turn. Snug the five screws that attach the vertical trough to the
chassis and check the door alignment.
c) To increase the door gap, loosen the five screws that secure the vertical trough to the chassis. Using the 2 mm hex
key wrench, tighten the top set screws one full turn. Snug the five screws that attach the vertical trough to the chassis
and check the door alignment.
d) Repeat the procedure as necessary until the doors are properly aligned.
e) Tighten the five screws that secure the vertical trough to the chassis.
Removing the Front (PLIM) Side Cosmetic Components
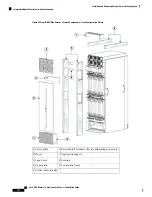
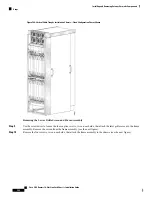
This section describes how to remove exterior cosmetic components, shown in
Exterior Cosmetic Components—Fixed Configuration Shown
, from the front (PLIM) side of the chassis. This
section includes all the steps you need to remove all the cosmetic parts from the chassis, but you are not
required to do so. To remove a particular part, see the appropriate step or steps in the procedure that follows.
While it is possible to remove most of the cosmetic parts on the LCC separately, some parts (such as a unistrut)
require that other parts be removed first.
Note
This section describes how to perform the following tasks:
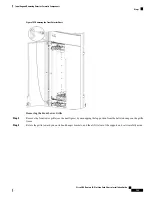
• Removing the Front Doors
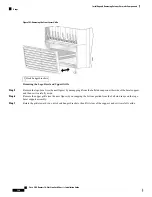
• Removing the Front Lower Grille
• Removing the Logo Bezel and Upper Grille
• Removing the Front Vertical Cable Troughs
• Removing the Lower Grille Screen and Frame Assembly
• Removing the Front Upper Grille Support
• Removing the Unistruts
Prerequisites
No prerequisites exist for this task.
Required Tools and Equipment
You need the following tools to perform this task:
Cisco CRS Routers 16-Slot Line Card Chassis Installation Guide
183
Installing and Removing Exterior Cosmetic Components
Removing the Front (PLIM) Side Cosmetic Components

