• Three Phillips M3 x 6-mm screws (part number 48-0460-01)
• Two Phillips #6 x 1¼-inch screws (part number 48-2289-01)
• One #8 wall anchor kit with screws (part number 51-4718-01)
Follow these steps to mount your chassis on a wall.
Step 1
Choose an orientation (left-, right-, or rear panel-side up) and a location on the wall for the chassis.
Step 2
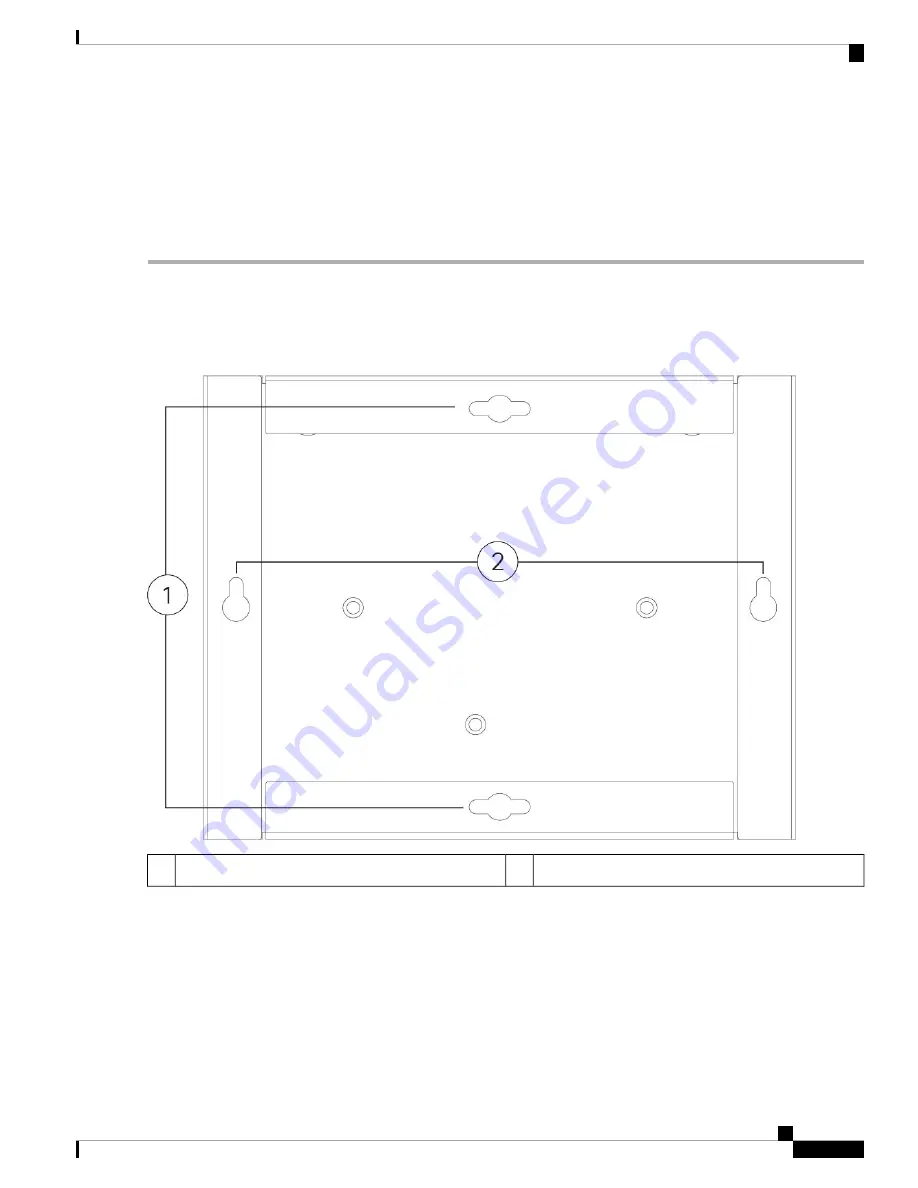
Use a pencil, ruler, and level to mark locations for the two mounting screws (#6 x 1¼ inch). You can use the wall-mount
bracket itself to mark either the top holes or the side holes.
Figure 26: Wall-Mount Bracket
Vertical mounting
2
Horizontal mounting
1
Step 3
Attach the wall-mount bracket to the chassis using the three Phillips M3 x 6-mm screws.
Cisco Firepower 1010 Hardware Installation Guide
29
Mount the Chassis
Wall-Mount the Chassis


