


Installing a Cisco 12012 3-11
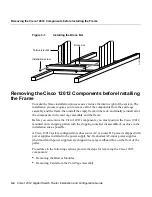
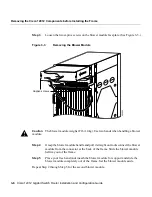
Removing the Cisco 12012 Components before Installing the Frame
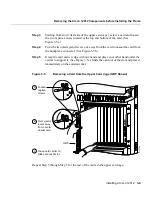
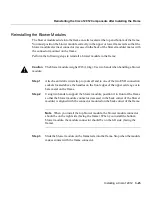
Figure 3-6
Opening the Air Filter Tray
Caution
To prevent damage, do not place any tools on the air filter tray or inside the lower
card cage. Damaging the honeycomb screen on the air filter tray or in the lower card cage
could restrict the air flow causing an overtemperature condition in the Cisco 12012.
GIGABIT R
O
UTE PR
OCESSOR
Q OC-3/STM-POS
OC-12/STM-4 A
T
M
OC-12/STM-4 POS
ALARM
CS
C
0
FA
IL
1
0
1
2
EN
AB
LE
D
SF
C
H10472
Air filter
tray
Air filter
Captive
screw
Captive
screw
Air deflector
Honeycomb
screen
Summary of Contents for Gigabit Switch Router Cisco 12012
Page 4: ......
Page 12: ...xii Cisco 12012 Gigabit Switch Router Installation and Configuration Guide ...
Page 16: ...xvi Cisco 12012 Gigabit Switch Router Installation and Configuration Guide ...
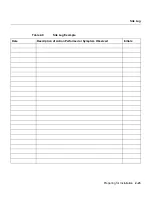
Page 96: ...2 26 Cisco 12012 Gigabit Switch Router Installation and Configuration Guide Site Log ...
Page 310: ...14 Cisco 12012 Gigabit Switch Router Installation and Configuration Guide ...


