1.
Compare the shipment to the equipment list provided by your customer service representative and verify
that you have received all items, including the following:
• Grounding lug kit
• Rack-mount kit
• ESD wrist strap
• Cables and connectors
• Any optional items ordered
2.
Check for damage and report any discrepancies or damage to your customer service representative. Have
the following information ready:
• Invoice number of shipper (see packing slip)
• Model and serial number of the damaged unit
• Description of damage
• Effect of damage on the installation
3.
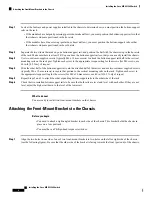
Check to be sure that all of the power supplies and the fan trays have the expected direction of airflow.
Port-side-intake airflow modules have a burgundy coloring, and port-side exhaust airflow modules have
blue coloring. The airflow direction must be the same for all modules.
Installing the Switch
This section describes how to use the rack-mount kit to install the Cisco MDS 9396S switch into a cabinet or
rack that meets the requirements described in the
section.
Attaching the Bottom-Support Rails on the Rack
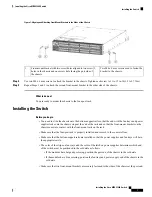
The switch chassis that you are installing ships with two adjustable bottom-support rails that you can attach
to a four-post rack to hold the chassis. Each of these bottom-support rails has two pieces—one that slides into
the other so that you can adjust them to fit racks with front and rear mounting posts that are spaced less than
36 inches (91 cm). On each bottom-support rail, the rail half that slides into the other rail includes a chassis
stop that fits into the module end of the chassis. With the air intake on the port side of the chassis, you must
position the bottom-support rail piece with the chassis stop on the hot aisle side of the rack.
Before you begin
• Verify that a four-post rack or cabinet is installed.
• If any other devices are stored in the rack or cabinet, verify that the heavier devices are installed below
lighter devices and that there is at least 2 RU open to install the switch.
• Verify that the bottom-support rails kit is included in the switch accessory kit.
• Verify that you have 8 screws for attaching the bottom-support rails to the racks (typicallyM6 x 10 mm
screws or the screws appropriate for the vertical mounting rails on the rack.
Installing the Cisco MDS 9396S Switch
5
Installing the Cisco MDS 9396S Switch
Installing the Switch


