c)
Install Two Post Slider into an ETSI Rack
d)
Install Four Post Slider into an ETSI rack
Step 3
Insert the chassis (with brackets) onto the sliders assembled on the rack.
Step 4
After the chassis is completely inserted, fasten the chassis with four screws (48-101524-01) on each side of the bracket,
and using a number-2 Phillps screwdriver, tighten them to a torque value of 4.65 N-m.
See
Install Air Filter, on page 52
for the air filter installation procedure, before you fasten the chassis to the rack.
Install Two Post Slider into an EIA/ANSI Rack
This procedure has details about installing the two post slider into an EIA/ ANSI rack.
Step 1
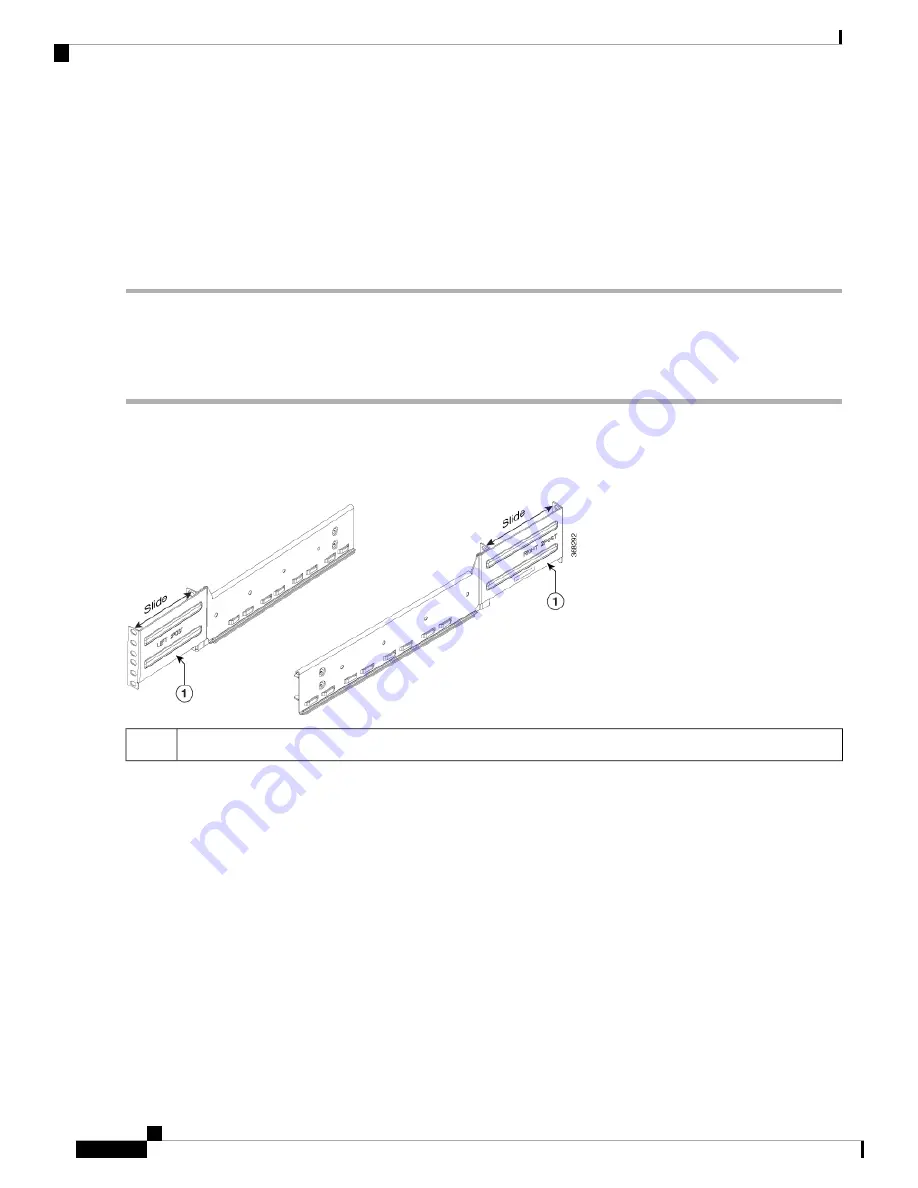
Identify the two post slider and adjust the length of the slider (3" to 5").
Slide the inner sliders and adjust the length to mate with the rack surface.
Figure 23: Two Post Slider Identification
Check for marking on the sliders; the right and the left sliders are indicated.
1
Step 2
Integrate the two post slider with the rack. The procedure for 23" and 19" rack is discussed here:
• 19" rack - the slider can be directly fitted on to a 19" rack. On the front side, insert only the top most screw of the
slider (48-101524-01) and tighten it to a torque value of 4.65 N-m. On the rear side, insert three screws (48-101524-01)
and tighten to a torque value of 4.65 N-m.
• 23" rack - the slider is fitted on to a 23" rack using an adapter (refer the following image). The formed surface must
always face the inner side of the rack post. On the front side of the adapter (towards the chassis), insert only the top
most screw of the slider (48-101524-01) and tighten it to a torque value of 4.65 N-m. On the rear side (towards the
chassis), insert three screws (48-101524-01) and tighten them to a torque value of 4.65 N-m. For the adapter portion
which is towards the rack, all the six screws are fitted on the front and rear side.
Hardware Installation Guide for Cisco NCS 1004
24
Install Cisco NCS 1004
Install Two Post Slider into an EIA/ANSI Rack


