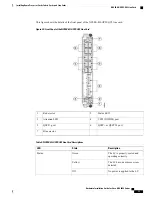
External USB port
11
Disc LED
4
Console ports
12
Critical LED
5
RJ-45 10/100/1000 copper full-duplex ports
(with status LEDs)
13
Major LED
6
SFP+ 10GE ports (with status LEDs)
14
Minor LED
7
Only the active RP console port sends and receives messages.
Note
Troubleshooting the RP Card
Use the Status LED, located on the faceplate of the RP card, to verify the correct installation of the card:
•
When the card is properly installed and no faults are detected, the card status LED turns green.
•
When the card status LED is solid yellow, either software initialization is in progress during bootup or
a fault exists on the board.
•
When the card status LED is blinking yellow, the card is not fully seated.
•
When the card status LED is off, verify that the card is installed correctly. There could be no power
applied to the card, a power fault, or a hardware fault.
•
Verify that there is power to the card by looking at the indicators on the power tray.
To confirm the location of the card that needs attention, the Attention LED can be lit by using the hw-module
attention-led location CLI command.
Note
If the installed or replaced card fails to operate or to power on after installation:
•
Ensure that the card is seated firmly in the Cisco NCS 4016 chassis slot. One easy way to verify physical
installation is to see whether the front faceplate of the card is even with the fronts of the other cards
installed in the card cage.
•
Ensure that the ejector levers are latched and that the captive screws are fastened properly. If you are
uncertain, unlatch the levers, loosen the screws, and attempt to reseat the card.
•
Examine the power system to see whether the chassis is receiving power.
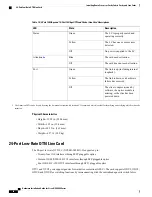
In addition to the Status and Attention LEDs, the following table describes the other LEDs on the RP card.
Hardware Installation Guide for Cisco NCS 4000 Series
61
Installing Route Processor Cards, Fabric Cards, and Line Cards
Verifying and Troubleshooting the Installation of an RP Card


