Steps
To replace an AC or DC power tray, follow these steps:
Step 1
Remove the power tray that you are replacing.
a) Remove the power modules from the power tray (
Figure 62: Removing a PM from a Power Tray
).
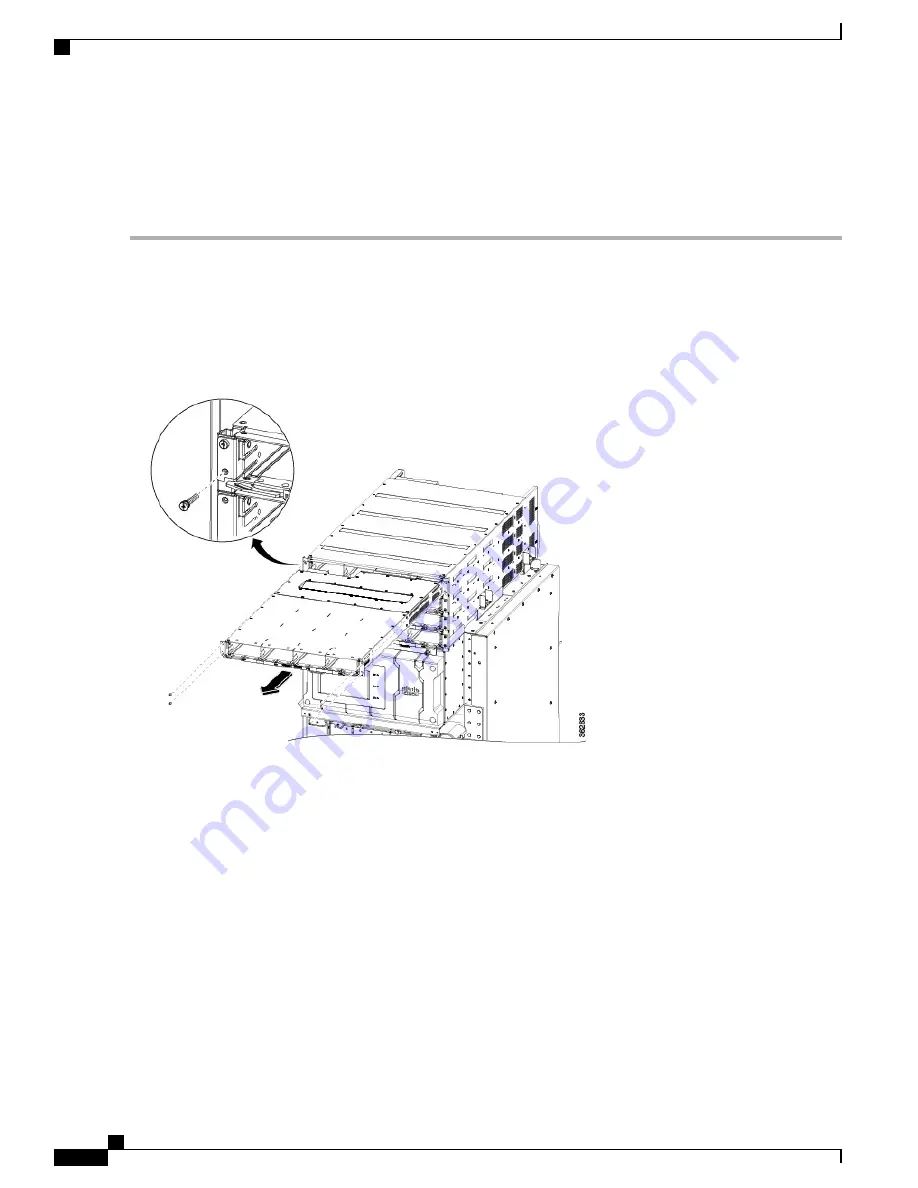
b) Loosen and remove the four M4 x 10 mm screws that attach the power tray to the power enclosure (
Removing a Power Tray from the Power Enclosure
Figure 60: Removing a Power Tray from the Power Enclosure
c) Pull both the left and right ejector handles out at the same time to eject the power tray from the FCC. Slide the power
tray all the way out of the power enclosure.
Do not use the ejector handles for lifting or supporting the power tray, because this could severely damage
the handles.
Caution
Step 2
Install the replacement power tray.
a) Using two people, one to support the power tray underneath and the other to keep it steady, lift the power tray up
and slide it partially into a power tray slot on the front side of the FCC.
b) Grasping both handles simultaneously, push both the left and right handles in at the same time to push the tray into
the FCC. Slide the tray all the way into the FCC, until both power tray handles hook around the pins.
Use care not to bend the
handles.
Caution
c) Use the screwdriver to tighten the four M4 x 10 mm screws that attach the power tray to the FCC.
d) Use the torque screwdriver to tighten the four screws to a torque value of 15 in-lb (1.69 N-m) to 20 in-lb (2.26 N-m).
Cisco Network Convergence System 6000 Fabric Card Chassis Hardware Installation Guide
100
Removing and Replacing Chassis Components
Replacing an AC or DC Power Tray


