S e n d d o c u m e n t c o m m e n t s t o n e x u s 7 k - d o c f e e d b a c k @ c i s c o . c o m
9-66
Cisco Nexus 7000 Series Hardware Installation and Reference Guide
OL-23069-06
Chapter 9 Replacement Procedures
Replacing the Front Door and Air Intake Assemblies on the Cisco Nexus 7018 Chassis
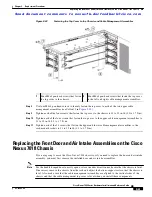
Figure 9-37
Removing the Bottom Hinge Bracket
j.
Remove the bracket from the chassis and place it in the opened box for that component.
k.
Fold the box flaps over the bracket and tape them in place.
l.
Loosen and remove the two M3 x 10 screws that hold the right door stopper to the right cable
management frame. Place the two screws and the door stopper in the small parts bag.
m.
Loosen and remove the two M3 x 10 screws that hold the left door stopper to the left cable
management frame. Place the two screws and the door stopper in the small parts bag.
n.
Fold the box flaps over the top and tape them in place.
o.
While holding the air intake frame in place, loosen the two captive screws on the air intake frame
(there is one captive screw on each side of that frame) so that they are no longer in contact with the
chassis (see Callout 1 in
).
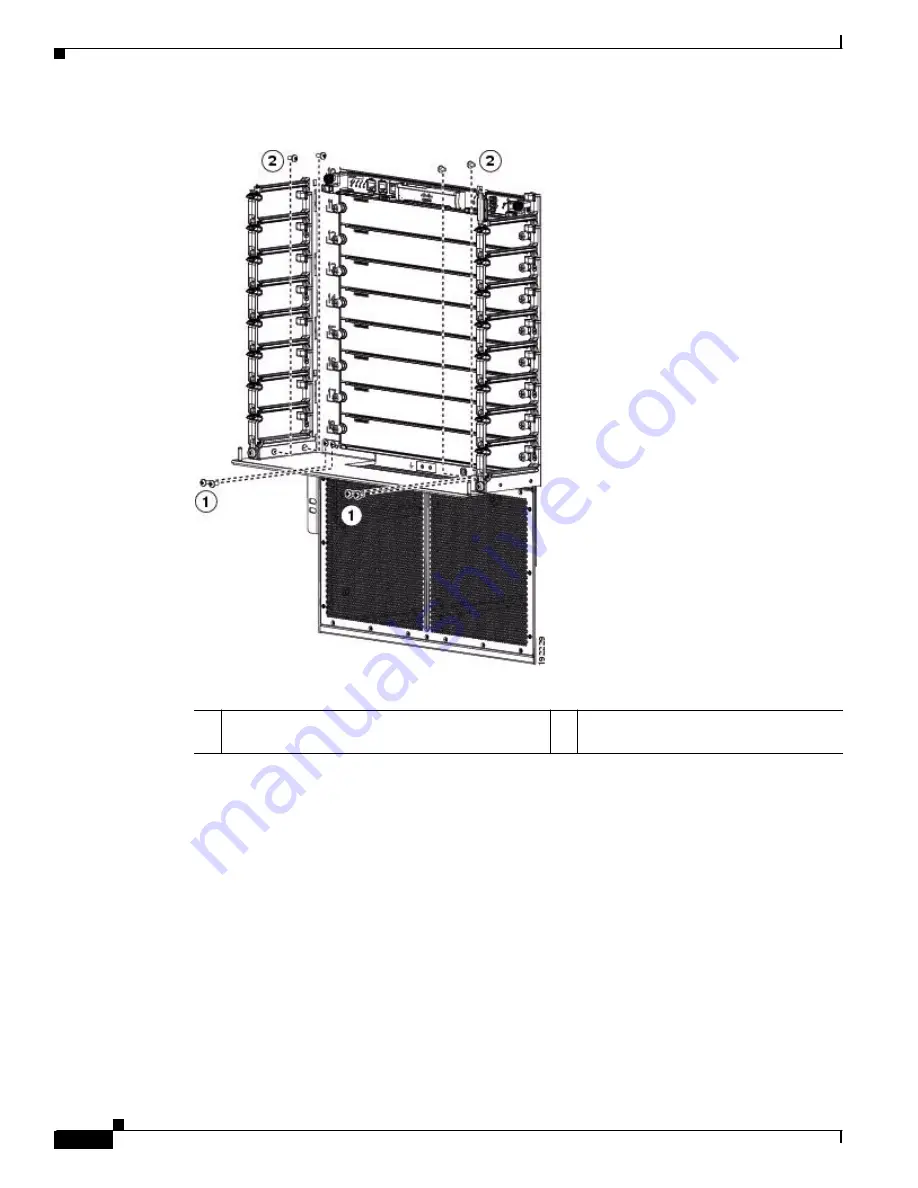
1
Remove four M4 x 8 screws from the cable
management assemblies (two screws on each side)
2
Remove four M4 x 8 screws from the
chassis.


