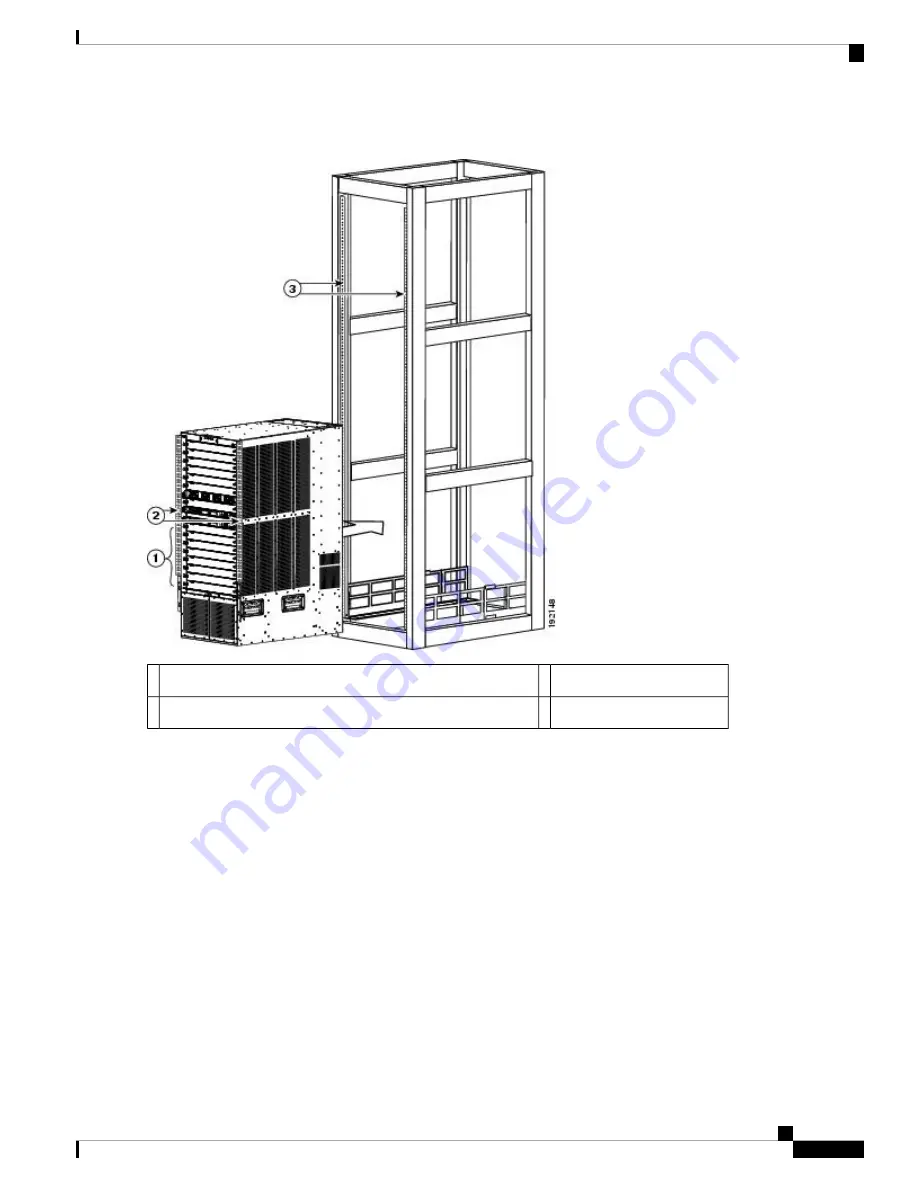
Figure 3: Moving a Cisco Nexus 7018 Chassis onto a Rack
Rack vertical mounting rails.
3
Push the sides of the lower half of the front side of the chassis.
1
Chassis mounting brackets.
2
Step 5
Lower the lift until it is no more than 0.25 inches below the bottom support rails. This action ensures that the chassis is
not pointing downwards in a way that might get it caught on the expansion edge of the bottom support rails.
Step 6
With the chassis flat on the bottom support rails, use two persons to push evenly on each side of the chassis until it is
fully loaded onto the rack (the two mounting brackets on the front of the chassis come into contact with the two vertical
mounting rails on the front of the rack). Use a third person to guide the chassis so that the rear of the chassis (the side
being pushed into the rack) does not get caught on any edges of the bottom support rails.
Step 7
Make sure that the screw holes in the chassis mounting brackets align with the screw holes in the vertical mounting rails.
If you need to reposition the chassis to align the screw holes, you can use the handles on the sides of the chassis.
To adjust the placement of the chassis so that the screw holes in the chassis mounting brackets align with the
screw holes in the vertical mounting rails, use the chassis handles shown in
Figure 4: Attaching the Cisco Nexus
7018 Chassis to the Rack, on page 12
.
Tip
Step 8
Use a Phillips torque screwdriver to screw in nine M6 x 19-mm or 12-24 x 3/4-inch screws in each of the two chassis
mounting brackets (use a total of 18 screws for two mounting brackets) as shown in
Figure 4: Attaching the Cisco Nexus
7018 Chassis to the Rack, on page 12
. Tighten each screw to a maximum of 40 in-lb [4.5 N·m] of torque.
Installing a Cisco Nexus 7018 Chassis
11
Installing a Cisco Nexus 7018 Chassis
Installing the Chassis