


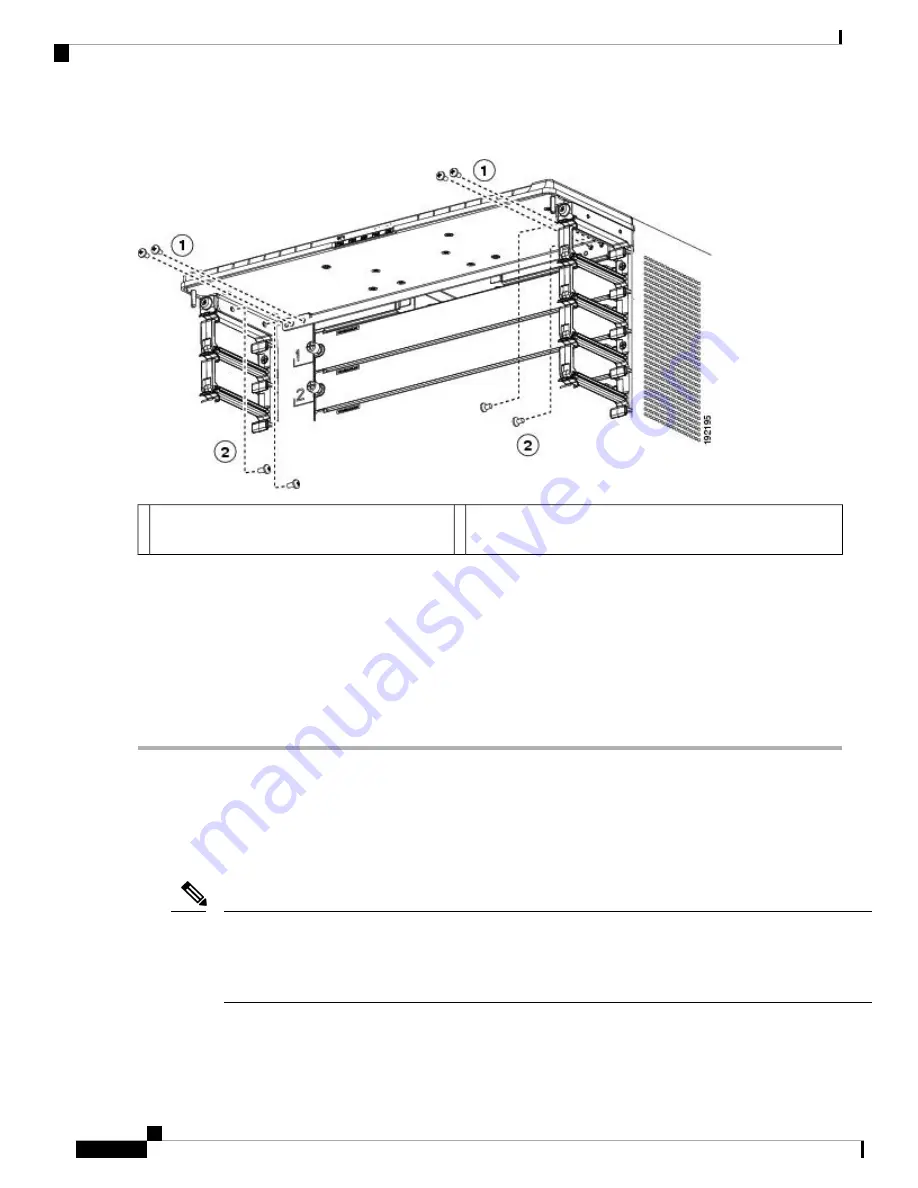
Figure 12: Fastening the Top Hood to the Chassis and Cable Management Assemblies
Four M4x8 pan-head screws that fasten the top hood to the left
and right cable management assemblies.
2
Four M4x8 pan-head screws that fasten the top
hood to the chassis.
1
Step 7
Use four M4x8 pan-head screws to loosely fasten the top hood to each of the two upper cable management assemblies
as shown in
Step 8
Tighten each of the four screws that fasten the top hood to the chassis to 11 to 15 in-lb (1.2 to 1.7 N·m).
Step 9
Tighten each of the four screws that fasten the top hood to the cable management assemblies to 11 to 15 in-lb (1.2 to
1.7 N·m).
Step 10
Tighten each of the 18 screws that fasten the upper and lower cable management assemblies to the rack-mount brackets
to 11 to 15 in-lb (1.2 to 1.7 N·m).
Installing the Front Door and Air Intake Frame
If you need to install the optional double-hinged door and air intake frame, you must install them after installing
the cable management frame on the chassis.
For the double-hinged door to easily open or close in either direction, make sure that the chassis is level. If
necessary, remove the chassis from the rack and adjust the bottom-support rails so that the chassis is level.
Also, make sure that the cable management frame is aligned to the vertical sides of the chassis and that the
cable management hood is level when you install those components.
Note
To install the front door and air intake frame to the Cisco Nexus 7018 cable management system, follow these
steps:
Installing a Cisco Nexus 7018 Chassis
22
Installing a Cisco Nexus 7018 Chassis
Installing the Front Door and Air Intake Frame


