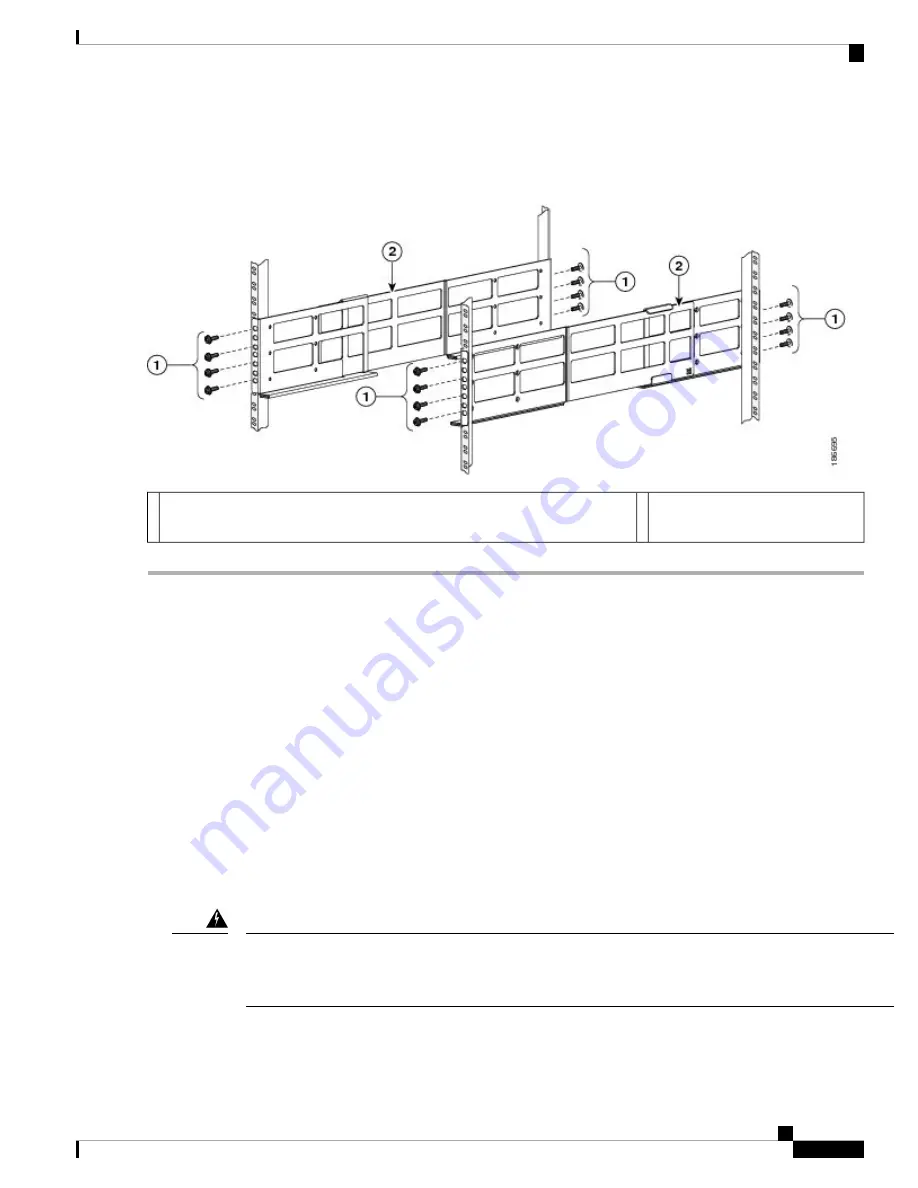
At least three of the screw holes on each end of the bottom-support rail align to the mounting rail. Use at least
three screws (four if possible) on each end of each bottom support rail.
Note
Figure 2: Attaching a Bottom-Support Rail to a Rack
Adjustable bottom-support rails (2)
2
Four sets of four M6 x 19 mm Phillips screws or four sets of four 12-24 x 3/4
in. Phillips screws (tightened to a maximum of 40 in-lb [4.5 N·m])
1
Installing the Chassis
This section describes how to install the chassis (transporting and elevating the chassis to the rack using a
mechanical lift, pushing it onto the rack, and then securing it to the rack).
This section includes the following topics:
Prerequisites for Installing the Chassis
Before you install the chassis, you must make sure that the following items are available for the installation:
• Data center ground is accessible where you are installing the Cisco Nexus 7018 chassis.
• Four-post, 19-inch EIA rack or cabinet that includes such a rack.
For more information on the rack or cabinet, see the
Installing a Four-Post Rack or Cabinet, on page 2
Stability hazard. The rack stabilizing mechanism must be in place, or the rack must be bolted to the floor
before you slide the unit out for servicing. Failure to stabilize the rack can cause the rack to tip over. Statement
1048
Warning
• Bottom-support rails installed in the rack or cabinet—You must already have two bottom-support rails
attached to the lowest possible rack unit on the chassis.
Installing a Cisco Nexus 7018 Chassis
7
Installing a Cisco Nexus 7018 Chassis
Installing the Chassis


