Install a Rack
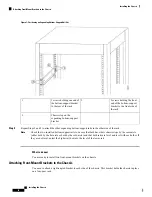
Before you install the switch, you must install a standard two- or four-post, 19-inch EIA data center rack (or
a cabinet that contains such a rack) that meets the requirements listed in
.
Step 1
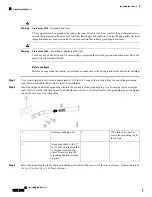
Bolt the rack to the concrete subfloor before moving the chassis onto it.
Statement 1048—
Rack Stabilization
The rack stabilizing mechanism must be in place, or the rack must be bolted to the floor before installation or
servicing. Failure to stabilize the rack can cause bodily injury.
Warning
Step 2
If the rack has bonded construction, connect it to the earth ground. This action enables you to easily ground the switch
and its components and to ground your electrostatic discharge (ESD) wrist strap to prevent damaging discharges when
you handle ungrounded components before installing them.
Step 3
Include one or two power sources at the rack. For AC power, provide a power receptacle. For DC power, provide a circuit
breaker with terminals for connecting power cables.
Statement 1018—
Supply Circuit
To reduce risk of electric shock and fire, take care when connecting units to the supply circuit so that wiring
is not overloaded.
Warning
If you are not using power redundancy or are using
n
+1 redundancy, you need only one power source. If you
are using
n
+
n
redundancy, you need two power sources.
Note
Unpacking and Inspecting a New Switch
Before you install a new chassis, you need to unpack and inspect it to be sure that you have all the items that
you ordered and verify that the switch was not damaged during shipment. If anything is damaged or missing,
contact your customer representative immediately.
When you handle the chassis or its components, you must follow ESD protocol at all times to prevent ESD
damage. This protocol includes but is not limited to wearing an ESD wrist strap that you connect to the earth
ground.
Caution
Do not discard the shipping container when you unpack the switch. Flatten the shipping cartons and store
them. If you need to move or ship the system in the future, you will need this container.
Tip
Step 1
Compare the shipment to the equipment list that is provided by your customer service representative and verify that you
have received all of the ordered items.
Installing the Chassis
2
Installing the Chassis
Install a Rack

