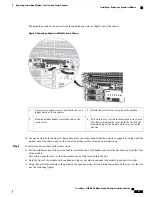
The module unseats its connectors from the midplane and moves slightly out of the chassis.
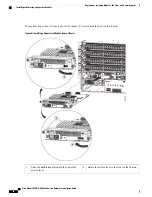
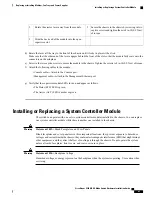
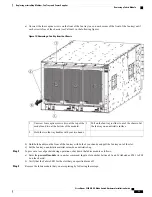
Figure 8: Removing a Supervisor Module from a Chassis
Rotate the ejector lever away from the module.
3
Unscrew two captive screws until each one is no
longer attached to the chassis.
1
Pull on the lever to slide the module part way out of
the chassis. Release the lever, hold the front of the
module and pull the module all the way out of the
chassis.
4
Slide the middle handle toward the end of the
ejector lever.
2
d) Use one hand to hold the front of the module, place your other hand under the module to support its weight, pull the
module out of the chassis, and set the it on an antistatic surface or inside an antistatic bag.
Step 4
To install the new module, follow these steps:
a) Pull the middle section of the ejector handle toward the end of the handle and rotate the handle away from the front
of the module.
This action opens the lever so that the module can be fully inserted into the slot.
b) Hold the front of the module with one hand and place your other hand under the module to support its weight.
c) Align the back of the module to the guides in the open supervisor slot and slide the module all the way into the slot
(see the following figure).
Cisco Nexus 9504 NX-OS Mode Switch Hardware Installation Guide
61
Replacing or Installing Modules, Fan Trays, and Power Supplies
Installing or Replacing a Supervisor Module

