4-9
Cisco Service Control Engine 1000 2xGBE Quick Start Guide
OL-7822-06
Chapter 4 Connect the Management Interfaces and Perform Initial System Configuration
Perform the Initial System Configuration
You must enter the time setting menu to configure SNTP settings. You may choose to skip the time
settings menu if you wish to accept all default values.
Note
Unlike all other settings defined in the system configuration, setting the time is done immediately and
not at the end of the setup process.
SUMMARY STEPS
1.
Enter the time settings menu.
2.
Configure the time zone name.
3.
Specify the offset from UTC.
4.
Confirm the local time and date.
5.
Enter the SNTP configuration menu.
6.
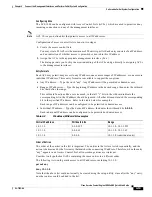
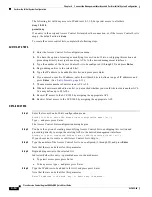
Configure the SNTP broadcast client. By default the SNTP broadcast client is not enabled.
7.
Define the time interval between unicast updates.
8.
Specify an IP address for the SNTP unicast server.
DETAILED STEPS
Step 1
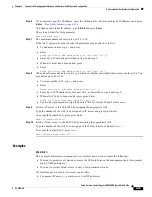
Enter the time settings menu.
Would you like to enter the Time settings menu? [no]: y
Type
y
and press press Enter.
Step 2
Configure the time zone name.
Type the time zone abbreviation and press press Enter.
Enter time zone name [UTC]: CET
Step 3
Specify the offset from UTC.
Type the minutes offset from UTC and press press Enter.
Enter time zone minutes offset from UTC: 60
Step 4
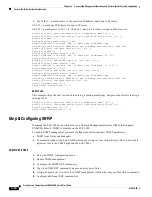
Confirm the local time and date.
The local time and date are displayed, and you are asked whether you want to change them
The local time and date is 15:00:01 CET FRI 01 July 2002
Would you like to set a new time and date? [no]:
•
If the time and date are correct, press
•
Enter
•
and go to Step 5.
•
If the time and date are not correct, answer yes to the above question, and press press Enter.
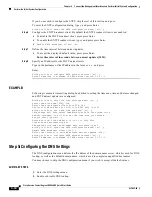
Would you like to set a new time and date? [no]: y
Confirm your response and type the new time and date.
This change will take effect immediately both on the system clock and calendar;
it will also set the time zone you entered. Are you sure? [yes/no]: y
Enter new local time and date: 14:00:01 1 July 2002
Time zone was successfully set.
The system clock and the calendar were successfully set.
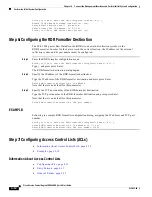
Step 5
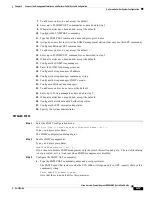
Enter the SNTP configuration menu.


