4-7
Cisco ONS 15454 DWDM Installation and Operations Guide, R6.0
September 2005
Chapter 4 Perform Node Acceptance Tests
NTP-G42 Perform the Terminal Node with 32WSS and 32DMX Cards Acceptance Test
Step 16
For Channel #1, change Operating Mode to
Add Drop
.
Step 17
Click
Apply
, then click
Yes
.
Step 18
Click the
Provisioning
>
Optical Chn
>
Parameters
tabs.
Step 19
Verify that the actual power coming from the tunable laser or TXP_MR_2.5G card shown under the
Power column is equal to the specified VOA Power Ref power shown in the same row.
Step 20
Click the
Optical Line
tab.
Step 21
Verify that the TX COM port (#67) has the same power as the VOA Power Ref setpoint in Step
. This
verifies that the optical signal is traveling correctly through the WSS card.
Step 22
Verify that the Port 1 power level reaches the provisioned VOA Power Ref setpoint.
Step 23
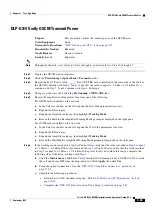
If an OPT-BST card is installed, complete the
“DLP-G79 Verify the OPT-BST Amplifier Laser and
on the OPT-BST to ensure that the amplifier is working properly.
Step 24
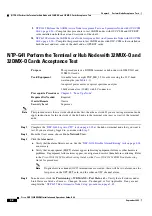
Complete the
“DLP-G80 Verify the OPT-PRE Amplifier Laser and Power” task on page 4-41
on the
OPT-PRE to ensure that the amplifier is working properly.
Step 25
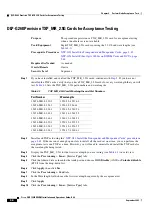
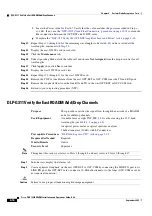
Complete the
“DLP-G269 Verify the 32DMX-O Power” task on page 4-42
or
32DMX Power” task on page 4-42
to verify that the 32DMX-O or 32DMX card is powered correctly.
Step 26
Display the 32WSS in card view.
Step 27
Click the
Maintenance
tab.
Step 28
For the circuit (channel) under test, click the
Operating Mode
table cell and choose
Not Assigned
from
the drop-down list.
Step 29
Click
Apply
, then
Yes
.
Step 30
Click the
Provisioning
>
Optical Chn: Optical Connector
tabs.
Step 31
Click the
Admin State
table cell. Choose
IS,AINS
(ANSI) or
Unlocked,AutomaticInService
(ETSI)
from the drop-down list for all ports that were changed to OOS,MT or Locked,Maintenance.
Step 32
Repeat Steps
through
for the remaining 31 wavelengths of the 100-Ghz grid to verify the correct
behavior of all VOAs inside the 32WSS card.
Step 33
Restore the default administrative states to the OPT-BST, OPT-PRE, and 32DMX ports that were
changed to
OOS,MT
(ANSI) or
Locked,maintenance
(ETSI) in Step
. Remove the loopback created
in
.
Step 34
Complete the
“NTP-G37 Run Automatic Node Setup” procedure on page 3-83
to restore the original
configuration.
Step 35
Click the
Alarms
tab.
a.
Verify that the alarm filter is not on. See the
“DLP-G128 Disable Alarm Filtering” task on page 8-28
as necessary.
b.
Verify that no equipment (EQPT) alarms appear indicating equipment failure or other hardware
problems. If equipment failure alarms appear, investigate and resolve them before continuing. Refer
to the
Cisco ONS 15454 Troubleshooting Guide
or the
Cisco ONS 15454 SDH Troubleshooting
Guide
for procedures.
Stop
.
You have completed this procedure
.
Summary of Contents for ONS 15454 DWDM
Page 38: ...Figures xxxviii Cisco ONS 15454 DWDM Installation and Operations Guide R6 0 August 2005 ...
Page 54: ...Procedures liv Cisco ONS 15454 DWDM Installation and Operations Guide R6 0 August 2005 ...
Page 64: ... 64 Cisco ONS 15454 DWDM Installation and Operations Guide R6 0 August 2005 Chapter ...


