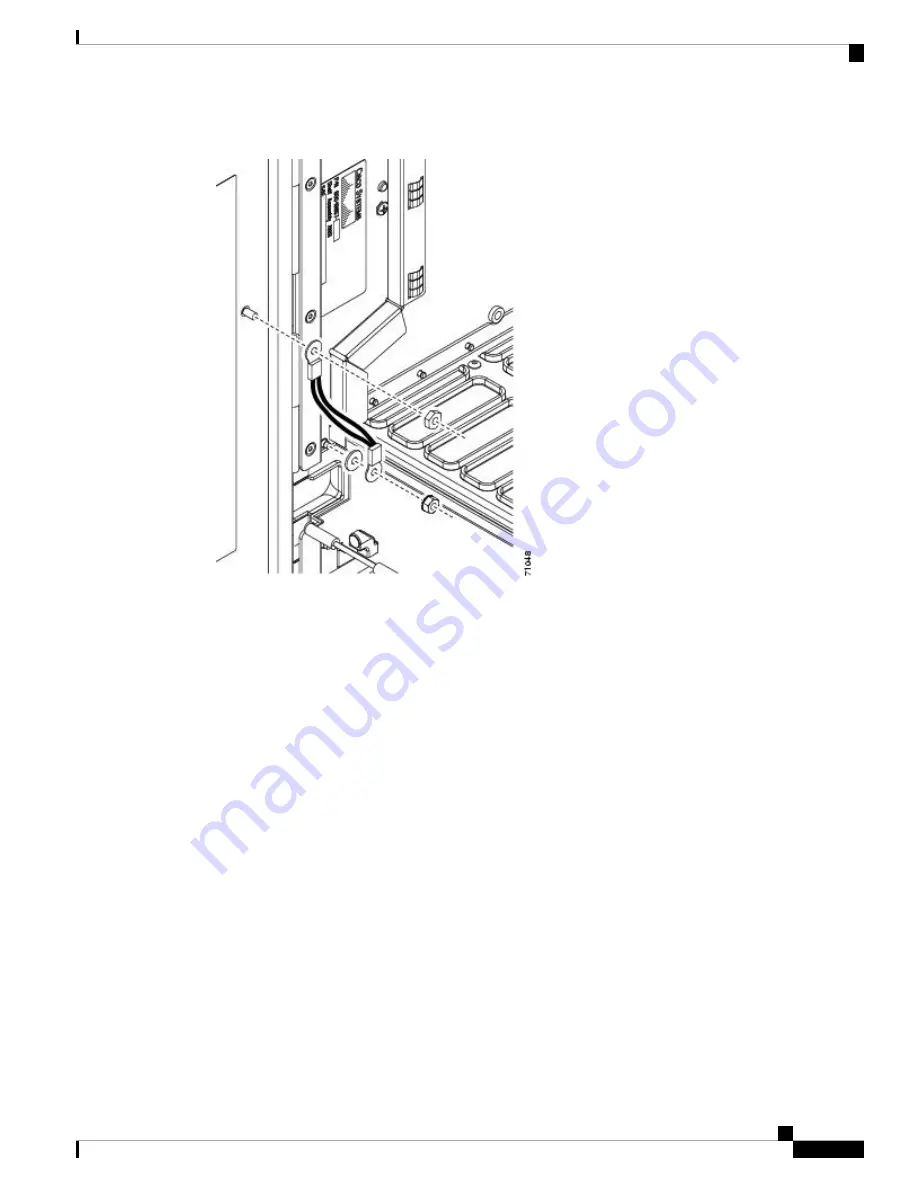
Figure 296: Installing the Door Ground Strap Retrofit Kit
Step 3
(ANSI only) Attach the other end of the ground strap to the longer screw on the fiber guide.
a) Attach the lock washer.
b) Attach the terminal lug.
c) Using the open-end wrench, attach and tighten the #4 Kepnut (49-0337-01) on the terminal lug.
To avoid interference with the traffic (line) card, make sure the ground strap is in a flat position
when the door is open. To move the ground strap into a flat position, rotate the terminal lug
counterclockwise before tightening the Kepnut.
Note
Step 4
Replace the left cable-routing channel if it was removed. If not, continue with Step 5.
Step 5
Using a Phillips screwdriver, insert and tighten the screws for the cable-routing channel.
The following figure shows the shelf assembly with the front door and ground strap installed.
Cisco ONS 15454 Hardware Installation Guide
449
Maintaining the ONS 15454 M12 (ANSI and ETSI), ONS 15454 M2 and ONS 15454 M6 Shelf
NTP-G40 Replace the Front Door
Summary of Contents for ONS 15454
Page 2: ... 2019 Cisco Systems Inc All rights reserved ...
Page 16: ...Cisco ONS 15454 Hardware Installation Guide xvi Contents ...
Page 28: ...Cisco ONS 15454 Hardware Installation Guide xxviii Preface Preface ...
Page 36: ...Cisco ONS 15454 Hardware Installation Guide 6 Overview Cisco ONS 15454 M6 Shelf ...
Page 510: ...Cisco ONS 15454 Hardware Installation Guide 480 Hardware Specifications Dimensions ...


