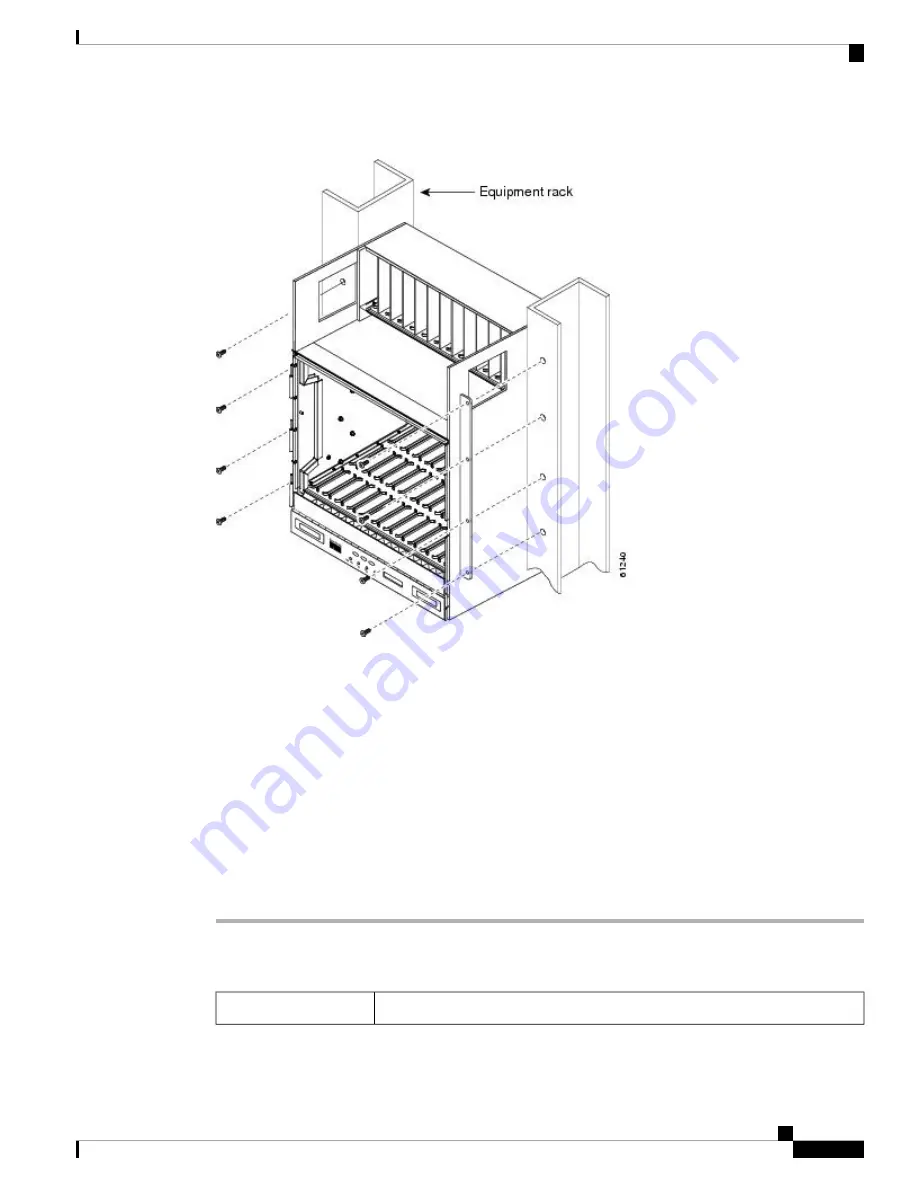
Figure 14: Mounting an ONS 15454 ETSI in a Rack
Step 3
Using the hex tool that shipped with the assembly, install the two temporary set screws into the holes that will
not be used to mount the shelf. Let the set screws protrude sufficiently to hold the mounting brackets.
Step 4
Lift the shelf to the desired position in the rack and set it on the screws.
Step 5
Align the screw holes on the mounting brackets with the mounting holes in the rack.
Step 6
Using the Phillips Dynamometric screwdriver, install one mounting screw in each side of the assembly.
When the shelf is secured to the rack, install the remaining mounting screws.
Step 7
When the shelf is secured to the rack, install the remaining mounting screws.
Use at least one set of the horizontal screw slots on the shelf to prevent slippage.
Note
Step 8
Using the hex tool, remove the temporary set screws.
Step 9
Return to your originating procedure (NTP).
DLP-G679 Mount the ONS 15454 Shelf in a Rack (Two People)
This task allows two people to mount the shelf in a rack.
Purpose
Cisco ONS 15454 Hardware Installation Guide
37
Installing the ONS 15454 M12 (ANSI and ETSI) Shelf
DLP-G679 Mount the ONS 15454 Shelf in a Rack (Two People)
Summary of Contents for ONS 15454
Page 2: ... 2019 Cisco Systems Inc All rights reserved ...
Page 16: ...Cisco ONS 15454 Hardware Installation Guide xvi Contents ...
Page 28: ...Cisco ONS 15454 Hardware Installation Guide xxviii Preface Preface ...
Page 36: ...Cisco ONS 15454 Hardware Installation Guide 6 Overview Cisco ONS 15454 M6 Shelf ...
Page 510: ...Cisco ONS 15454 Hardware Installation Guide 480 Hardware Specifications Dimensions ...


