1200-Watt DC-Input Power Supply Replacement Instructions 9
Removing and Replacing a Power Supply
Removing a Power Supply
Follow these steps to remove a power supply.
Step 1
Turn OFF (O) the system power switch on the power supply you are going to remove.
Warning
Before performing any of the following procedures, ensure that power is removed from
the DC circuit. To ensure that all power is OFF, locate the circuit breaker on the panel board that
services the DC circuit, switch the circuit breaker to the OFF position, and tape the switch handle of
the circuit breaker in the OFF position. (To see translated versions of this warning, refer to page 20.)
Warning
Before working on a chassis or working near power supplies, unplug the power cord on
AC units or disconnect the power at the circuit breaker on DC units. (To see translated versions of
this warning, refer to page 18.)
Warning
This unit might have more than one power cord. To reduce the risk of electric shock,
disconnect the two power supply cords before servicing the unit. (To see translated versions of this
warning, refer to page 19.)
Step 2
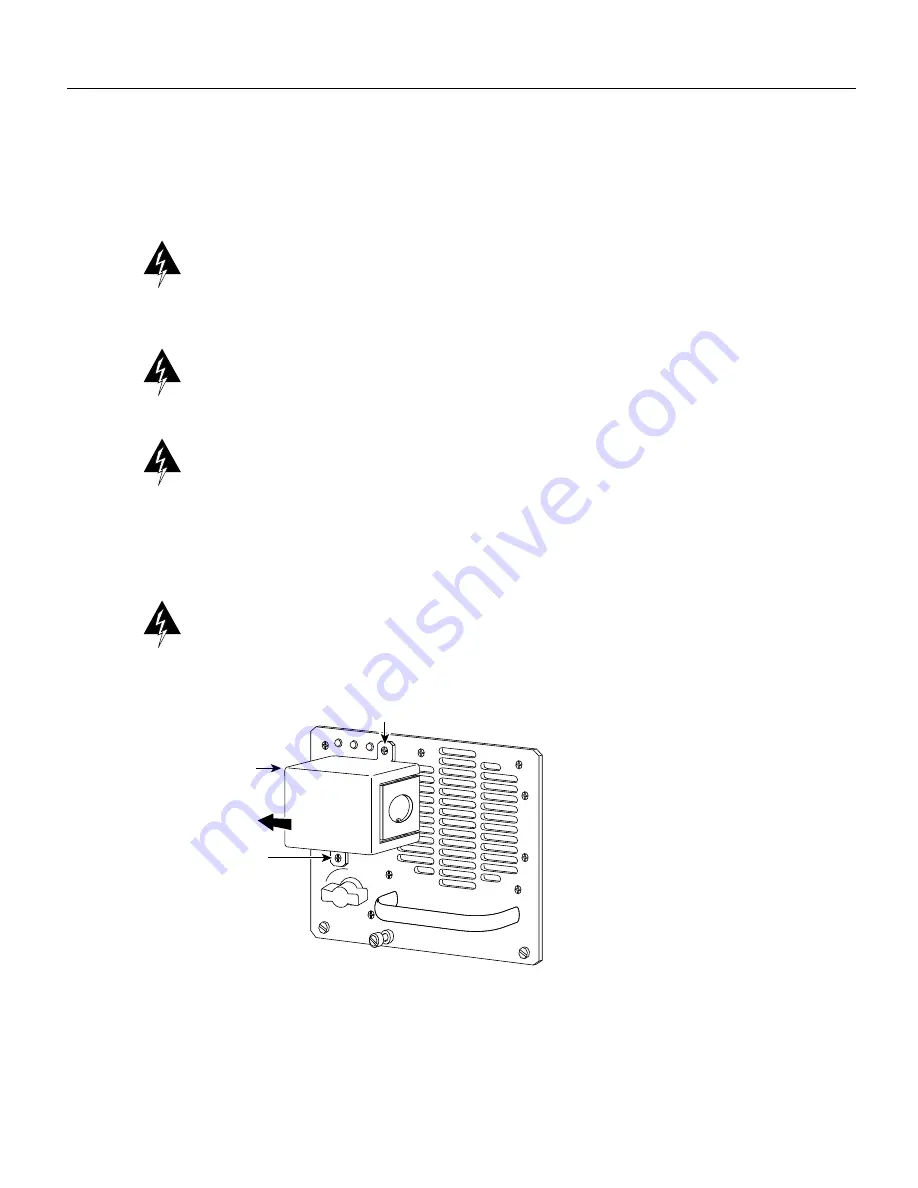
Remove the 8-mm screws on the terminal block cover so the cover is free of the terminal
block. (See Figure 4.)
Warning
When installing the unit, the ground connection must always be made first and
disconnected last. (To see translated versions of this warning, refer to page 20.)
Figure 4
Removing and Replacing the Terminal Block Cover
Step 3
Replace the terminal block cover so it remains with the power supply.
H3033
0
I
OK
OK
FAIL
DC
FAN OUTPUT
Terminal
block
cover
Remove
Remove
DC-input power supply


