Using Directories
Operator User Guide 7-27
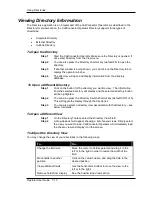
Customizing View
The CallConnector Operator Directory window is highly customizable to provide a convenient and
easy-to-use interface to the operators. Operators can:
•
Sort the directory listing by a particular field
•
Group the directory listing by specific fields
•
Decide which fields to display
•
Save and load a customized view
•
Change font and font size
•
Change the size of the directory window
•
Change the position of the directory window
To Sort the Directory Listing
You can sort the directory by the contents of each field in ascending and descending order. This
makes it more convenient when looking through the list of contacts, and it allows you to search
for information.
Step 1
Click on the Column Name to sort the list by that column. If the column
has not been sorted yet, it will be sorted in the ascending order.
Step 1
The arrow icon appearing next to the Column Name indicates the sort
direction of all the entries. Click on the Column Name again to reverse
the sorting order.
You can hold the Shift key and click on the column header of multiple columns to sort
all those columns.
To Group/Ungroup the Directory Listing
Step 1
Right-click on any column name in the Directory window.
Step 2
When the pop-up menu appears, select the Group By option. You will
see the list of available columns you can use as the criteria to group by.
Step 3
Select the column you want to group by. A checkmark will appear next to
the column name to indicate that the directory listing is currently grouped
by the selected column. Select the column name again will clear the
grouping by that particular column.
Step 4
To ungroup all the queues, right-click on any column name, and select
the Clear Grouping option from the drop-down menu.
Multi-level grouping is supported. Repeat the step 1 to 3 if you would like to have
another grouping within the current grouping.
Notes
Notes

