Chapter 7
Using Directories
7-28 CallConnector Operator
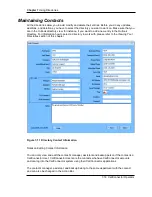
To Display/Hide Columns
By default, the CallConnector Operator will display all the columns that contain all the information
of the contacts visible in the Directory window. Operators can decide which columns they do not
want to view by deselecting them from a list of columns to display.
Step 1
Right-click on any column name in the Directory window.
Step 2
When the pop-up menu appears, select the Columns option. You will see
the list of available columns. A checkmark next to a column name
indicates that it is currently visible to the operators.
Step 3
If a column is being displayed, click on the column name to hide it. On
the other hand, if a column is not shown, click on the column name to
present it.
Step 4
Repeat these steps to add or remove additional columns.
To Save a Customized View
Step 1
Select a directory.
Step 2
Customize the directory fields: position, size, grouping, sorting.
Step 3
On the Directory Toolbar, select the Directory View Field:
Step 4
A drop-down list will appear showing a list of saved views. Click on the
Save current directory view option to save your customized view.
Step 5
When prompted, enter the name of the view you want to save. Then click
OK.
Step 6
The name of the view should show up in the list of saved views.
To Load a Customized View
Step 1
On the Directory Toolbar, select the Directory View Field:
Step 2
A drop-down list will appear showing a list of saved views. Simply select
the view you want to load. CallConnector Operator will immediately load
the chosen view and display it on the screen.

