Administering Your Cisco RV220W
Logging
Cisco RV220W Administration Guide
181
9
•
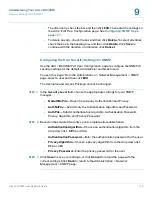
Send To E-mail Address(1, 2, and 3)
—Enter a valid email address where
the logs and alerts will be sent. You can use these fields to enter up to three
email addresses. At least one address is required. Example:
user@provider.net
•
Authentication with SMTP server
—If the SMTP server requires
authentication before accepting connections, select either
Login Plain
or
CRAM-MD5
and enter the Username and Password for your account. If your
email service does not require authentication, select
None
.
•
Respond to Identd from SMTP Server
—If your service provider uses
IDENT request to verify the sender of email messages, check this box to
enable the router to respond to these requests.
•
To confirm that the email settings are functional, press
Test
.
STEP 3
If you entered email settings above, configure a schedule in the
Send E-Mail Logs
By Schedule
section. Emails will be sent only on the specified schedule.
•
Unit
—Select the frequency at which to send the logs:
Never
,
Hourly
,
Daily
,
or
Weekly
. If you choose
Never
, email logs are not sent. This option is useful
when you do not want to receive logs by e-mail, but want to use the email
settings for other email functions.
•
Day
—If you chose Weekly, choose the day of the week when the logs will
be sent.
•
Time
—If you chose Daily or Weekly, enter the time of day when the logs will
be sent.
STEP 4
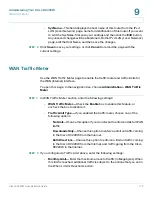
If you want to enable the Cisco RV220W to send logs to a Syslog server, enter the
settings for up to eight syslog servers in the
Syslog Server
section. The log
content is determined by the specified logging policy.
•
Check the box to enable the entry.
•
Syslog Server—
Enter the IP address or Internet name of the server.
•
Logging Policy—
From the list, choose a logging policy. The logging policy
specifies the information to log. To add a logging policy, use the
Administration > Logging > Logging Policies
page. For more information,
see
Logging Policies, page 176
.
STEP 5
Click
Save
to save your settings, or click
Cancel
to clear your entries.


