background image

Configuring the Cisco WAP4410N Wireless-N Access Point

Setup

WAP4410N Wireless-N Access Point with Power Over Internet Administration Guide

26

6

Time

The 

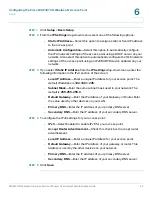
Setup > Time 

page displays the time settings of the access point. By setting 

up the correct time, you can help your network administrator search the system 
log to identify problems. By default, the WAP is configured to obtain its time from a 
predefined list of NTP servers.

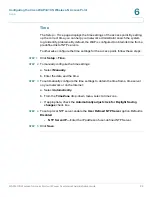
To otherwise configure the time settings for the access point, follow these steps:

STEP 1

Click 

Setup

 > 

Time

.

STEP  2

To manually configure the time settings:

a. Select 

Manually

.

b. Enter the date and the time.

STEP  3

To automatically configure the time settings to obtain the time from a time server 
on your network or on the Internet:

a. Select 

Automatically

.

b. From the 

Time Zone

 drop-down menu, select a time zone. 

c. If appropriate, check the 

Automatically adjust clock for Daylight Saving 

changes

 check box.

STEP  4

To set up local NTP server, enable the 

User Defined NTP Server 

option. Default is 

Disabled

NTP Server IP

—Enter the IP address of user-defined NTP Server. 

STEP  5

Click 

Save

.

Summary of Contents for Small Business WAP44

Page 1: ...Cisco Small Business WAP4410N Wireless N Access Point with Power Over Ethernet ADMINISTRATION GUIDE ...

Page 2: ...rademarks of Cisco and or its affiliates in the U S and other countries To view a list of Cisco trademarks go to this URL www cisco com go trademarks Third party trademarks mentioned are the property of their respective owners The use of the word partner does not imply a partnership relationship between Cisco and any other company 1110R ...

Page 3: ...w the Wireless N Access Point 13 Front Panel 13 Back Panel 14 Antennas and Positions 14 Chapter 4 Connecting the Cisco WAP4410N Access Point 15 Placement Options 15 Desktop Option 15 Wall Mount Option 16 Stand Option 16 Connecting the Cisco WAP4410N Access Point to the Network 17 Using a PoE Switch or Router 17 Using a Standard Switch or Router 18 Chapter 5 Setting Up the Cisco WAP4410N Wireless N...

Page 4: ... Time 26 Advanced 27 Wireless 28 Basic Settings 28 Security 30 Connection Control 37 Wi Fi Protected Setup 39 VLAN and QoS 39 Advanced Settings 41 AP Mode 43 Administration 44 Management 44 Log 46 Diagnostics 47 Factory Default 48 Firmware Upgrade 48 Reboot 49 Configuration Management 49 SSL Certification Management 50 Status 50 Local Network 50 Wireless 51 System Performance 52 Appendix A Trouble...

Page 5: ...WAP4410N Wireless N Access Point with Power Over Internet Administration Guide 5 Contents Appendix B Where to Go From Here 61 ...

Page 6: ...ar 12VDC power adaptor so it can receive data and power over a single Ethernet network cable The Cisco WAP4410N supports the 802 11n Draft 2 0 Specification by IEEE It also supports 802 11g and 802 11b clients in a mixed environment In addition this access point provides longer coverage by using multiple antennas to transmit and receive data streams in different directions Use the instructions in ...

Page 7: ...l features of the access point Connecting the Cisco WAP4410N Access Point on page 15 Explains how to place and connect the access point Setting Up the Cisco WAP4410N Wireless N Access Point on page 19 Explains how to use the web based utility to configure the basic settings of the access point through your web browser Configuring the Cisco WAP4410N Wireless N Access Point on page 23 Describes how ...

Page 8: ...ired or wireless network via the access point or wireless router An infrastructure configuration extends the accessibility of a wireless computer to a wired network and may double the effective wireless transmission range for two wireless adapter computers Since an access point is able to forward data within a network the effective transmission range in an infrastructure network may be more than d...

Page 9: ...and USB adapters for all PCs when you want to enjoy wireless connectivity These wireless products can also communicate with a 802 11n 802 11g or 802 11b wireless print server if available To link your wired network with your wireless network connect the access point s Ethernet network port to any switch or router that uses Power over Ethernet PoE It can also connect to a non PoE switch or router b...

Page 10: ...shows a typical infrastructure wireless network setup In this illustration the switch connects to a router that connects to the Internet The network provides connectivity among wireless network devices and computers that have a wired connection to the switch The wireless access points connect to a Cisco switch that provides them with power Each access point connects multiple wireless devices to th...

Page 11: ...option of broadcasting the SSID While this option may be more convenient it allows anyone to log into your wireless network This includes hackers So don t broadcast the SSID Make the SSID unique Wireless networking products come with a default SSID set by the factory Hackers know these defaults and can check them against your network Change your SSID to something unique and not something related t...

Page 12: ...r network has a RADIUS server for authentication A network encrypted with WPA WPA2 is more secure than a network encrypted with WEP because WPA WPA2 uses dynamic key encryption To protect the information as it passes over the airwaves you should enable the highest protection level Implementing encryption may have a negative impact on your network s performance but if you are transmitting sensitive...

Page 13: ... device is powered on PoE Light Green Lights up when the access point is powered through an Ethernet cable WIRELESS Light Green Lights up when the wireless module is active on the access point This light flashes when the access point is actively sending to or receiving data from a wireless device ETHERNET Light Green Lights up when the access point successfully connects to a device through the Eth...

Page 14: ...based utility of the access point ETHERNET Port Connects to Ethernet network devices such as a switch or router POWER Port Connects the access point to power using the supplied 12VDC power adapter Use if your switch or router does not support PoE Antennas and Positions The Cisco WAP4410N Access Point has three detachable 2dBi omni directional antennas These antennas are located on the back of the ...

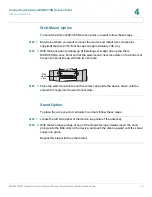
Page 15: ...isco WAP4410N access point to your network Depending on your application you might want to set up the device first before mounting it Placement Options You can place the Cisco WAP4410N horizontally on its rubber feet vertically in a stand or mount it on the wall Desktop Option For desktop mounting place the access point horizontally on a surface so it sits on its four rubber feet ...

Page 16: ...4410N Access Point so that the wall mount crisscross slots on the bottom of the access point line up with the two screws STEP 3 Place the wall mount slots over the screws and slide the device down until the screws fit snugly into the wall mount slots Stand Option To place the access point vertically in a stand follow these steps STEP 1 Locate the left side panel of the device opposite of the anten...

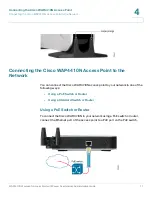
Page 17: ...ecting the Cisco WAP4410N Access Point to the Network You can connect the Cisco WAP4410N access point to your network in one of the following ways Using a PoE Switch or Router Using a Standard Switch or Router Using a PoE Switch or Router To connect the Cisco WAP4410N to your network using a PoE switch or router connect the Ethernet port of the access point to a PoE port on the PoE switch ...

Page 18: ...tandard Switch or Router To connect the Cisco WAP4410N to your network using a standard switch or router follow these steps STEP 1 Use the supplied Ethernet cable to connect the Ethernet port of the access point to an Ethernet port on the switch STEP 2 Connect the included power adapter to the Power port of the Cisco WAP4410N Access Point STEP 3 Plug the power adapter into an electrical outlet The...

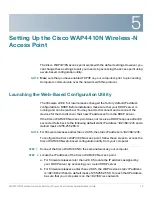
Page 19: ...o discover their new IP addresses from the DHCP server If the Cisco WAP4410N access point does not receive a DHCP response after 60 seconds it falls back to the following default static IP address 192 168 1 245 and a default mask of 255 255 255 0 NOTE For firmware releases earlier than v2 0 0 5 the static IP address is 192 168 1 245 To configure the Cisco WAP4410N access point follow these steps t...

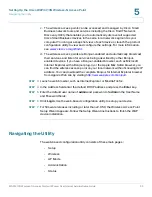
Page 20: ...ou have a Bonjour enabled browser such as Microsoft Internet Explorer with a Bonjour plug in or the Apple Mac Safari browser you can find the wireless access point on your local network without knowing its IP address You can download the complete Bonjour for Internet Explorer browser from Apple s Web site by visiting http www apple com bonjour STEP 3 Launch a web browser such as Internet Explorer ...

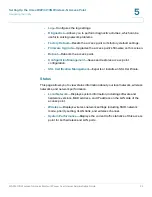
Page 21: ...ess network mode for example B G N Mixed SSID and radio channel Security Configures the access point s security settings Connection Control Controls the wireless connections from client devices to this access point Wi Fi Protected Setup Simplifies the process of setting up and configuring security on a wireless network VLAN and QoS Configures the 802 1Q VLAN and the Quality of Service QoS settings...

Page 22: ...he access point Configuration Management Saves and restores access point configuration SSL Certification Management Exports or installs an SSL Certificate Status This page allows you to view status information about your local network wireless networks and network performance Local Network Displays system information including software and hardware versions MAC address and IP address on the LAN si...

Page 23: ...hapter describes how to configure your Cisco WAP4410N access point using the web based configuration utility The web based configuration utility contains the following topics which are described in this chapter Setup Wireless AP Mode Administration Status Setup The Setup section describes how to configure the general settings of the access point ...

Page 24: ... letters digits and hyphens Host Name labels cannot begin or end with a hyphen No other symbols punctuation characters or blank spaces are permitted You can use the host name to access the web based configuration utility through the network if a record of the host name exists in your DNS server The access point publishes the host name to your DNS server if you configured the access point to acquir...

Page 25: ...tion of the screen Local IP Address Enter a unique IP address for your access point The default IP address is 192 168 1 245 Subnet Mask Enter the same subnet mask used in your network The default is 255 255 255 0 Default Gateway Enter the IP address of your Gateway or Router Enter the value used by other devices on your LAN Primary DNS Enter the IP address of your primary DNS server Secondary DNS ...

Page 26: ...he time settings for the access point follow these steps STEP 1 Click Setup Time STEP 2 To manually configure the time settings a Select Manually b Enter the date and the time STEP 3 To automatically configure the time settings to obtain the time from a time server on your network or on the Internet a Select Automatically b From the Time Zone drop down menu select a time zone c If appropriate chec...

Page 27: ... discovered by using multicast DNS mDNS Bonjour advertises services to the network and answers queries for service types it supports simplifying network configuration in small business environments STEP 4 Enable or disable the redirecting of wireless clients to a custom Web page When redirect mode is enabled the user will be redirected to the URL you specify after the wireless client associates wi...

Page 28: ...ss connectivity completely This might be useful during system maintenance B Only Connects all the wireless client devices to the access point at Wireless B data rates with maximum speed at 11 Mbps G Only Connects both Wireless N and Wireless G client devices at Wireless G data rates with maximum speed at 54Mbps Wireless B clients cannot be connected in this mode N Only Connects only Wireless N cli...

Page 29: ...to transmit at 40MHz We recommend not enabling 40MHz in the 2 4GHz band in dense commercial areas STEP 4 In the SSID Name and SSID Broadcast fields enter the SSIDs you want your access point to broadcast SSID Name This field specifies a unique SSID that is shared among all devices in a wireless network It is case sensitive must not exceed 32 alphanumeric characters and may contain any keyboard cha...

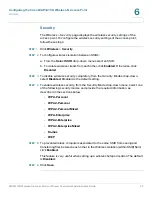
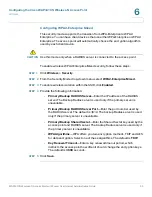
Page 30: ... click Disabled STEP 3 To disable wireless security completely from the Security Modes drop down select Disabled Disabled is the default setting STEP 4 To enable wireless security from the Security Mode drop down menu select one of the following security modes and provide the required information as described in the sections below WPA Personal WPA2 Personal WPA2 Personal Mixed WPA Enterprise WPA2 ...

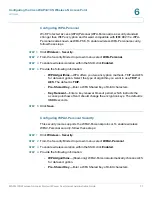
Page 31: ...cryption methods TKIP and AES for data encryption Select the type of algorithm you want to use TKIP or AES The default is TKIP Pre Shared Key Enter a WPA Shared Key of 8 63 characters Key Renewal Enter a key renewal timeout period which instructs the access point how often it should change the encryption keys The default is 3600 seconds STEP 5 Click Save Configuring WPA2 Personal Security This sec...

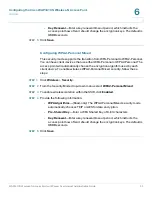
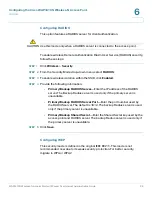
Page 32: ...cess point will automatically choose the encryption algorithm used by each client device To enable wireless WPA2 Personal Mixed security follow these steps STEP 1 Click Wireless Security STEP 2 From the Security Mode drop down menu select WPA2 Personal Mixed STEP 3 To enable wireless isolation within the SSID click Enabled STEP 4 Provide the following information WPA Algorithms Read only The WPA2 ...

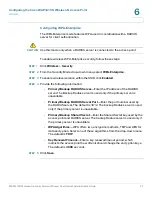
Page 33: ...mary Backup RADIUS Server Enter the IP address of the RADIUS server The Backup Radius server is used only if the primary server is unavailable Primary Backup RADIUS Server Port Enter the port number used by the RADIUS server The default is 1812 The backup Radius server is used only if the primary server is unavailable Primary Backup Shared Secret Enter the Shared Secret key used by the access poin...

Page 34: ... Enabled STEP 4 Provide the following information Primary Backup RADIUS Server Enter the IP address of the RADIUS server The Backup Radius server is used only if the primary server is unavailable Primary Backup RADIUS Server Port Enter the port number used by the RADIUS server The default is 1812 The backup Radius server is used only if the primary server is unavailable Primary Backup Shared Secre...

Page 35: ...le wireless isolation within the SSID click Enabled STEP 4 Provide the following information Primary Backup RADIUS Server Enter the IP address of the RADIUS server The Backup Radius server is used only if the primary server is unavailable Primary Backup RADIUS Server Port Enter the port number used by the RADIUS server The default is 1812 The backup Radius server is used only if the primary server...

Page 36: ...ick Enabled STEP 4 Provide the following information Primary Backup RADIUS Server Enter the IP address of the RADIUS server The Backup Radius server is used only if the primary server is unavailable Primary Backup RADIUS Server Port Enter the port number used by the RADIUS server The default is 1812 The backup Radius server is used only if the primary server is unavailable Primary Backup Shared Se...

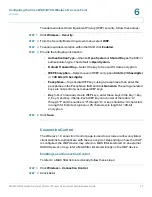
Page 37: ...assphrase then enter the passphrase in the Passphrase field and click Generate The auto generated keys are not as strong as manual WEP keys Key 1 4 To manually create WEP keys enter these keys in the Key 1 Key 2 Key 3 and Key 4 fields Each WEP key can consist of the letters A through F and the numbers 0 through 9 A key should be 10 characters in length for 64 bit encryption or 26 characters in len...

Page 38: ...ontrol list by entering these addresses in the MAC 01 20 fields STEP 4 Click Save Enabling RADIUS Connection Control To refer to a MAC filter list stored on an external RADlUS server follow these steps STEP 1 Click Wireless Connection Control STEP 2 Click RADIUS STEP 3 Provide the following information Primary Backup RADIUS Server Enter the IP address of the RADIUS server The Backup Radius server ...

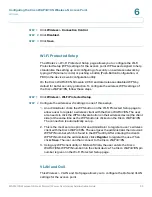
Page 39: ...wi fi settings in one of three ways 1 An administrator clicks the WPS button on the Wi Fi Protected Setup page to allow a user to register a wireless client with the Cisco WAP4410N The user also needs to click the WPS software button on their wireless device the client side at the same time as the WPS button is clicked on the Cisco WAP4410N The connection is automatically set up 2 This is the most...

Page 40: ... Enter the default VLAN ID VLAN Tag Select Tagged to determine the associated VLAN from the VLAN tag The default is Untagged AP Management VLAN Specify the VLAN ID used for management VLAN Tag over WDS Select Enabled or Disabled as required STEP 3 To configure the QoS settings enter the following information VLAN ID Enter the ID to assign to the VLAN Priority Select a priority from the list The hi...

Page 41: ...you choose 40MHz Wireless N connections use the 40MHz channel but Wireless B and Wireless G connections still use the 20MHz channel The default is 20MHz Guard Interval Select a guard interval for Wireless N connections The three options are Auto Short 400ns and Long 800ns The default is Auto CTS Protection Mode Keep the default setting Auto so the access point can use this feature as needed when t...

Page 42: ...tion to ensure efficient communication This value should remain at its default setting of 2347 If you encounter inconsistent data flow only minor modifications are recommended Fragmentation Threshold Enter the preferred setting between 256 and 2346 We recommend not using fragmentation unless you suspect radio interference The additional headers applied to each fragment increase the overhead on the...

Page 43: ... Enter the MAC address of the remote access point directly or click the Site Survey button to select from a list of available access points Wireless WDS Bridge Select to let the access point operate as a wireless bridge to perform transparent bridging with other associated wireless bridges and not allow any wireless client or station to access them Remote Wireless Bridge s MAC Address Enter the MA...

Page 44: ...agement The Administration Management page allows you to configure the password Web Access and SNMP settings You should change the username password that controls access to the access point s web based utility to prevent unauthorized access To change the management settings of the access point follow these steps STEP 1 Click Administration Management STEP 2 Configure the management settings Local ...

Page 45: ...ck Enabled Otherwise click Disabled The default is Disabled Contact Enter the name of the contact person such as a network administrator for the access point Device Name Enter the name you want to assign to the access point Location Enter the location of the access point Get Community Enter the password that allows read only access to the access point s SNMP information The default is public Set C...

Page 46: ...you The default is 600 seconds 10 minutes Syslog Notification Syslog is a standard protocol used to capture information about network activity The access point supports this protocol and sends its activity logs to an external server To enable Syslog click Enabled The default is Disabled Syslog Server IP Address Enter the IP address of the Syslog server In addition to the standard event log the acc...

Page 47: ... test to help diagnose problems with the access point follow these steps STEP 1 Click Administration Diagnostics STEP 2 Set up the ping test IP or URL Address Enter the IP address you want to ping The IP address can be on your network or on the Internet NOTE If the address is on the Internet and no connection currently exists you could get a timeout error In that case wait a few seconds and try ag...

Page 48: ...STEP 3 Click Save Your access point will reboot Firmware Upgrade The Administration Firmware Upgrade page allows you to upgrade the access point s firmware CAUTION Do not upgrade the firmware unless you are experiencing problems with the access point or the new firmware has a feature you want to use CAUTION Upgrading the firmware deletes all custom settings To upgrade the firmware of the access po...

Page 49: ...n the Device Reboot field click Yes STEP 3 Click Save Configuration Management The Administration Configuration Management page allows you to create a backup configuration file or upload a configuration file to the access point To manage the configuration for the access point follow these steps STEP 1 Click Administration Configuration Management STEP 2 To create a backup configuration file click ...

Page 50: ...how to change the status settings for the access point Local Network The Status Local Network page displays the access point s current status information for the local network To check local network status follow these steps STEP 1 Click Status Local Network This page displays the status information of your access point PID VID The WAP hardware model and version Software Version The version of the...

Page 51: ...etwork To check wireless network status of the access point follow these steps STEP 1 Click Status Wireless This page displays the status of the wireless network Mode The access point s wireless network mode Channel The access point s channel setting SSID 1 4 MAC Address The MAC address of the access point s wireless interface SSID 1 4 The access point s SSID VLAN Trunk The access point s VLAN Tru...

Page 52: ... access point s connection for the wired network Packets Received The number of packets received Packets Sent The number of packets sent Bytes Received The number of bytes received Bytes Sent The number of bytes sent Error Packets Received The number of error packets received Drop Received Packets The number of packets being dropped after they were received Wireless The statistics for the wireless...

Page 53: ...nistration Guide 53 6 Bytes Sent The number of bytes sent for each wireless network Error Packets Received The number of error packets received for each wireless network Drop Received Packets The number of packets being dropped after they were received STEP 2 To update the system performance status information click Refresh ...

Page 54: ...thing more than a wireless hub and as such cannot be configured to handle DHCP capabilities Q Can I run an application from a remote computer over the wireless network This depends on whether or not the application is designed to be used over a network Consult the application s documentation to determine if it supports operation over a network Q Can I play multiplayer games with other users of the...

Page 55: ...and an operating frequency of 2 4GHz Q What is the IEEE 802 11n draft standard It is one of the IEEE standards for wireless networks that is being finalized The 802 11n standard allows wireless networking hardware from different manufacturers to communicate provided that the hardware complies with the 802 11n standard The 802 11n standard states a maximum data transfer rate of 600Mbps and an opera...

Page 56: ...tually transmitting data Achieving these functions simultaneously requires a dynamic RF networking technology that links access points and nodes In such a system the user s end node undertakes a search for the best possible access to the system First it evaluates such factors as signal strength and quality as well as the message load currently being carried by each access point and the distance of...

Page 57: ...he parameters of the spread spectrum signal being broadcast If a receiver is not tuned to the right frequency a spread spectrum signal looks like background noise There are two main alternatives Direct Sequence Spread Spectrum DSSS and Frequency Hopping Spread Spectrum FHSS Q What is DSSS What is FHSS And what are their differences Frequency Hopping Spread Spectrum FHSS uses a narrowband carrier t...

Page 58: ...e IP addresses which can change every time a computer logs on to the network the MAC address of a device stays the same making it a valuable identifier for the network Q How do I avoid interference Using multiple access points on the same channel and in close proximity to one another will generate interference When employing multiple access points make sure to operate each one on a different chann...

Page 59: ... many users create a large amount of network traffic Q How do I configure multiple Cisco WAP4410N access points with the same configuration STEP 1 Configure one access point and then save the configuration file through its web page STEP 2 Using a text editor change the command secret_shown 1 to secret_shown 0 in the configuration file and then save the file STEP 3 Restore the file to the access po...

Page 60: ... be able to utilize wireless networking without having TCP IP enabled Windows Help provides complete instructions on enabling TCP IP Shared Resources If you wish to share printers folders or files over your network Windows Help provides complete instructions on using shared resources Network Neighborhood My Network Places Other computers on your network will appear under Network Neighborhood or My...

Page 61: ...sco_small_business _support_center_contacts html Cisco Small Business Firmware Downloads www cisco com go smallbizfirmware Select a link to download firmware for Cisco Small Business Products No login is required Downloads for all other Cisco Small Business products including Network Storage Systems are available in the Download area on Cisco com at www cisco com go software registration login req...

Page 62: ...eless N Access Point with Power Over Internet Administration Guide 62 B Cisco Small Business Cisco Partner Central for Small Business Partner Login Required www cisco com web partners sell smb Cisco Small Business Home www cisco com smb ...

Reviews: